IB KH6521 22 38117 LB5new - kompernass.com · A tensão de rede deve estar de acordo com a...
54
new KOMPERNASS GMBH · BURGSTRASSE 21 · D-44867 BOCHUM www.kompernass.com ID-Nr.: KH6521/22 - 10/09-V1 LEITOR DE DVD KH 6522 KH 6521 5 DVD Player Operating instructions Leitor de DVD Manual de instruções
Transcript of IB KH6521 22 38117 LB5new - kompernass.com · A tensão de rede deve estar de acordo com a...

new
KOMPERNASS GMBH · BURGSTRASSE 21 · D-44867 BOCHUM
www.kompernass.com
ID-Nr.: KH6521/22 - 10/09-V1
LEITOR DE DVD
KH 6522
KH 6521
5
DVD PlayerOperating instructions
Leitor de DVDManual de instruções
CV_KH6521_22_38117_LB5new 20.10.2009 13:45 Uhr Seite 1
q w e r uyt
A
o i
KH 6521 / 6522
f g h j k
l;2@2#
B
a s d
2)2!
C
q
d
a
i
l
o
;
2*
2@
2!
f
3#
3$
3@
2&
2(
s
2)
j
k
2$2#
gh
2^
2%
yu
3)
er
t
w
3!
CV_KH6521_22_38117_LB5new 20.10.2009 13:45 Uhr Seite 4
- 1 -
ÍNDICE PÁGINA1. Dados técnicos 22. Utilização correcta 23. Material fornecido 24. Elementos de comando 25. Instalação do leitor de DVD 36. Indicações de segurança 37. Telecomando 47.1 Colocação das pilhas . . . . . . . . . . . . . . . . . . . . . . . . . . . . . . . . . . . . . . . . . . . . . . . . . . . . . . . . . . . . . . . . . . . . . . . . . . . . . . . . . . . . . . . . .4
7.2 Utilizar o telecomando . . . . . . . . . . . . . . . . . . . . . . . . . . . . . . . . . . . . . . . . . . . . . . . . . . . . . . . . . . . . . . . . . . . . . . . . . . . . . . . . . . . . . . . . .4
7.3 Substituir as pilhas . . . . . . . . . . . . . . . . . . . . . . . . . . . . . . . . . . . . . . . . . . . . . . . . . . . . . . . . . . . . . . . . . . . . . . . . . . . . . . . . . . . . . . . . . . . .4
8. Ligar o leitor de DVD a um televisor 48.1 Ligar a um televisor através do cabo Scart/RGB . . . . . . . . . . . . . . . . . . . . . . . . . . . . . . . . . . . . . . . . . . . . . . . . . . . . . . . . . . . . . . . . . . . .5
8.2 Ligar a um televisor através de S-vídeo . . . . . . . . . . . . . . . . . . . . . . . . . . . . . . . . . . . . . . . . . . . . . . . . . . . . . . . . . . . . . . . . . . . . . . . . . . . .5
8.3 Ligar a um televisor através da entrada de vídeo (Composite Video) . . . . . . . . . . . . . . . . . . . . . . . . . . . . . . . . . . . . . . . . . . . . . . . . . . . .5
8.4 Ligar através de um sinal de componentes (YPbPr/YUV) . . . . . . . . . . . . . . . . . . . . . . . . . . . . . . . . . . . . . . . . . . . . . . . . . . . . . . . . . . . . . .5
8.5 Ligar a um televisor através de HDMI . . . . . . . . . . . . . . . . . . . . . . . . . . . . . . . . . . . . . . . . . . . . . . . . . . . . . . . . . . . . . . . . . . . . . . . . . . . . .6
9. Ligar componentes áudio ao leitor de DVD 69.1 Requisitos para a ligação de um sistema Hi-Fi . . . . . . . . . . . . . . . . . . . . . . . . . . . . . . . . . . . . . . . . . . . . . . . . . . . . . . . . . . . . . . . . . . . . . .6
9.2 Ligar componentes áudio digitais através do cabo digital . . . . . . . . . . . . . . . . . . . . . . . . . . . . . . . . . . . . . . . . . . . . . . . . . . . . . . . . . . . . .6
9.3 Ligar componentes áudio através de um cabo analógico . . . . . . . . . . . . . . . . . . . . . . . . . . . . . . . . . . . . . . . . . . . . . . . . . . . . . . . . . . . . .7
9.4 Ligar auscultadores . . . . . . . . . . . . . . . . . . . . . . . . . . . . . . . . . . . . . . . . . . . . . . . . . . . . . . . . . . . . . . . . . . . . . . . . . . . . . . . . . . . . . . . . . . .7
10. Configurações no menu OSD 810.1 Operação do menu OSD . . . . . . . . . . . . . . . . . . . . . . . . . . . . . . . . . . . . . . . . . . . . . . . . . . . . . . . . . . . . . . . . . . . . . . . . . . . . . . . . . . . . .8
10.2 Menu de configuração GENERAL . . . . . . . . . . . . . . . . . . . . . . . . . . . . . . . . . . . . . . . . . . . . . . . . . . . . . . . . . . . . . . . . . . . . . . . . . . . . . .8
10.3 Menu de configuração AUDIO . . . . . . . . . . . . . . . . . . . . . . . . . . . . . . . . . . . . . . . . . . . . . . . . . . . . . . . . . . . . . . . . . . . . . . . . . . . . . . . .9
10.4 Menu de configuração DOLBY . . . . . . . . . . . . . . . . . . . . . . . . . . . . . . . . . . . . . . . . . . . . . . . . . . . . . . . . . . . . . . . . . . . . . . . . . . . . . . .10
10.5 Menu de configuração VIDEO . . . . . . . . . . . . . . . . . . . . . . . . . . . . . . . . . . . . . . . . . . . . . . . . . . . . . . . . . . . . . . . . . . . . . . . . . . . . . . . .10
10.6 Configuração do menu PREFERENCE . . . . . . . . . . . . . . . . . . . . . . . . . . . . . . . . . . . . . . . . . . . . . . . . . . . . . . . . . . . . . . . . . . . . . . . . . .11
11. Colocação do leitor de DVD em funcionamento 1211.1 Introduzir um DVD . . . . . . . . . . . . . . . . . . . . . . . . . . . . . . . . . . . . . . . . . . . . . . . . . . . . . . . . . . . . . . . . . . . . . . . . . . . . . . . . . . . . . . . . . .12
11.2 Introduzir cartões de memória/dispositivos de armazenamento USB com ficheiros MP3/WMA/MPEG4/JPEG . . . . . . . . . . . . . . .12
11.3 Retirar cartões de memória/dispositivos de armazenamento USB . . . . . . . . . . . . . . . . . . . . . . . . . . . . . . . . . . . . . . . . . . . . . . . . . . . .13
12. Reproduzir DVD, VCD ou S-VCD 1312.1 Funções ao reproduzir um DVD, VCD ou S-VCD . . . . . . . . . . . . . . . . . . . . . . . . . . . . . . . . . . . . . . . . . . . . . . . . . . . . . . . . . . . . . . . . . .14
13. Reproduzir CD/WMA/MP3/MPEG4 de fotografias JPEG 1814. Função de ripar CD 1915. Limpeza do leitor de DVD 2016. Eliminação 2017. Eliminar avarias e erros 2018. Glossário/Índice remissivo 2119. Garantia e assistência técnica 2320. Importador 23
Leia cuidadosamente o manual de instruções antes da primeira utilização e conserve-o para utilização posterior. Ao entregar o aparelho a terceiros, entregue também o manual.

LEITOR DE DVD KH6521/22
1. Dados técnicos
Este aparelho encontra-se em conformidade com os requisitos básicos e asoutras normas relevantes da Directiva relativa a aparelhos de baixa tensão2006/96/EC, a Directiva relativa à compatibilidade electromagnética2004/108/EC e a Directiva relativa aos requisitos de concepção ecológica2005/32/EC (regulamento n.º 1275/2008, anexo II, alínea 1).
Ligação de rede: AC 220 V - 240 V ~ 50 HzConsumo de energia: 20 WattsConsumo de energia em standby: < 1 WClasse de protecção: II / Norma de televisão: PAL/NTSCTemperatura de funcionamento: +5 ~ +40°CHumidade: 5 ~ 90 % (sem condensação)Dimensões (C x L x A): 220 x 430 x 44 mmPeso : aprox. 1,6 kgClasse do laser: 1
Saída de vídeo Formatos: 4:3 / 16:9Descodificador: MPEG 2Conversor D/A: 12 Bit
Saída de áudio Descodificador: MPEG Dolby Digital (AC-3)
DTS apenas é possível com descodificador externo adicional
Conversor D/A: 24 Bit / 96 kHz
Porta USBDispositivos de armazenamento USB compatíveis: USB 1.1 e 2.0 com uma
capacidade de até 4 GBCorrente máx: 100 mA
Compartimento para cartões de memóriaCartões de memória compatíveis: SD (2 GB sem SDHC), MS/
MSPro (4 GB), MMC (4 GB)
Saída para auscultadoresFicha jaque: 3,5 mmTensão de saída máxima: aprox. 25 mV
Meios /Formatos que podem ser reproduzidosVídeo: DVD, DVD+R, DVD+RW, DVD-R,
DVD-RW, DVD-R DL, DVD+R DL,VCD, S-VCD
Audío: CD, CD-R, CD-RW, DVD-áudio,MP3, WMA, OGG Vorbis
Outros formatos: AVI, MPEG 4, Xvid, JPEG (CD de fotografias)
Código de região: ou
PostScript Bild
Unbenannt-1
2. Utilização correcta
O leitor de DVD Silvercrest KH 6521/22 não é um aparelho portátil e deveser utilizado em espaços fechados. O aparelho destina-se exclusivamente aouso privado e não comercial.O aparelho destina-se a ser utilizado como aparelho electrónico de entretenimento.O fabricante não assume qualquer responsabilidade/garantia por danos resultantes de uma utilização inadequada do aparelho!
3. Material fornecido
Leitor de DVD- Telecomando de infravermelhos- 2 pilhas para telecomando, tipo AAA/ (pilhas micro)- Cabo Scart RGB- Cabo cinch RCA áudio/vídeo- Cabo HDMI- Manual de instruções
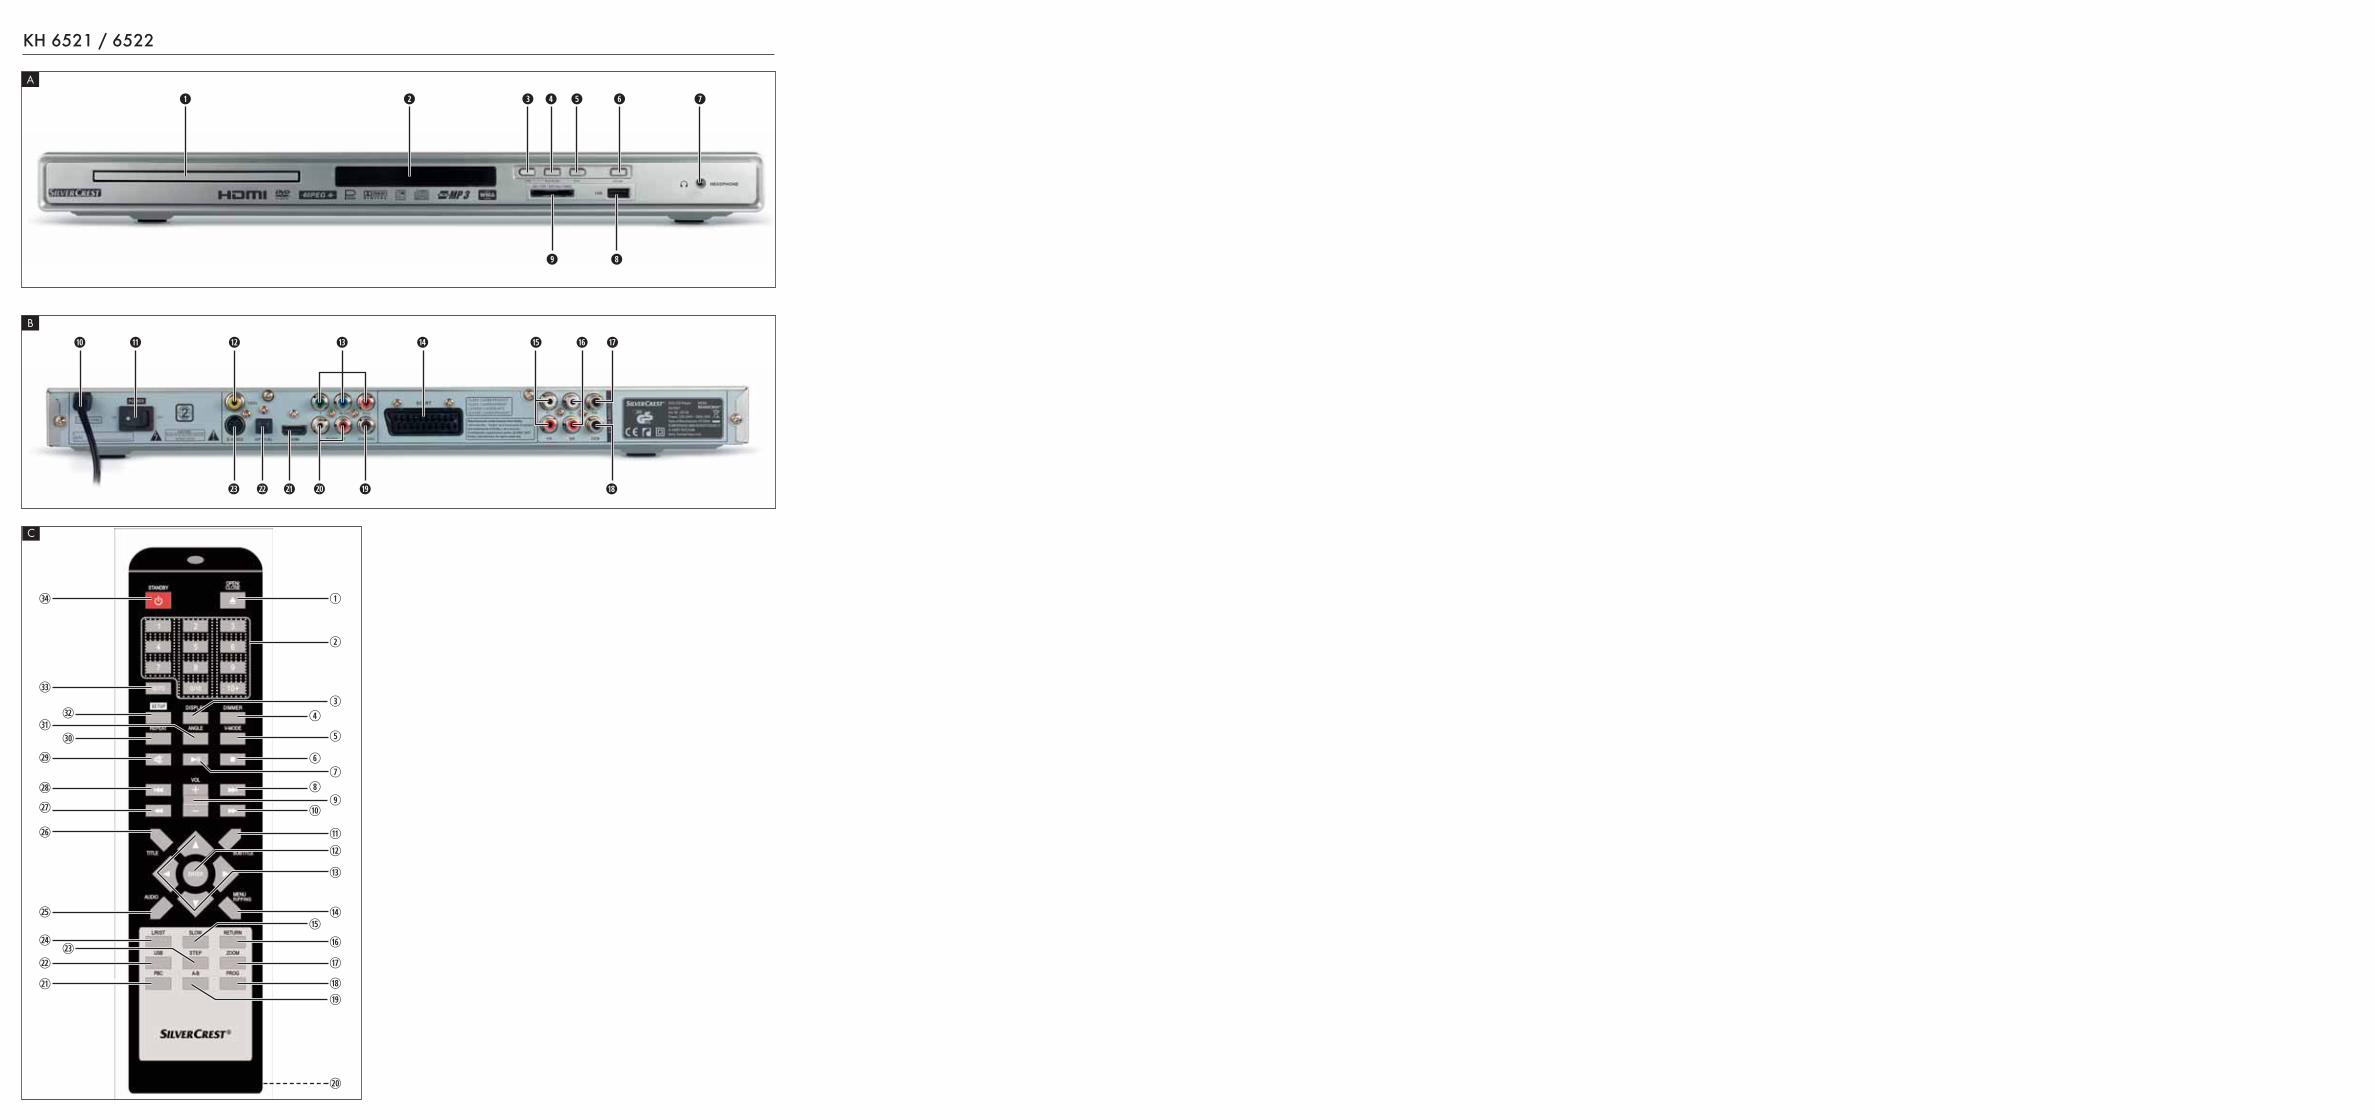
4. Elementos de comando
A. Parte da frente do leitor de DVDq Compartimento para o CD
w Visor (com LED de standby (verde) e sensor de IV para o telecomando)
e Botão OPEN/CLOSE r Botão PLAY/PAUSE��t Botão STOP �
y Botão STANDBY u Saída para auscultadores com ficha jaque de 3,5 mm
i Porta USB
o Compartimento para cartões de memória SD/MMC/MS e MSPro
B. Parte de trás do leitor de DVDa Cabo de rede
s Interruptor POWER d VIDEO: saída Composite Video
f Y, Pb/Cb, Pr/Cr: saídas de vídeo para componentes
g SCART: saída Scart/RGB
h FL/FR: saída para canais de áudio dianteiro, esquerdo e direito
j SL/SR: saída para canais de áudio traseiro esquerdo e direito
k SW: saída para canal de áudio de graves
l CEN: saída para canal de áudio dianteiro e central
; COAXIAL: saída de áudio coaxial
2) MIX L/R: saída de áudio esquerda e direita
2! HDMI: saída HDMI
2@ OPTICAL: saída de áudio digital óptica
2# S-VIDEO: saída S-vídeo
- 2 -
C. Telecomandoq OPEN/CLOSE : abrir/fechar o compartimento para o CD
w Teclado numérico
e DISPLAY: exibir informações do disco
r DIMMER: ajustar a luminosidade do visor
t V-MODE: configurar saída de vídeo
y STOP�: parar a reprodução
u PLAY/PAUSE�� : Interromper/iniciar a reprodução
i SKIP FWD : Avançar capítulo
o VOL +/-: aumentar/reduzir o volume
a FAST FWD�: avanço rápido
s SUBTITLE: configurar as legendas
d ENTER: confirmar introduções
f Botões de comando ����
g MENU/RIPPING: aceder ao menu do disco/função de ripar
h SLOW: função de avanço lento
j RETURN: configurar o modo de reprodução
k ZOOM: ajustar a ampliação da imagem
l PROG: aceder à função de programação
; A-B: repetir sequência
2) Compartimento para as pilhas (na parte de trás)
2! PBC: activar/desactivar função PBC (apenas VCD, SVCD)
2@ USB: alternar entre reprodução a partir de disco e reprodução a partirde suporte USB/cartão de memória
2# STEP: modo de imagem parada
2$ L/R/ST: ajustar canal de áudio
2% AUDIO: ajustar o idioma de áudio
2^ TITLE: aceder ao menu de títulos
2& FAST RWD: retrocesso rápido
2* SKIP BWD : Retroceder capítulo
2( MUTE : desligar/ligar o som
3) REPEAT: ajustar função de repetição
3! ANGLE: alterar o ângulo da câmara
3@ SETUP: aceder ao menu OSD
3# GOTO: aceder ao menu de selecção directa do título, capítulo e tempo
3$ STANDBY : colocar o aparelho em modo de standby
5. Instalação do leitor de DVD
1. Retire cuidadosamente o leitor de DVD e os acessórios fornecidos daembalagem.
2. Retire a película de protecção do visor.3. Coloque o leitor de DVD numa superfície plana, regular e estável.
Não exponha o aparelho ao calor nem à humidade externa. Tenha atenção para que o aparelho tenha espaço de ventilação suficienteem todos os lados. Não coloque nenhum televisor directamente sobre o leitor de DVD.
Atenção!Não introduza já o cabo de rede do leitor de DVD na tomada. Espere até ter ligado o leitor de DVD a um televisor.
Caso queira alterar o tipo de ligação de vídeo ou áudio, retire primeiroa ficha de rede! Caso contrário, podem ocorrer picos de tensão tantono leitor de DVD como nos aparelhos a ele ligados, ficando estesirreparavelmente danificados!
- 3 -
6. Indicações de segurança
• Este aparelho não deve ser utilizado por pessoas (incluindo crianças)com capacidades físicas, sensoriais ou mentais limitadas ou falta deexperiência e/ou de conhecimento, a não ser que estas sejam super-visionadas por uma pessoa responsável pela sua segurança ou quedesta recebam instruções acerca do funcionamento do aparelho.
• As crianças devem ser supervisionadas, de modo a garantir que nãobrincam com o aparelho.
• Para evitar uma activação inadvertida, retire a ficha de rede após cadautilização e antes de cada limpeza.
• Verifique o aparelho e todas as peças quanto a danos visíveis. Apenas é possível garantir a segurança do aparelho se este se encontrarem perfeitas condições de funcionamento.
• A ficha de rede deve estar sempre num local de fácil acesso para queseja possível desligá-la rapidamente da rede eléctrica em caso deemergência.
Perigo de choque eléctrico!• Ligue o aparelho a uma tomada de rede correctamente instalada e ligada
à terra. A tensão de rede deve estar de acordo com a indicação existentena placa de identificação do aparelho.
• Em caso de danos, a ficha de rede ou o cabo de rede devem serimediatamente substituídos por técnicos autorizados ou pela AssistênciaTécnica, de modo a evitar perigos.
• Solicite apenas ao serviço de apoio ao cliente a reparação de cabosde ligação ou aparelhos que não funcionem na perfeição ou quetenham sido danificados.
• Nunca mergulhe o aparelho em água. Limpe-o apenas com um pano ligeiramente humedecido.
• Não exponha o aparelho à chuva e nunca o utilize em ambientes húmidosou molhados.
• Certifique-se de que o cabo de ligação nunca fica molhado ou húmidodurante o funcionamento.
• Não deve abrir ou reparar a estrutura do aparelho. Neste caso, a segurança não é assegurada e o direito à garantia é anulado.
• Proteja o aparelho de gotas e salpicos de água. Por isso, não coloquenenhum recipiente com água (como p.ex. jarras de flores) por cima doaparelho.
Perigo de incêndio!• Não utilize o aparelho próximo de superfícies quentes.• Não coloque o aparelho em locais directamente expostos aos raios
solares. Caso contrário, este poderia sobreaquecer e ficar irreparavel-mente danificado.
• Nunca deixe o aparelho sem vigilância durante o seu funcionamento.• Nunca cubra as ranhuras de ventilação do aparelho enquanto este se
encontrar ligado.• Não coloque quaisquer fontes de ignição, como p.ex. velas, sobre
o aparelho.
Perigo de ferimentos• Mantenha o cabo de ligação e o aparelho fora do alcance das crianças.
Estas frequentemente subestimam os riscos dos aparelhos eléctricos.• Certifique-se de que o aparelho é instalado de forma segura.• Caso o aparelho tenha caído ou se encontre danificado, não o deve
voltar a colocar em funcionamento. O aparelho deve ser verificadopor um técnico especializado e reparado, se necessário.
• As pilhas/pilhas recarregáveis podem ser fatais, se engolidas. Mantenha as pilhas fora do alcance das crianças. Em caso de ingestãode uma pilha, procure imediatamente auxílio médico.
• Mantenha também as películas de embalagem fora do alcance das crianças. Existe perigo de asfixia.
Perigo! Radiação laser!O aparelho dispõe de um "laser de classe 1".• Nunca abra o aparelho. • Não tente reparar o aparelho. • No interior do aparelho existem raios laser invisíveis.
Evite a exposição directa ao raio laser.
Nota: Alguns vernizes de mobiliário agressivos podem danificar as bases de borrachado aparelho. Se necessário, coloque o aparelho sobre uma superfícieantiderrapante.
Trovoada!Em caso de trovoada, os aparelhos ligados à corrente podem sofrer danos. Por isso, neste caso, retire sempre a ficha de rede da tomada.
Indicação relativamente a tensões transitórias (EFT/processosde transição rápidos eléctricos) e descargas electrostáticas:No caso de uma anomalia devido a processos de transição rápidoseléctricos (tensão transitória) ou descargas electrostáticas, o produtodeve ser reposto às definições de origem para regressar ao modo defuncionamento normal. Poderá ser necessário desligar a alimentaçãode tensão e voltar a ligá-la. As pilhas (caso existam) devem ser removidase novamente colocadas.
Indicação relativa à desconexão da redeO interruptor POWER deste aparelho não o desliga totalmente da rede eléctrica.O aparelho continua a consumir energia, mesmo em modo de standby. Paradesligar totalmente o aparelho da rede, a ficha de rede tem de ser retiradada tomada.
Indicações relativas ao manuseamento de pilhasO telecomando funciona a pilhas. Para um manuseamento correcto das pilhas, tenha em atenção as seguintesindicações:
Perigo resultante de uma utilização indevida!• Não atire as pilhas para o fogo.• Não curto-circuite as pilhas.• Não tente recarregar as pilhas.• Verifique as pilhas com regularidade. O ácido derramado das pilhas
pode causar danos permanentes no aparelho. O manuseamento de pilhas danificadas ou que tenham vertido requer uma prudência especial.Perigo de ferimentos! Utilizar luvas de protecção.
• Limpe o compartimento para as pilhas e os contactos das pilhas comum pano seco.
• Guardar as pilhas fora do alcance de crianças. Em caso de ingestão,procurar imediatamente auxílio médico.
• Se não utilizar o aparelho durante um longo período de tempo, retireas pilhas.
• Nunca abra ou solde as pilhas. Existe perigo de explosão e de ferimentos!
Atenção!Não assumimos qualquer responsabilidade por danos no leitor de DVDresultantes do efeito da humidade, da entrada de água no aparelho oude sobreaquecimento!
7. Telecomando
7.1 Colocação das pilhas1. Abra o compartimento para as pilhas na parte de trás do telecomando.2. Introduza as duas pilhas fornecidas do tipo AAA (micro) no compartimento
para as pilhas. Certifique-se de que as pilhas são colocadas de acordocom a sua polaridade.
3. Volte a fechar a tampa do compartimento para as pilhas.
7.2 Utilizar o telecomandoPara garantir um funcionamento correcto ao utilizar o telecomando… • direccione o telecomando sempre para o leitor de DVD.• certifique-se de que não se encontram quaisquer obstáculos que impeçam
a recepção entre o telecomando e o leitor de DVD• ao utilizar o telecomando, não se distancie mais do que 5 metros do
leitor de DVDCaso contrário, tal pode provocar avarias no comando das funções do leitorde DVD com o telecomando.
7.3 Substituir as pilhasCaso o comando do leitor de DVD não funcione correctamente através dotelecomando ou simplesmente deixe de funcionar, as pilhas deverão sersubstituídas.• Substitua sempre todas as pilhas, para poder utilizar o telecomando
novamente com a capacidade total.
8. Ligar o leitor de DVD a um televisor
Depois de instalar o leitor de DVD pode ligá-lo a um televisor. O leitor deDVD pode ser ligado a televisores com os formatos de imagem PAL ou NTSC. Se pretender ligar o leitor de DVD a um televisor da norma NTSC, devealterar as configurações de vídeo no "menu OSD" do leitor de DVD. O formatoPAL é o formato predefinido. Dependendo do modelo do televisor, existemdiferentes possibilidades de ligação do leitor de DVD ao mesmo, as quais serão descritas de seguida.
- 4 -
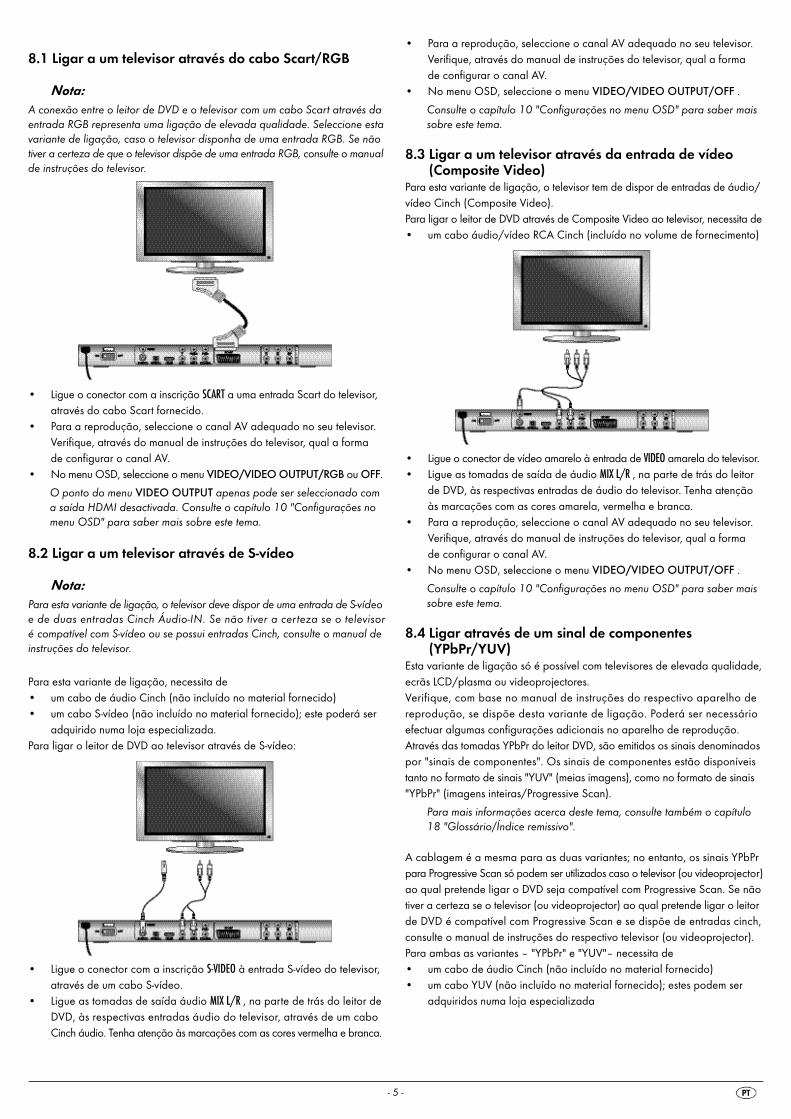
8.1 Ligar a um televisor através do cabo Scart/RGB
Nota:A conexão entre o leitor de DVD e o televisor com um cabo Scart através daentrada RGB representa uma ligação de elevada qualidade. Seleccione estavariante de ligação, caso o televisor disponha de uma entrada RGB. Se nãotiver a certeza de que o televisor dispõe de uma entrada RGB, consulte o manualde instruções do televisor.
• Ligue o conector com a inscrição SCART a uma entrada Scart do televisor,através do cabo Scart fornecido.
• Para a reprodução, seleccione o canal AV adequado no seu televisor.Verifique, através do manual de instruções do televisor, qual a forma de configurar o canal AV.
• No menu OSD, seleccione o menu VIDEO/VIDEO OUTPUT/RGB ou OFF.
O ponto do menu VIDEO OUTPUT apenas pode ser seleccionado coma saída HDMI desactivada. Consulte o capítulo 10 "Configurações nomenu OSD" para saber mais sobre este tema.
8.2 Ligar a um televisor através de S-vídeo
Nota:Para esta variante de ligação, o televisor deve dispor de uma entrada de S-vídeoe de duas entradas Cinch Áudio-IN. Se não tiver a certeza se o televisoré compatível com S-vídeo ou se possui entradas Cinch, consulte o manual deinstruções do televisor.
Para esta variante de ligação, necessita de • um cabo de áudio Cinch (não incluído no material fornecido)• um cabo S-vídeo (não incluído no material fornecido); este poderá ser
adquirido numa loja especializada.Para ligar o leitor de DVD ao televisor através de S-vídeo:
• Ligue o conector com a inscrição S-VIDEO à entrada S-vídeo do televisor,através de um cabo S-vídeo.
• Ligue as tomadas de saída áudio MIX L/R , na parte de trás do leitor deDVD, às respectivas entradas áudio do televisor, através de um caboCinch áudio. Tenha atenção às marcações com as cores vermelha e branca.
- 5 -
• Para a reprodução, seleccione o canal AV adequado no seu televisor.Verifique, através do manual de instruções do televisor, qual a forma de configurar o canal AV.
• No menu OSD, seleccione o menu VIDEO/VIDEO OUTPUT/OFF .
Consulte o capítulo 10 "Configurações no menu OSD" para saber maissobre este tema.
8.3 Ligar a um televisor através da entrada de vídeo(Composite Video)
Para esta variante de ligação, o televisor tem de dispor de entradas de áudio/vídeo Cinch (Composite Video).Para ligar o leitor de DVD através de Composite Video ao televisor, necessita de• um cabo áudio/vídeo RCA Cinch (incluído no volume de fornecimento)
• Ligue o conector de vídeo amarelo à entrada de VIDEO amarela do televisor.• Ligue as tomadas de saída de áudio MIX L/R , na parte de trás do leitor
de DVD, às respectivas entradas de áudio do televisor. Tenha atençãoàs marcações com as cores amarela, vermelha e branca.
• Para a reprodução, seleccione o canal AV adequado no seu televisor.Verifique, através do manual de instruções do televisor, qual a forma de configurar o canal AV.
• No menu OSD, seleccione o menu VIDEO/VIDEO OUTPUT/OFF .
Consulte o capítulo 10 "Configurações no menu OSD" para saber maissobre este tema.
8.4 Ligar através de um sinal de componentes(YPbPr/YUV)
Esta variante de ligação só é possível com televisores de elevada qualidade,ecrãs LCD/plasma ou videoprojectores.Verifique, com base no manual de instruções do respectivo aparelho dereprodução, se dispõe desta variante de ligação. Poderá ser necessárioefectuar algumas configurações adicionais no aparelho de reprodução.Através das tomadas YPbPr do leitor DVD, são emitidos os sinais denominadospor "sinais de componentes". Os sinais de componentes estão disponíveistanto no formato de sinais "YUV" (meias imagens), como no formato de sinais"YPbPr" (imagens inteiras/Progressive Scan).
Para mais informações acerca deste tema, consulte também o capítulo18 "Glossário/Índice remissivo".
A cablagem é a mesma para as duas variantes; no entanto, os sinais YPbPrpara Progressive Scan só podem ser utilizados caso o televisor (ou videoprojector)ao qual pretende ligar o DVD seja compatível com Progressive Scan. Se nãotiver a certeza se o televisor (ou videoprojector) ao qual pretende ligar o leitorde DVD é compatível com Progressive Scan e se dispõe de entradas cinch,consulte o manual de instruções do respectivo televisor (ou videoprojector).Para ambas as variantes – "YPbPr" e "YUV"– necessita de• um cabo de áudio Cinch (não incluído no material fornecido)• um cabo YUV (não incluído no material fornecido); estes podem ser
adquiridos numa loja especializada

Na parte de trás do leitor de DVD pode encontrar as tomadas de ligação Y, Pb/Cb e Pr/Cr.
Ligar o leitor DVD através de um sinal de componentes:
• Ligue os conectores Y (verde), Pb/Cb (azul) e Pr/Cr (vermelho) às entradasdo televisor com o mesmo nome.
• Ligue as tomadas de saída áudio MIX L/R, na parte de trás do leitor deDVD às respectivas entradas áudio do televisor, através de um caboCinch de áudio.
Tenha atenção às marcações com as cores vermelha e branca.• Para a reprodução, seleccione o canal AV adequado no seu televisor.
Verifique, através do manual de instruções do televisor, qual a forma de configurar o canal AV.
• No menu OSD, seleccione o menu VIDEO/VIDEO OUTPUT/YUV.
Consulte o capítulo 10 "Configurações no menu OSD" para saber maissobre este tema.
8.5 Ligar a um televisor através de HDMIEsta variante de ligação é apenas possível com aparelhos de televisão deelevada qualidade, ecrãs LCD/plasma ou projectores. Verifique, com base no manual de instruções do respectivo aparelho dereprodução, se dispõe desta variante de ligação. Poderá ser necessárioefectuar ainda algumas configurações adicionais no aparelho de reprodução.Para esta variante de ligação, necessita de um cabo HDMI (incluído nomaterial fornecido).
O leitor de DVD através de HDMI:
• Ligue a tomada com a inscrição HDMI à respectiva tomada no televisor,através de um cabo HDMI
• Para a reprodução, seleccione o canal AV adequado no seu televisor.Verifique, através do manual de instruções do televisor, qual a forma de configurar o canal AV.
• No menu OSD, seleccione o menu VIDEO/HDMI Setup/ON .
Consulte o capítulo 10 "Configurações no menu OSD" para saber maissobre este tema.
9. Ligar componentes áudio ao leitor de DVD
Além da reprodução do som de DVD, VCD/S-VCD e de CD de áudio e de MP3 através das colunas do televisor ao qual o leitor de DVD está ligado,também é possível efectuar a reprodução de som através de componentesáudio externos, como sistemas Hi-Fi, receptores Dolby Digital-/DTS ou sistemasSurround.
9.1 Requisitos para a ligação de um sistema Hi-FiPara obter uma melhor qualidade de som na reprodução de DVD com o leitorde DVD, pode ligar um sistema Hi-Fi ao leitor de DVD. Antes de efectuar a ligação,verifique com base no manual de instruções do sistema Hi-Fi• se o sistema Hi-Fi é apropriado para a ligação a um leitor de DVD; • se o sistema Hi-Fi possui entradas cinch; caso possua, pode ligar o sistema
Hi-Fi ao leitor de DVD através de um cabo cinch.
Ligar um sistema Hi-Fi:
• Ligue as tomadas de saída de áudio MIX L/R , na parte de trás do leitorde DVD às respectivas entradas de áudio do sistema HiFi, através deum cabo cinch. Tenha atenção às marcações com as cores vermelha e branca.
• Verifique, com base no manual de instruções, quais as configuraçõeseventualmente necessárias do sistema Hi-Fi para que o som seja transmitidoatravés do mesmo durante a reprodução de um DVD, VCD/S-VCD, CDde áudio ou de MP3 inserido no leitor de DVD .
Indicação:Para uma qualidade de som ideal, coloque as colunas do seu sistema HiFido lado esquerdo e direito do televisor ao qual ligou o leitor de DVD.
Se tiver ligado o leitor de DVD ao televisor através de um cabo Scart, os sinaisde áudio são transmitidos ao sistema Hi-Fi através do cabo cinch e tambémao televisor através do cabo Scart. Neste caso, reduza o volume do televisorpara o mínimo.
9.2 Ligar componentes áudio digitais através do cabo digital
Para desfrutar da reprodução de som estereofónico em DVDs equipados paratal (podem ser reconhecidos pelo logótipo Dolby Digital ou DTS), pode ligaro leitor de DVD a componentes áudio digitais – p. ex. um receptor Dolby Digitalou DTS ou um sistema Surround adequado.Os cabos necessários para as variantes de ligação descritas em seguida podem ser adquiridos numa loja especializada.Verifique, com base no manual de instruções dos componentes áudio digitais,se estes permitem a ligação do leitor de DVD … • através de um cabo coaxial• ou através de um cabo óptico.
- 6 -
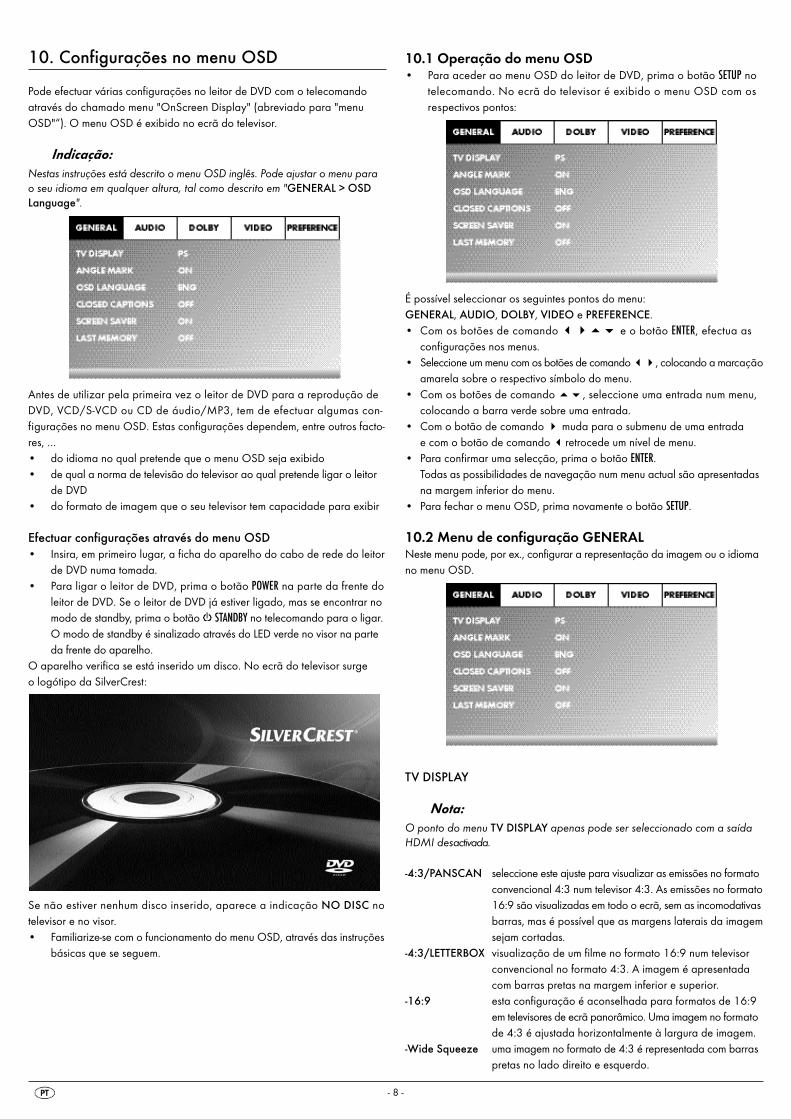
Ligação através de cabo coaxialLigue o leitor de DVD a um componente áudio digital através de um cabocoaxial digital:• Ligue o conector com a inscrição COAXIAL à respectiva entrada do
componente áudio digital.
Ligação através de cabo ópticoLigue o leitor de DVD a um componente áudio digital através de um caboóptico:• Retire a ficha de protecção da entrada com a inscrição OPTICAL na parte
de trás do leitor de DVD e introduza aí o conector do cabo óptico.• Introduza o conector na extremidade do cabo óptico na respectiva entrada
do componente áudio digital.
Nota:O cabo óptico é um cabo em fibra de vidro e não deve ser dobrado. A fibrade vidro que compõe o cabo poderia partir-se e este ficaria inutilizado.
Indicação:Certifique-se de que não existe sujidade na entrada para o cabo óptico. Issopoderia provocar interferências no sinal. Insira sempre a ficha de protecçãona entrada, quando não estiver inserido nenhum cabo óptico.
- 7 -
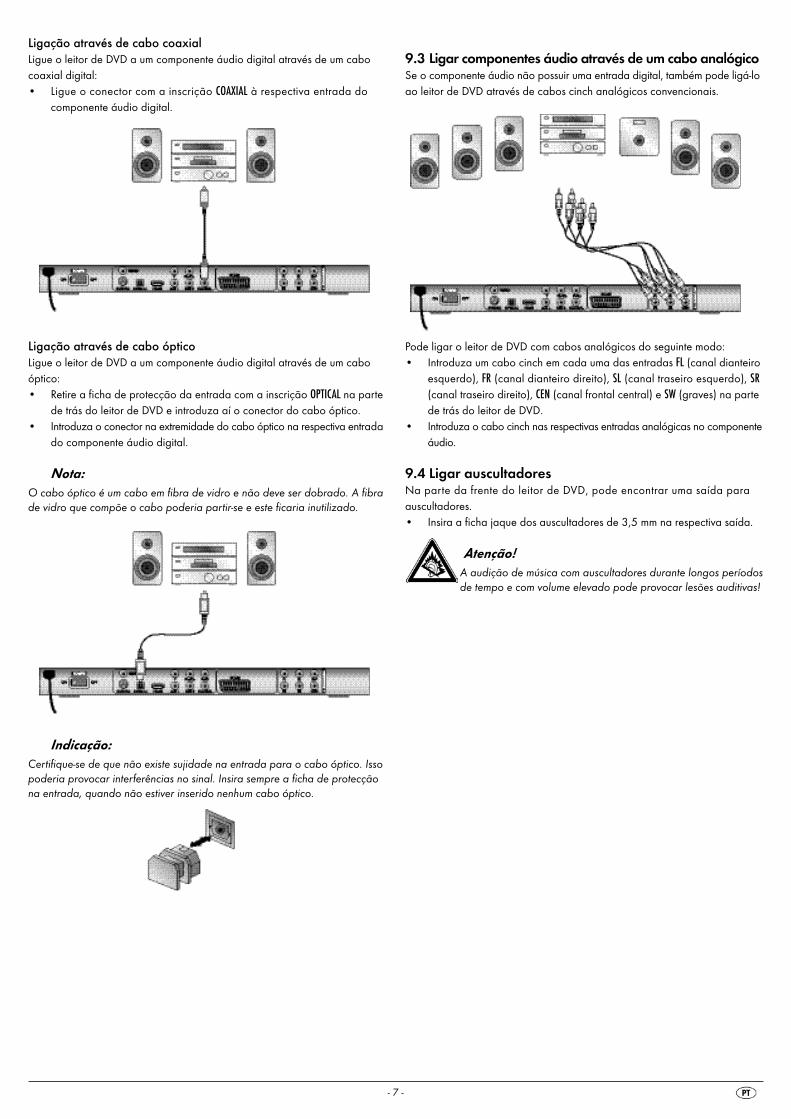
9.3 Ligar componentes áudio através de um cabo analógicoSe o componente áudio não possuir uma entrada digital, também pode ligá-loao leitor de DVD através de cabos cinch analógicos convencionais.
Pode ligar o leitor de DVD com cabos analógicos do seguinte modo:• Introduza um cabo cinch em cada uma das entradas FL (canal dianteiro
esquerdo), FR (canal dianteiro direito), SL (canal traseiro esquerdo), SR(canal traseiro direito), CEN (canal frontal central) e SW (graves) na partede trás do leitor de DVD.
• Introduza o cabo cinch nas respectivas entradas analógicas no componenteáudio.
9.4 Ligar auscultadoresNa parte da frente do leitor de DVD, pode encontrar uma saída para auscultadores.• Insira a ficha jaque dos auscultadores de 3,5 mm na respectiva saída.
Atenção! A audição de música com auscultadores durante longos períodosde tempo e com volume elevado pode provocar lesões auditivas!
10. Configurações no menu OSD
Pode efectuar várias configurações no leitor de DVD com o telecomandoatravés do chamado menu "OnScreen Display" (abreviado para "menuOSD"“). O menu OSD é exibido no ecrã do televisor.
Indicação: Nestas instruções está descrito o menu OSD inglês. Pode ajustar o menu parao seu idioma em qualquer altura, tal como descrito em "GENERAL > OSDLanguage".
Antes de utilizar pela primeira vez o leitor de DVD para a reprodução deDVD, VCD/S-VCD ou CD de áudio/MP3, tem de efectuar algumas con-figurações no menu OSD. Estas configurações dependem, entre outros facto-res, …• do idioma no qual pretende que o menu OSD seja exibido• de qual a norma de televisão do televisor ao qual pretende ligar o leitor
de DVD• do formato de imagem que o seu televisor tem capacidade para exibir
Efectuar configurações através do menu OSD• Insira, em primeiro lugar, a ficha do aparelho do cabo de rede do leitor
de DVD numa tomada.• Para ligar o leitor de DVD, prima o botão POWER na parte da frente do
leitor de DVD. Se o leitor de DVD já estiver ligado, mas se encontrar nomodo de standby, prima o botão STANDBY no telecomando para o ligar.O modo de standby é sinalizado através do LED verde no visor na parteda frente do aparelho.
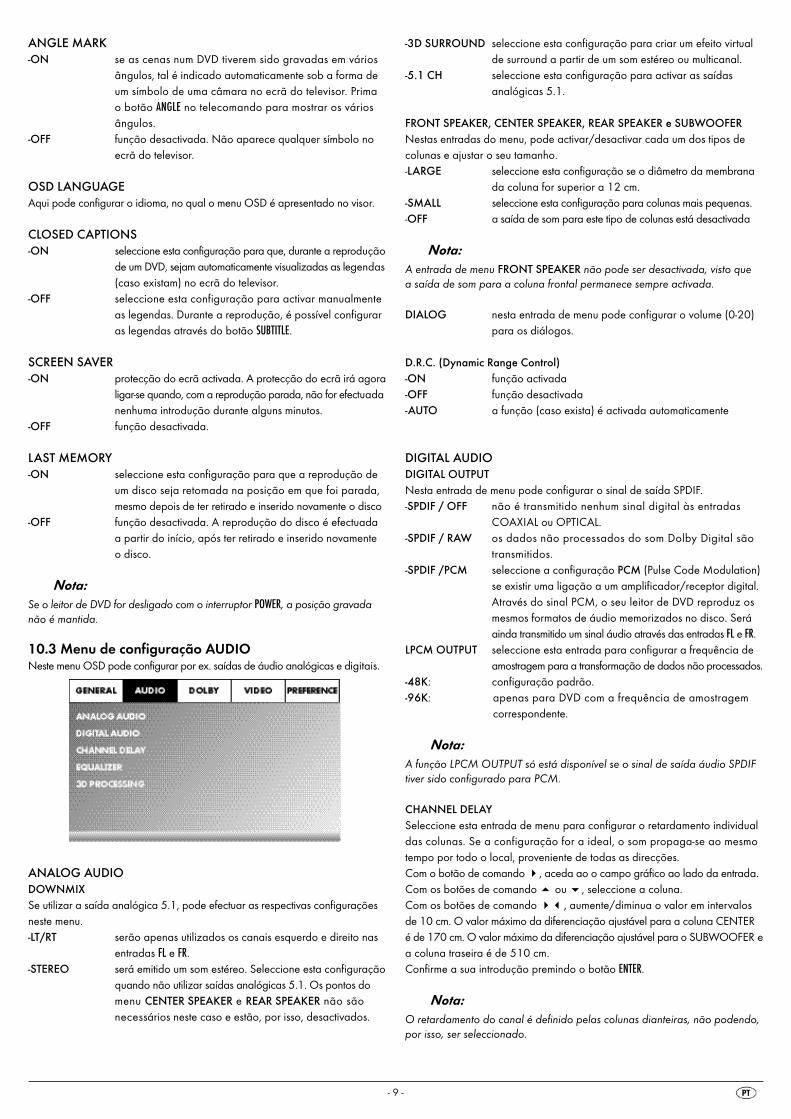
O aparelho verifica se está inserido um disco. No ecrã do televisor surge o logótipo da SilverCrest:
Se não estiver nenhum disco inserido, aparece a indicação NO DISC no televisor e no visor.• Familiarize-se com o funcionamento do menu OSD, através das instruções
básicas que se seguem.
10.1 Operação do menu OSD• Para aceder ao menu OSD do leitor de DVD, prima o botão SETUP no
telecomando. No ecrã do televisor é exibido o menu OSD com osrespectivos pontos:
É possível seleccionar os seguintes pontos do menu:GENERAL, AUDIO, DOLBY, VIDEO e PREFERENCE.• Com os botões de comando ���� e o botão ENTER, efectua as
configurações nos menus. • Seleccione um menu com os botões de comando ��, colocando a marcação
amarela sobre o respectivo símbolo do menu.• Com os botões de comando ��, seleccione uma entrada num menu,
colocando a barra verde sobre uma entrada.• Com o botão de comando � muda para o submenu de uma entrada
e com o botão de comando �retrocede um nível de menu.• Para confirmar uma selecção, prima o botão ENTER.
Todas as possibilidades de navegação num menu actual são apresentadasna margem inferior do menu.
• Para fechar o menu OSD, prima novamente o botão SETUP.
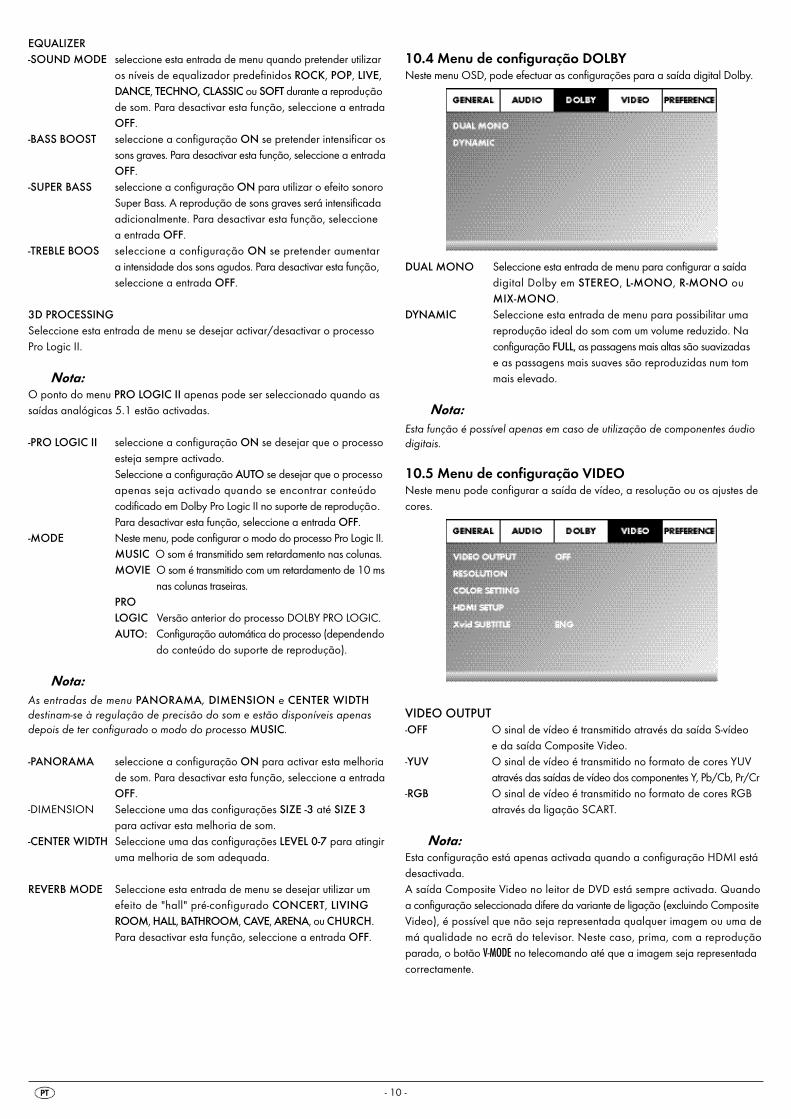
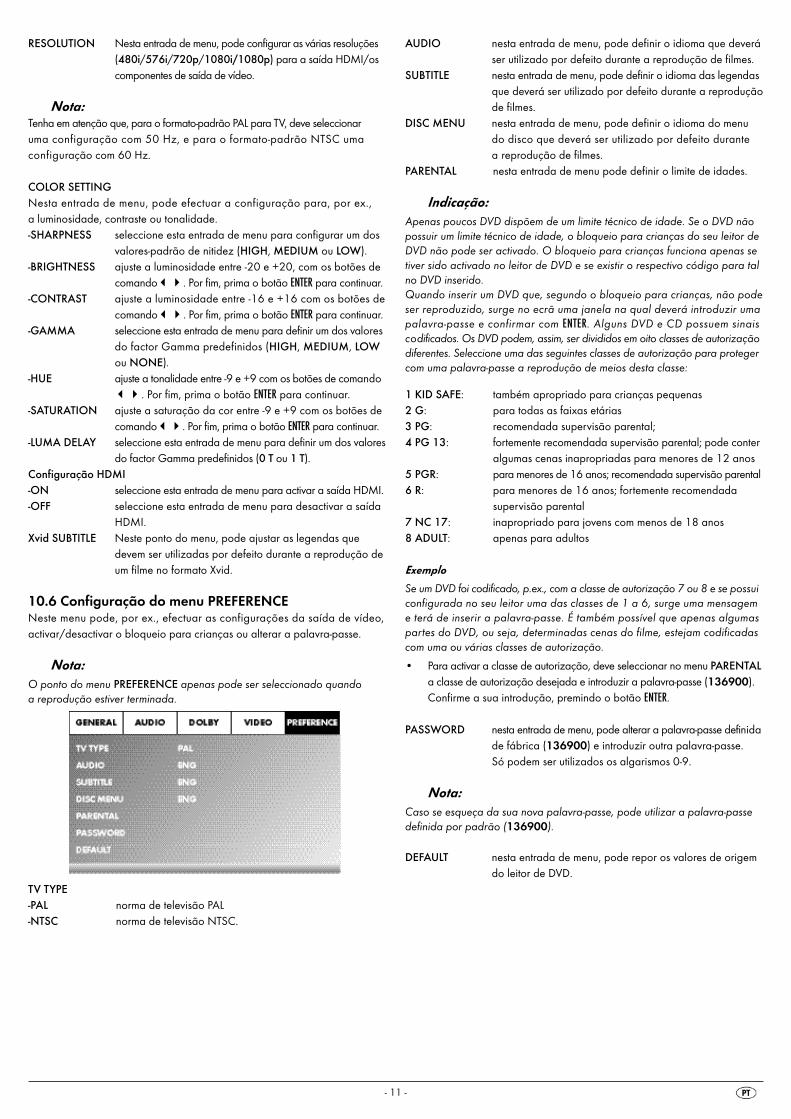
10.2 Menu de configuração GENERALNeste menu pode, por ex., configurar a representação da imagem ou o idiomano menu OSD.
TV DISPLAY
Nota:O ponto do menu TV DISPLAY apenas pode ser seleccionado com a saídaHDMI desactivada.
-4:3/PANSCAN seleccione este ajuste para visualizar as emissões no formatoconvencional 4:3 num televisor 4:3. As emissões no formato16:9 são visualizadas em todo o ecrã, sem as incomodativasbarras, mas é possível que as margens laterais da imagemsejam cortadas.
-4:3/LETTERBOX visualização de um filme no formato 16:9 num televisorconvencional no formato 4:3. A imagem é apresentadacom barras pretas na margem inferior e superior.
-16:9 esta configuração é aconselhada para formatos de 16:9em televisores de ecrã panorâmico. Uma imagem no formatode 4:3 é ajustada horizontalmente à largura de imagem.
-Wide Squeeze uma imagem no formato de 4:3 é representada com barraspretas no lado direito e esquerdo.
- 8 -
ANGLE MARK-ON se as cenas num DVD tiverem sido gravadas em vários
ângulos, tal é indicado automaticamente sob a forma deum símbolo de uma câmara no ecrã do televisor. Primao botão ANGLE no telecomando para mostrar os váriosângulos.
-OFF função desactivada. Não aparece qualquer símbolo noecrã do televisor.
OSD LANGUAGEAqui pode configurar o idioma, no qual o menu OSD é apresentado no visor.
CLOSED CAPTIONS-ON seleccione esta configuração para que, durante a reprodução
de um DVD, sejam automaticamente visualizadas as legendas(caso existam) no ecrã do televisor.
-OFF seleccione esta configuração para activar manualmenteas legendas. Durante a reprodução, é possível configuraras legendas através do botão SUBTITLE.
SCREEN SAVER-ON protecção do ecrã activada. A protecção do ecrã irá agora
ligar-se quando, com a reprodução parada, não for efectuadanenhuma introdução durante alguns minutos.
-OFF função desactivada.
LAST MEMORY-ON seleccione esta configuração para que a reprodução de
um disco seja retomada na posição em que foi parada,mesmo depois de ter retirado e inserido novamente o disco
-OFF função desactivada. A reprodução do disco é efectuadaa partir do início, após ter retirado e inserido novamente o disco.
Nota:Se o leitor de DVD for desligado com o interruptor POWER, a posição gravadanão é mantida.
10.3 Menu de configuração AUDIONeste menu OSD pode configurar por ex. saídas de áudio analógicas e digitais.
ANALOG AUDIODOWNMIXSe utilizar a saída analógica 5.1, pode efectuar as respectivas configuraçõesneste menu.-LT/RT serão apenas utilizados os canais esquerdo e direito nas
entradas FL e FR. -STEREO será emitido um som estéreo. Seleccione esta configuração
quando não utilizar saídas analógicas 5.1. Os pontos domenu CENTER SPEAKER e REAR SPEAKER não são necessários neste caso e estão, por isso, desactivados.
- 9 -
-3D SURROUND seleccione esta configuração para criar um efeito virtualde surround a partir de um som estéreo ou multicanal.
-5.1 CH seleccione esta configuração para activar as saídas analógicas 5.1.
FRONT SPEAKER, CENTER SPEAKER, REAR SPEAKER e SUBWOOFERNestas entradas do menu, pode activar/desactivar cada um dos tipos de colunas e ajustar o seu tamanho.-LARGE seleccione esta configuração se o diâmetro da membrana
da coluna for superior a 12 cm.-SMALL seleccione esta configuração para colunas mais pequenas.-OFF a saída de som para este tipo de colunas está desactivada
Nota:A entrada de menu FRONT SPEAKER não pode ser desactivada, visto que a saída de som para a coluna frontal permanece sempre activada.
DIALOG nesta entrada de menu pode configurar o volume (0-20)para os diálogos.
D.R.C. (Dynamic Range Control)-ON função activada-OFF função desactivada-AUTO a função (caso exista) é activada automaticamente
DIGITAL AUDIODIGITAL OUTPUTNesta entrada de menu pode configurar o sinal de saída SPDIF.-SPDIF / OFF não é transmitido nenhum sinal digital às entradas
COAXIAL ou OPTICAL.-SPDIF / RAW os dados não processados do som Dolby Digital são
transmitidos.-SPDIF /PCM seleccione a configuração PCM (Pulse Code Modulation)
se existir uma ligação a um amplificador/receptor digital.Através do sinal PCM, o seu leitor de DVD reproduz osmesmos formatos de áudio memorizados no disco. Seráainda transmitido um sinal áudio através das entradas FL e FR.
LPCM OUTPUT seleccione esta entrada para configurar a frequência deamostragem para a transformação de dados não processados.
-48K: configuração padrão.-96K: apenas para DVD com a frequência de amostragem
correspondente.
Nota:A função LPCM OUTPUT só está disponível se o sinal de saída áudio SPDIFtiver sido configurado para PCM.
CHANNEL DELAYSeleccione esta entrada de menu para configurar o retardamento individualdas colunas. Se a configuração for a ideal, o som propaga-se ao mesmotempo por todo o local, proveniente de todas as direcções.Com o botão de comando �, aceda ao o campo gráfico ao lado da entrada.Com os botões de comando � ou �, seleccione a coluna.Com os botões de comando ��, aumente/diminua o valor em intervalosde 10 cm. O valor máximo da diferenciação ajustável para a coluna CENTERé de 170 cm. O valor máximo da diferenciação ajustável para o SUBWOOFER ea coluna traseira é de 510 cm. Confirme a sua introdução premindo o botão ENTER.
Nota:O retardamento do canal é definido pelas colunas dianteiras, não podendo,por isso, ser seleccionado.
EQUALIZER-SOUND MODE seleccione esta entrada de menu quando pretender utilizar
os níveis de equalizador predefinidos ROCK, POP, LIVE,DANCE, TECHNO, CLASSIC ou SOFT durante a reproduçãode som. Para desactivar esta função, seleccione a entradaOFF.
-BASS BOOST seleccione a configuração ON se pretender intensificar ossons graves. Para desactivar esta função, seleccione a entradaOFF.
-SUPER BASS seleccione a configuração ON para utilizar o efeito sonoroSuper Bass. A reprodução de sons graves será intensificadaadicionalmente. Para desactivar esta função, seleccionea entrada OFF.
-TREBLE BOOS seleccione a configuração ON se pretender aumentar a intensidade dos sons agudos. Para desactivar esta função,seleccione a entrada OFF.
3D PROCESSINGSeleccione esta entrada de menu se desejar activar/desactivar o processoPro Logic II.
Nota:O ponto do menu PRO LOGIC II apenas pode ser seleccionado quando assaídas analógicas 5.1 estão activadas.
-PRO LOGIC II seleccione a configuração ON se desejar que o processoesteja sempre activado. Seleccione a configuração AUTO se desejar que o processoapenas seja activado quando se encontrar conteúdocodificado em Dolby Pro Logic II no suporte de reprodução.Para desactivar esta função, seleccione a entrada OFF.
-MODE Neste menu, pode configurar o modo do processo Pro Logic II. MUSIC O som é transmitido sem retardamento nas colunas.MOVIE O som é transmitido com um retardamento de 10 ms
nas colunas traseiras.PRO LOGIC Versão anterior do processo DOLBY PRO LOGIC.AUTO: Configuração automática do processo (dependendo
do conteúdo do suporte de reprodução).
Nota:As entradas de menu PANORAMA, DIMENSION e CENTER WIDTHdestinam-se à regulação de precisão do som e estão disponíveis apenas depois de ter configurado o modo do processo MUSIC.
-PANORAMA seleccione a configuração ON para activar esta melhoriade som. Para desactivar esta função, seleccione a entradaOFF.
-DIMENSION Seleccione uma das configurações SIZE -3 até SIZE 3para activar esta melhoria de som.
-CENTER WIDTH Seleccione uma das configurações LEVEL 0-7 para atingiruma melhoria de som adequada.
REVERB MODE Seleccione esta entrada de menu se desejar utilizar umefeito de "hall" pré-configurado CONCERT, LIVINGROOM, HALL, BATHROOM, CAVE, ARENA, ou CHURCH.Para desactivar esta função, seleccione a entrada OFF.
10.4 Menu de configuração DOLBYNeste menu OSD, pode efectuar as configurações para a saída digital Dolby.
DUAL MONO Seleccione esta entrada de menu para configurar a saída digital Dolby em STEREO, L-MONO, R-MONO ouMIX-MONO.
DYNAMIC Seleccione esta entrada de menu para possibilitar uma reprodução ideal do som com um volume reduzido. Naconfiguração FULL, as passagens mais altas são suavizadas e as passagens mais suaves são reproduzidas num tommais elevado.
Nota:Esta função é possível apenas em caso de utilização de componentes áudiodigitais.
10.5 Menu de configuração VIDEONeste menu pode configurar a saída de vídeo, a resolução ou os ajustes decores.
VIDEO OUTPUT-OFF O sinal de vídeo é transmitido através da saída S-vídeo
e da saída Composite Video.-YUV O sinal de vídeo é transmitido no formato de cores YUV
através das saídas de vídeo dos componentes Y, Pb/Cb, Pr/Cr-RGB O sinal de vídeo é transmitido no formato de cores RGB
através da ligação SCART.
Nota:Esta configuração está apenas activada quando a configuração HDMI estádesactivada. A saída Composite Video no leitor de DVD está sempre activada. Quando a configuração seleccionada difere da variante de ligação (excluindo CompositeVideo), é possível que não seja representada qualquer imagem ou uma demá qualidade no ecrã do televisor. Neste caso, prima, com a reproduçãoparada, o botão V-MODE no telecomando até que a imagem seja representadacorrectamente.
- 10 -
RESOLUTION Nesta entrada de menu, pode configurar as várias resoluções(480i/576i/720p/1080i/1080p) para a saída HDMI/oscomponentes de saída de vídeo.
Nota:Tenha em atenção que, para o formato-padrão PAL para TV, deve seleccionaruma configuração com 50 Hz, e para o formato-padrão NTSC umaconfiguração com 60 Hz.
COLOR SETTINGNesta entrada de menu, pode efectuar a configuração para, por ex., a luminosidade, contraste ou tonalidade.-SHARPNESS seleccione esta entrada de menu para configurar um dos
valores-padrão de nitidez (HIGH, MEDIUM ou LOW).-BRIGHTNESS ajuste a luminosidade entre -20 e +20, com os botões de
comando��. Por fim, prima o botão ENTER para continuar.-CONTRAST ajuste a luminosidade entre -16 e +16 com os botões de
comando��. Por fim, prima o botão ENTER para continuar.-GAMMA seleccione esta entrada de menu para definir um dos valores
do factor Gamma predefinidos (HIGH, MEDIUM, LOWou NONE).
-HUE ajuste a tonalidade entre -9 e +9 com os botões de comando��. Por fim, prima o botão ENTER para continuar.
-SATURATION ajuste a saturação da cor entre -9 e +9 com os botões decomando��. Por fim, prima o botão ENTER para continuar.
-LUMA DELAY seleccione esta entrada de menu para definir um dos valoresdo factor Gamma predefinidos (0 T ou 1 T).
Configuração HDMI-ON seleccione esta entrada de menu para activar a saída HDMI.-OFF seleccione esta entrada de menu para desactivar a saída
HDMI.Xvid SUBTITLE Neste ponto do menu, pode ajustar as legendas que
devem ser utilizadas por defeito durante a reprodução deum filme no formato Xvid.
10.6 Configuração do menu PREFERENCENeste menu pode, por ex., efectuar as configurações da saída de vídeo, activar/desactivar o bloqueio para crianças ou alterar a palavra-passe.
Nota:O ponto do menu PREFERENCE apenas pode ser seleccionado quando a reprodução estiver terminada.
TV TYPE-PAL norma de televisão PAL-NTSC norma de televisão NTSC.
- 11 -
AUDIO nesta entrada de menu, pode definir o idioma que deveráser utilizado por defeito durante a reprodução de filmes.
SUBTITLE nesta entrada de menu, pode definir o idioma das legendasque deverá ser utilizado por defeito durante a reproduçãode filmes.
DISC MENU nesta entrada de menu, pode definir o idioma do menudo disco que deverá ser utilizado por defeito durante a reprodução de filmes.
PARENTAL nesta entrada de menu pode definir o limite de idades.
Indicação:Apenas poucos DVD dispõem de um limite técnico de idade. Se o DVD nãopossuir um limite técnico de idade, o bloqueio para crianças do seu leitor deDVD não pode ser activado. O bloqueio para crianças funciona apenas se tiver sido activado no leitor de DVD e se existir o respectivo código para talno DVD inserido. Quando inserir um DVD que, segundo o bloqueio para crianças, não podeser reproduzido, surge no ecrã uma janela na qual deverá introduzir umapalavra-passe e confirmar com ENTER. Alguns DVD e CD possuem sinaiscodificados. Os DVD podem, assim, ser divididos em oito classes de autorizaçãodiferentes. Seleccione uma das seguintes classes de autorização para protegercom uma palavra-passe a reprodução de meios desta classe:
1 KID SAFE: também apropriado para crianças pequenas2 G: para todas as faixas etárias3 PG: recomendada supervisão parental;4 PG 13: fortemente recomendada supervisão parental; pode conter
algumas cenas inapropriadas para menores de 12 anos5 PGR: para menores de 16 anos; recomendada supervisão parental6 R: para menores de 16 anos; fortemente recomendada
supervisão parental7 NC 17: inapropriado para jovens com menos de 18 anos8 ADULT: apenas para adultos
Exemplo
Se um DVD foi codificado, p.ex., com a classe de autorização 7 ou 8 e se possuiconfigurada no seu leitor uma das classes de 1 a 6, surge uma mensageme terá de inserir a palavra-passe. É também possível que apenas algumaspartes do DVD, ou seja, determinadas cenas do filme, estejam codificadascom uma ou várias classes de autorização.
• Para activar a classe de autorização, deve seleccionar no menu PARENTALa classe de autorização desejada e introduzir a palavra-passe (136900).Confirme a sua introdução, premindo o botão ENTER.
PASSWORD nesta entrada de menu, pode alterar a palavra-passe definidade fábrica (136900) e introduzir outra palavra-passe. Só podem ser utilizados os algarismos 0-9.
Nota:Caso se esqueça da sua nova palavra-passe, pode utilizar a palavra-passedefinida por padrão (136900).
DEFAULT nesta entrada de menu, pode repor os valores de origemdo leitor de DVD.
11. Colocação do leitor de DVD em funciona-mento
Depois de …• ter instalado o leitor de DVD num local adequado• ter ligado o leitor de DVD a um televisor com uma das possibilidades
de ligação mencionadas• ter ligado, se assim o pretender, o leitor de DVD a um sistema Hi-Fi ou
Surround (analógico/digital) ou a um receptor Dolby Digital ou DTS• ter inserido pilhas no telecomando e este estar operacional• e saber como aceder e utilizar o menu OSD com o telecomando… o leitor de DVD está operacional.
11.1 Introduzir um DVDPara reproduzir um disco no leitor de DVD:• ligue o seu televisor.• certifique-se de que o seu leitor de DVD está operacional.Se o televisor, o leitor de DVD e outros aparelhos eventualmente ligados (p. ex.um componente áudio) estiverem operacionais e ligados, e o leitor de DVDestiver correctamente ligado à televisão, surge no ecrã do televisor o logótipoda SilverCrest.Se não estiver inserido nenhum disco no compartimento para o CD do leitorde DVD: No ecrã do televisor aparece NO DISC.• Abra o compartimento para o disco, premindo o botão OPEN/CLOSE no
telecomando ou na parte da frente do leitor de DVD. No ecrã do televisoraparece OPEN.
• Insira o DVD no compartimento para o disco, com o lado com inscriçõesvoltado para cima. No caso de discos com duas faces: o lado que pretende que sejareproduzido tem que estar voltado para baixo.
• Depois de ter inserido o disco, prima novamente o botão OPEN/CLOSEno telecomando ou na parte da frente do leitor de DVD, para fecharo compartimento para CD.
• O conteúdo do disco é agora carregado; isto pode demorar alguns segundos. Enquanto isso, aparecerá no ecrã do televisor LOADING.
11.2 Introduzir cartões de memória/dispositivos de armazenamento USB com ficheirosMP3/WMA/MPEG4/JPEG
Nota:O leitor de DVD inicia sempre no modo de DVD. Para ler cartões de memória/dispositivos de armazenamento USB, prima o botão USB no telecomando. O leitor de DVD reconhece os formatos de ficheiro JPEG, MP3 e WMA e MPEG4.
Para inserir cartões de memória dos tipos SD, MS/MSPro e MMC no leitorde DVD:• ligue o televisor.• certifique-se de que o seu leitor de DVD está operacional.Quando o televisor, o leitor DVD e eventualmente outros aparelhos ligados(p. ex. um componente de áudio) se encontrem operacionais e ligados,e o leitor DVD estiver correctamente ligado ao televisor, poderá ver no ecrãdo televisor o logotipo do Silvercrest. Se não estiver inserido nenhum disco no compartimento para o CD do leitorde DVD: No ecrã do televisor aparece NO DISC.• Insira o cartão de memória no compartimento para cartões de memória.
Proceda de acordo com os seguintes passos - dependendo do tipo decartão de memória que vai reproduzir.
Aviso!Tenha sempre em atenção que os cartões de memória devem ser introduzidosnos compartimentos dos cartões de memória tal como descrito! Nunca dobreos cartões de memória quando os introduzir no compartimento para cartõesde memória! Introduza os cartões de memória exercendo pouca pressão, atéao encosto no compartimento de cartões de memória.
Se os cartões de memória forem introduzidos sem esforço:• Verifique se se trata de um cartão de memória que pode ser reproduzido
com o leitor DVD. Não tente inserir cartões de memória de outros tipos no compartimentopara cartões de memória!
• Verifique se introduziu o cartão de memória no sentido correcto nocompartimento para cartões de memória.
• Não introduza o cartão de memória no compartimento de cartões comdemasiada força!
Caso contrário, o leitor DVD, o cartão de memória e os dados nele contidospodem ser danificados!
Tipos de cartões de memória e capacidades suportadasPodem ser reproduzidos cartões de memória do tipo SD (2 GB sem SDHC),MS/MSPro (4 GB), MMC (4 GB).
Indicação:O seu leitor de DVD apenas consegue ler dispositivos de armazenamentocom vários formatos de ficheiro quando cada pasta contém apenas ficheirosdo mesmo formato.
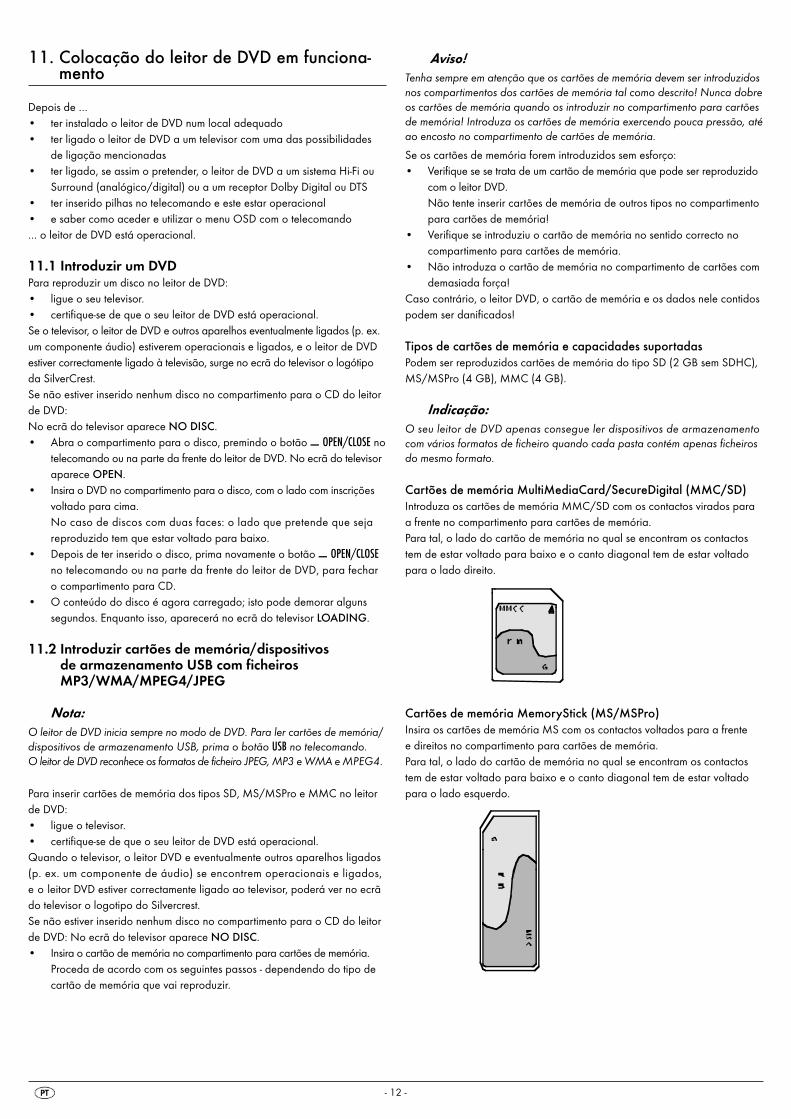
Cartões de memória MultiMediaCard/SecureDigital (MMC/SD)Introduza os cartões de memória MMC/SD com os contactos virados paraa frente no compartimento para cartões de memória.Para tal, o lado do cartão de memória no qual se encontram os contactostem de estar voltado para baixo e o canto diagonal tem de estar voltadopara o lado direito.
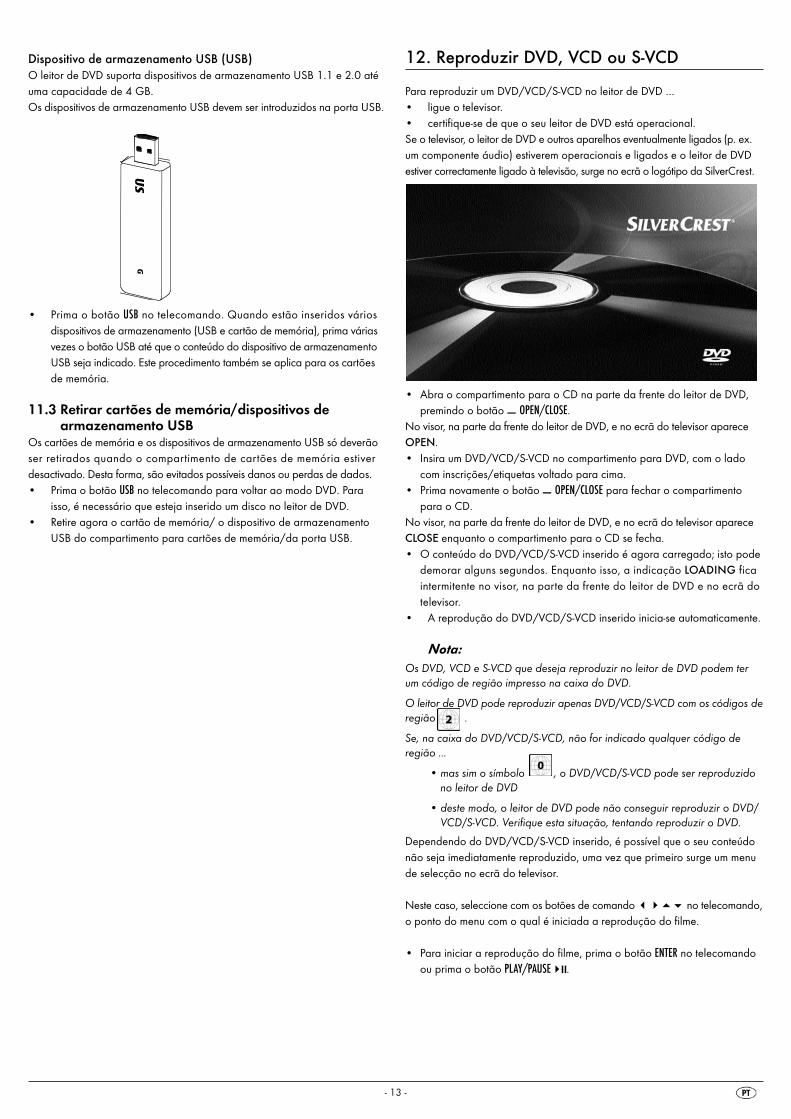
Cartões de memória MemoryStick (MS/MSPro)Insira os cartões de memória MS com os contactos voltados para a frente e direitos no compartimento para cartões de memória. Para tal, o lado do cartão de memória no qual se encontram os contactostem de estar voltado para baixo e o canto diagonal tem de estar voltadopara o lado esquerdo.
- 12 -
Dispositivo de armazenamento USB (USB)O leitor de DVD suporta dispositivos de armazenamento USB 1.1 e 2.0 atéuma capacidade de 4 GB.Os dispositivos de armazenamento USB devem ser introduzidos na porta USB.
• Prima o botão USB no telecomando. Quando estão inseridos váriosdispositivos de armazenamento (USB e cartão de memória), prima váriasvezes o botão USB até que o conteúdo do dispositivo de armazenamentoUSB seja indicado. Este procedimento também se aplica para os cartõesde memória.
11.3 Retirar cartões de memória/dispositivos de armazenamento USB
Os cartões de memória e os dispositivos de armazenamento USB só deverãoser retirados quando o compartimento de cartões de memória estiverdesactivado. Desta forma, são evitados possíveis danos ou perdas de dados.• Prima o botão USB no telecomando para voltar ao modo DVD. Para
isso, é necessário que esteja inserido um disco no leitor de DVD. • Retire agora o cartão de memória/ o dispositivo de armazenamento
USB do compartimento para cartões de memória/da porta USB.
- 13 -
12. Reproduzir DVD, VCD ou S-VCD
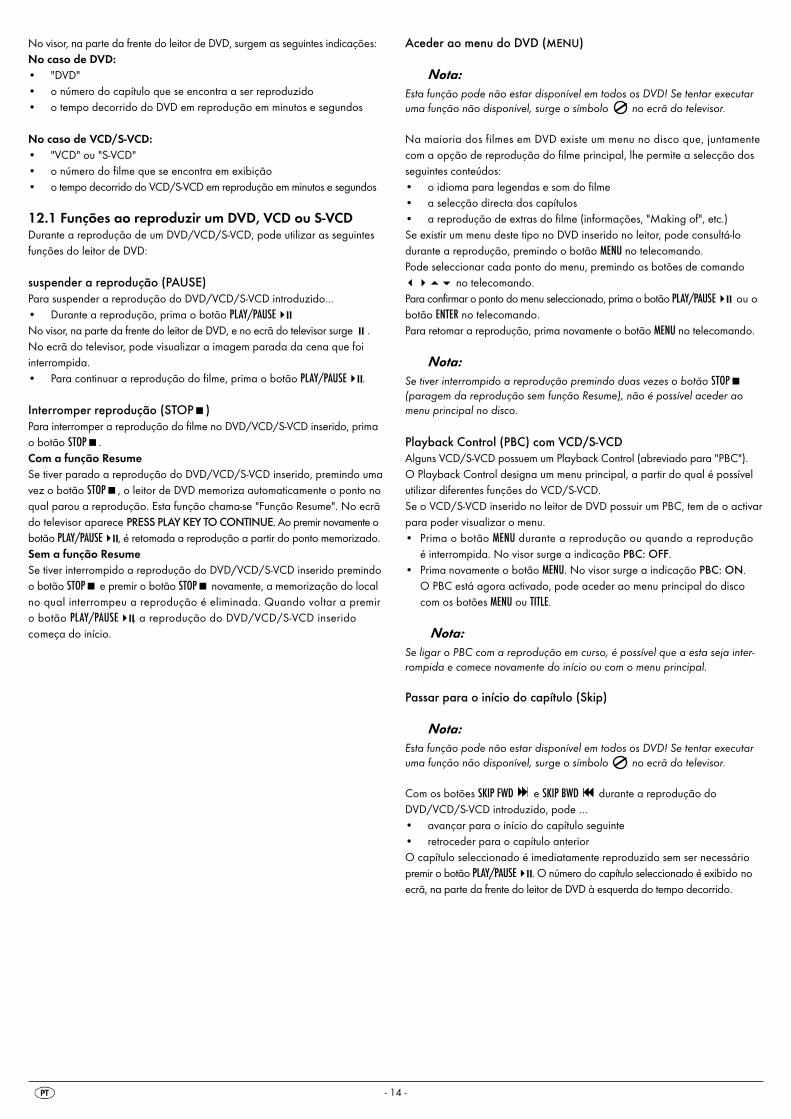
Para reproduzir um DVD/VCD/S-VCD no leitor de DVD …• ligue o televisor.• certifique-se de que o seu leitor de DVD está operacional.Se o televisor, o leitor de DVD e outros aparelhos eventualmente ligados (p. ex.um componente áudio) estiverem operacionais e ligados e o leitor de DVDestiver correctamente ligado à televisão, surge no ecrã o logótipo da SilverCrest.
• Abra o compartimento para o CD na parte da frente do leitor de DVD,premindo o botão OPEN/CLOSE.
No visor, na parte da frente do leitor de DVD, e no ecrã do televisor apareceOPEN.• Insira um DVD/VCD/S-VCD no compartimento para DVD, com o lado
com inscrições/etiquetas voltado para cima.• Prima novamente o botão OPEN/CLOSE para fechar o compartimento
para o CD. No visor, na parte da frente do leitor de DVD, e no ecrã do televisor apareceCLOSE enquanto o compartimento para o CD se fecha.• O conteúdo do DVD/VCD/S-VCD inserido é agora carregado; isto pode
demorar alguns segundos. Enquanto isso, a indicação LOADING ficaintermitente no visor, na parte da frente do leitor de DVD e no ecrã dotelevisor.
• A reprodução do DVD/VCD/S-VCD inserido inicia-se automaticamente.
Nota:Os DVD, VCD e S-VCD que deseja reproduzir no leitor de DVD podem terum código de região impresso na caixa do DVD.
O leitor de DVD pode reproduzir apenas DVD/VCD/S-VCD com os códigos deregião .
Se, na caixa do DVD/VCD/S-VCD, não for indicado qualquer código de região …
• mas sim o símbolo , o DVD/VCD/S-VCD pode ser reproduzidono leitor de DVD
• deste modo, o leitor de DVD pode não conseguir reproduzir o DVD/VCD/S-VCD. Verifique esta situação, tentando reproduzir o DVD.
Dependendo do DVD/VCD/S-VCD inserido, é possível que o seu conteúdonão seja imediatamente reproduzido, uma vez que primeiro surge um menude selecção no ecrã do televisor.
Neste caso, seleccione com os botões de comando ���� no telecomando,o ponto do menu com o qual é iniciada a reprodução do filme.
• Para iniciar a reprodução do filme, prima o botão ENTER no telecomandoou prima o botão PLAY/PAUSE�� .
No visor, na parte da frente do leitor de DVD, surgem as seguintes indicações:No caso de DVD:• "DVD"• o número do capítulo que se encontra a ser reproduzido• o tempo decorrido do DVD em reprodução em minutos e segundos
No caso de VCD/S-VCD: • "VCD" ou "S-VCD"• o número do filme que se encontra em exibição• o tempo decorrido do VCD/S-VCD em reprodução em minutos e segundos
12.1 Funções ao reproduzir um DVD, VCD ou S-VCDDurante a reprodução de um DVD/VCD/S-VCD, pode utilizar as seguintesfunções do leitor de DVD:
suspender a reprodução (PAUSE)Para suspender a reprodução do DVD/VCD/S-VCD introduzido…• Durante a reprodução, prima o botão PLAY/PAUSE��No visor, na parte da frente do leitor de DVD, e no ecrã do televisor surge �.No ecrã do televisor, pode visualizar a imagem parada da cena que foiinterrompida.• Para continuar a reprodução do filme, prima o botão PLAY/PAUSE�� .
Interromper reprodução (STOP�)Para interromper a reprodução do filme no DVD/VCD/S-VCD inserido, primao botão STOP�.Com a função ResumeSe tiver parado a reprodução do DVD/VCD/S-VCD inserido, premindo umavez o botão STOP�, o leitor de DVD memoriza automaticamente o ponto noqual parou a reprodução. Esta função chama-se "Função Resume". No ecrãdo televisor aparece PRESS PLAY KEY TO CONTINUE. Ao premir novamente obotão PLAY/PAUSE�� , é retomada a reprodução a partir do ponto memorizado.Sem a função ResumeSe tiver interrompido a reprodução do DVD/VCD/S-VCD inserido premindoo botão STOP� e premir o botão STOP� novamente, a memorização do localno qual interrompeu a reprodução é eliminada. Quando voltar a premiro botão PLAY/PAUSE��, a reprodução do DVD/VCD/S-VCD inserido começa do início.
Aceder ao menu do DVD (MENU)
Nota:Esta função pode não estar disponível em todos os DVD! Se tentar executaruma função não disponível, surge o símbolo no ecrã do televisor.
Na maioria dos filmes em DVD existe um menu no disco que, juntamentecom a opção de reprodução do filme principal, lhe permite a selecção dosseguintes conteúdos:• o idioma para legendas e som do filme• a selecção directa dos capítulos • a reprodução de extras do filme (informações, "Making of", etc.)Se existir um menu deste tipo no DVD inserido no leitor, pode consultá-lo durante a reprodução, premindo o botão MENU no telecomando.Pode seleccionar cada ponto do menu, premindo os botões de comando���� no telecomando.Para confirmar o ponto do menu seleccionado, prima o botão PLAY/PAUSE��ou obotão ENTER no telecomando.Para retomar a reprodução, prima novamente o botão MENU no telecomando.
Nota:Se tiver interrompido a reprodução premindo duas vezes o botão STOP�(paragem da reprodução sem função Resume), não é possível aceder aomenu principal no disco.
Playback Control (PBC) com VCD/S-VCDAlguns VCD/S-VCD possuem um Playback Control (abreviado para "PBC"). O Playback Control designa um menu principal, a partir do qual é possívelutilizar diferentes funções do VCD/S-VCD. Se o VCD/S-VCD inserido no leitor de DVD possuir um PBC, tem de o activarpara poder visualizar o menu.• Prima o botão MENU durante a reprodução ou quando a reprodução
é interrompida. No visor surge a indicação PBC: OFF.• Prima novamente o botão MENU. No visor surge a indicação PBC: ON.
O PBC está agora activado, pode aceder ao menu principal do discocom os botões MENU ou TITLE.
Nota:Se ligar o PBC com a reprodução em curso, é possível que a esta seja inter-rompida e comece novamente do início ou com o menu principal.
Passar para o início do capítulo (Skip)
Nota:Esta função pode não estar disponível em todos os DVD! Se tentar executaruma função não disponível, surge o símbolo no ecrã do televisor.
Com os botões SKIP FWD e SKIP BWD durante a reprodução doDVD/VCD/S-VCD introduzido, pode …• avançar para o início do capítulo seguinte• retroceder para o capítulo anteriorO capítulo seleccionado é imediatamente reproduzido sem ser necessáriopremir o botão PLAY/PAUSE�� . O número do capítulo seleccionado é exibido noecrã, na parte da frente do leitor de DVD à esquerda do tempo decorrido.
- 14 -
Introdução do número do título através dos botões numéricos
Nota:Esta função pode não estar disponível em todos os DVD! Se tentar executaruma função não disponível, surge o símbolo no ecrã do televisor.
Em vez de utilizar a função Skip, pode introduzir directamente o número docapítulo do filme de um DVD/VCD/S-VCD inserido com os botões numéricosno telecomando.• Para isso, prima o botão numérico no telecomando correspondente ao
número do capítulo, como por ex. o botão 3 para o terceiro título, durante a reprodução ou com a reprodução parada.
• A reprodução do capítulo do número introduzido inicia-se automaticamente.
Selecção directa de capítulos ou horas através da função de procura(GOTO)
Indicação:Estas funções podem não estar disponíveis em todos os DVD/VCD/S-VCD! Setentar executar uma função não disponível, surge o símbolo no ecrã dotelevisor.
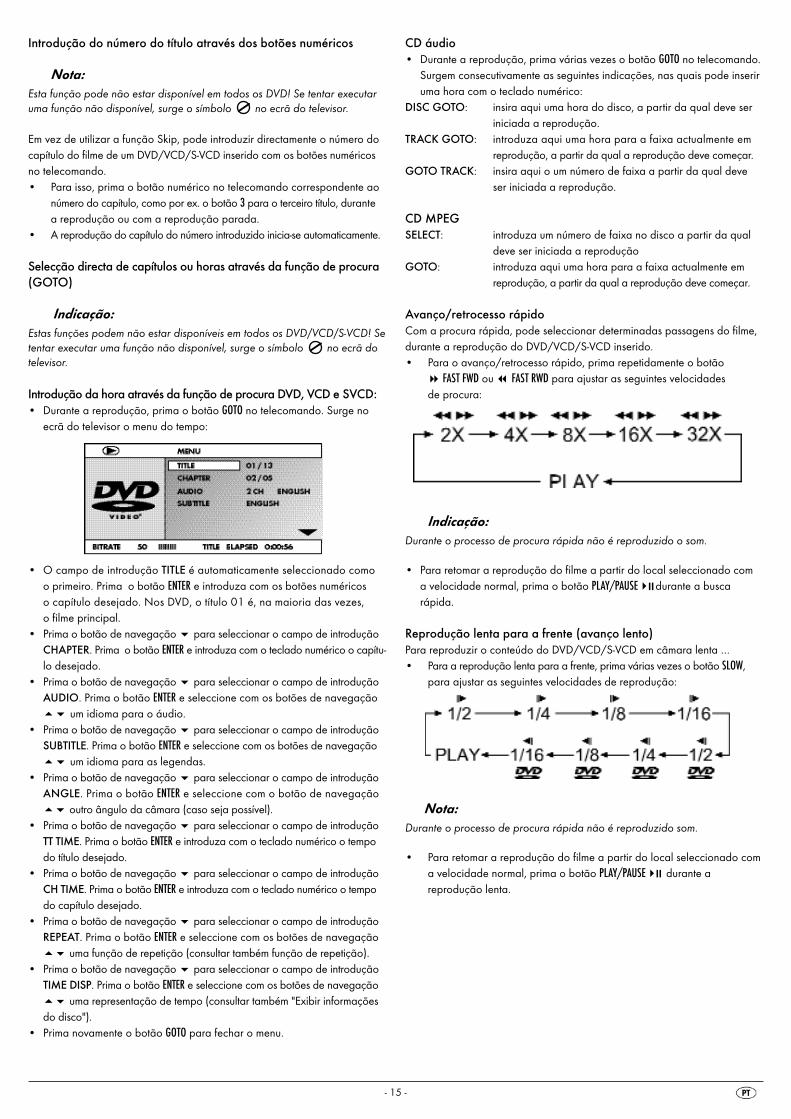
Introdução da hora através da função de procura DVD, VCD e SVCD:• Durante a reprodução, prima o botão GOTO no telecomando. Surge no
ecrã do televisor o menu do tempo:
• O campo de introdução TITLE é automaticamente seleccionado como o primeiro. Prima o botão ENTER e introduza com os botões numéricos o capítulo desejado. Nos DVD, o título 01 é, na maioria das vezes, o filme principal.
• Prima o botão de navegação � para seleccionar o campo de introduçãoCHAPTER. Prima o botão ENTER e introduza com o teclado numérico o capítu-lo desejado.
• Prima o botão de navegação � para seleccionar o campo de introduçãoAUDIO. Prima o botão ENTER e seleccione com os botões de navegação�� um idioma para o áudio.
• Prima o botão de navegação � para seleccionar o campo de introduçãoSUBTITLE. Prima o botão ENTER e seleccione com os botões de navegação�� um idioma para as legendas.
• Prima o botão de navegação � para seleccionar o campo de introduçãoANGLE. Prima o botão ENTER e seleccione com o botão de navegação�� outro ângulo da câmara (caso seja possível).
• Prima o botão de navegação � para seleccionar o campo de introduçãoTT TIME. Prima o botão ENTER e introduza com o teclado numérico o tempodo título desejado.
• Prima o botão de navegação � para seleccionar o campo de introduçãoCH TIME. Prima o botão ENTER e introduza com o teclado numérico o tempodo capítulo desejado.
• Prima o botão de navegação � para seleccionar o campo de introduçãoREPEAT. Prima o botão ENTER e seleccione com os botões de navegação�� uma função de repetição (consultar também função de repetição).
• Prima o botão de navegação � para seleccionar o campo de introduçãoTIME DISP. Prima o botão ENTER e seleccione com os botões de navegação�� uma representação de tempo (consultar também "Exibir informaçõesdo disco").
• Prima novamente o botão GOTO para fechar o menu.
- 15 -
CD áudio• Durante a reprodução, prima várias vezes o botão GOTO no telecomando.
Surgem consecutivamente as seguintes indicações, nas quais pode inseriruma hora com o teclado numérico:
DISC GOTO: insira aqui uma hora do disco, a partir da qual deve seriniciada a reprodução.
TRACK GOTO: introduza aqui uma hora para a faixa actualmente emreprodução, a partir da qual a reprodução deve começar.
GOTO TRACK: insira aqui o um número de faixa a partir da qual deveser iniciada a reprodução.
CD MPEGSELECT: introduza um número de faixa no disco a partir da qual
deve ser iniciada a reproduçãoGOTO: introduza aqui uma hora para a faixa actualmente em
reprodução, a partir da qual a reprodução deve começar.
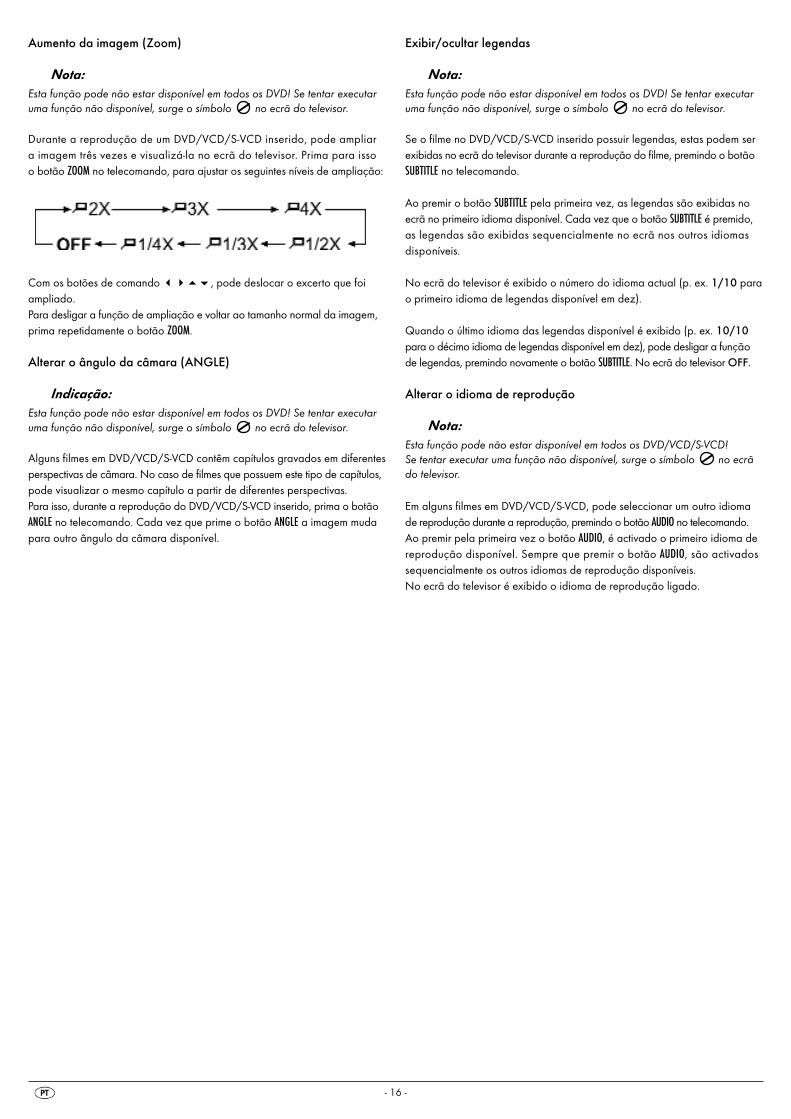
Avanço/retrocesso rápidoCom a procura rápida, pode seleccionar determinadas passagens do filme,durante a reprodução do DVD/VCD/S-VCD inserido.• Para o avanço/retrocesso rápido, prima repetidamente o botão
� FAST FWD ou FAST RWD para ajustar as seguintes velocidades de procura:
Indicação:Durante o processo de procura rápida não é reproduzido o som.
• Para retomar a reprodução do filme a partir do local seleccionado com a velocidade normal, prima o botão PLAY/PAUSE��durante a busca rápida.
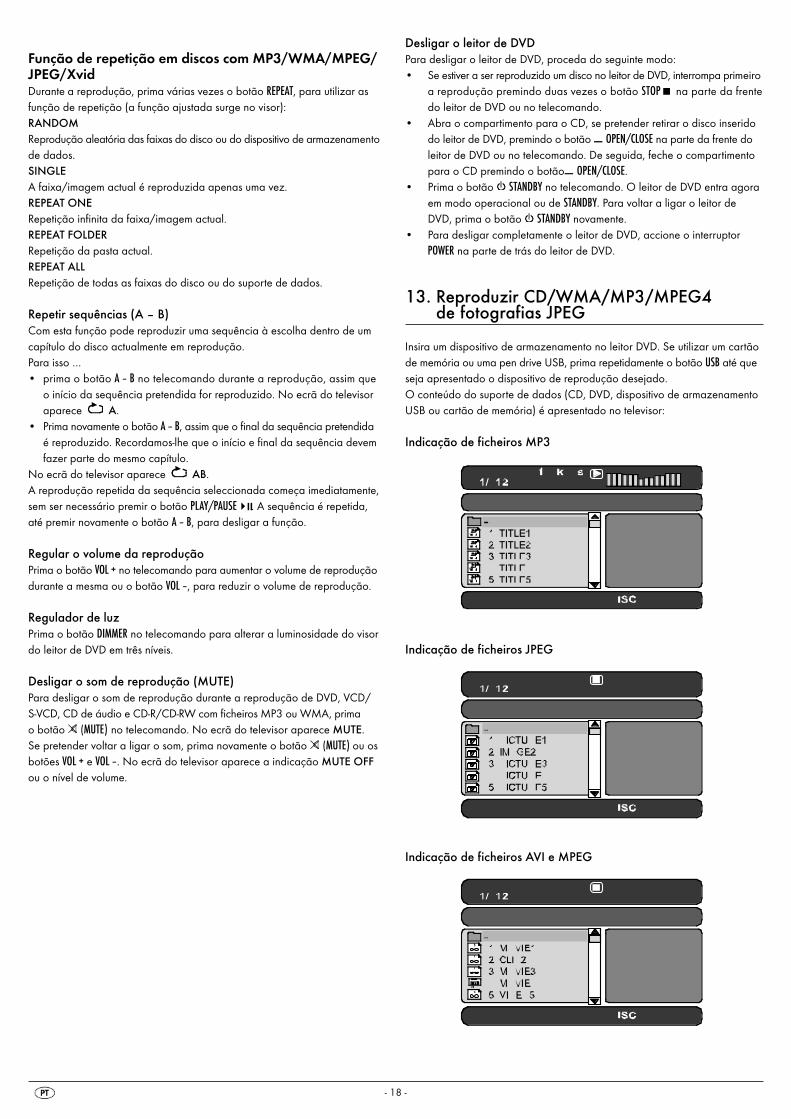
Reprodução lenta para a frente (avanço lento)Para reproduzir o conteúdo do DVD/VCD/S-VCD em câmara lenta …• Para a reprodução lenta para a frente, prima várias vezes o botão SLOW,
para ajustar as seguintes velocidades de reprodução:
Nota:Durante o processo de procura rápida não é reproduzido som.
• Para retomar a reprodução do filme a partir do local seleccionado coma velocidade normal, prima o botão PLAY/PAUSE��durante a reprodução lenta.
Aumento da imagem (Zoom)
Nota:Esta função pode não estar disponível em todos os DVD! Se tentar executaruma função não disponível, surge o símbolo no ecrã do televisor.
Durante a reprodução de um DVD/VCD/S-VCD inserido, pode ampliara imagem três vezes e visualizá-la no ecrã do televisor. Prima para isso o botão ZOOM no telecomando, para ajustar os seguintes níveis de ampliação:
Com os botões de comando ����, pode deslocar o excerto que foi ampliado.Para desligar a função de ampliação e voltar ao tamanho normal da imagem,prima repetidamente o botão ZOOM.
Alterar o ângulo da câmara (ANGLE)
Indicação:Esta função pode não estar disponível em todos os DVD! Se tentar executaruma função não disponível, surge o símbolo no ecrã do televisor.
Alguns filmes em DVD/VCD/S-VCD contêm capítulos gravados em diferentesperspectivas de câmara. No caso de filmes que possuem este tipo de capítulos,pode visualizar o mesmo capítulo a partir de diferentes perspectivas.Para isso, durante a reprodução do DVD/VCD/S-VCD inserido, prima o botãoANGLE no telecomando. Cada vez que prime o botão ANGLE a imagem mudapara outro ângulo da câmara disponível.
Exibir/ocultar legendas
Nota:Esta função pode não estar disponível em todos os DVD! Se tentar executaruma função não disponível, surge o símbolo no ecrã do televisor.
Se o filme no DVD/VCD/S-VCD inserido possuir legendas, estas podem serexibidas no ecrã do televisor durante a reprodução do filme, premindo o botãoSUBTITLE no telecomando.
Ao premir o botão SUBTITLE pela primeira vez, as legendas são exibidas noecrã no primeiro idioma disponível. Cada vez que o botão SUBTITLE é premido,as legendas são exibidas sequencialmente no ecrã nos outros idiomasdisponíveis.
No ecrã do televisor é exibido o número do idioma actual (p. ex. 1/10 parao primeiro idioma de legendas disponível em dez).
Quando o último idioma das legendas disponível é exibido (p. ex. 10/10para o décimo idioma de legendas disponível em dez), pode desligar a funçãode legendas, premindo novamente o botão SUBTITLE. No ecrã do televisor OFF.
Alterar o idioma de reprodução
Nota:Esta função pode não estar disponível em todos os DVD/VCD/S-VCD! Se tentar executar uma função não disponível, surge o símbolo no ecrãdo televisor.
Em alguns filmes em DVD/VCD/S-VCD, pode seleccionar um outro idiomade reprodução durante a reprodução, premindo o botão AUDIO no telecomando. Ao premir pela primeira vez o botão AUDIO, é activado o primeiro idioma dereprodução disponível. Sempre que premir o botão AUDIO, são activadossequencialmente os outros idiomas de reprodução disponíveis.No ecrã do televisor é exibido o idioma de reprodução ligado.
- 16 -

Reprodução programada (PROG)
Nota:Esta função pode não estar disponível em todos os DVD/VCD/S-VCD! Se tentar executar uma função não disponível, surge o símbolo no ecrãdo televisor.
Com a função de programação, pode efectuar a sua própria programaçãodo filme, seleccionando apenas determinados capítulos do DVD/VCD/S-VCDinserido para reprodução. Pode determinar também a sequência pela qualos capítulos devem ser reproduzidos. Pode seleccionar um máximo de 20capítulos de um filme para a reprodução programada.• Durante a reprodução ou com a reprodução parada, prima o botão
PROG no telecomando.O menu de programação é exibido no ecrã do televisor:
Janela de programa
Primeiro encontram-se listadas as posições de programa 1-10, estando a posiçãode programa 1 marcada.1. Com o teclado numérico, introduza o número da faixa que deve ser
reproduzida em primeiro lugar. A marcação substitui a introdução do ca-pítulo.(CH:)
2. Com o teclado numérico, insira o número do capítulo que deve serreproduzido. A marcação muda para a posição de programa 2.
3. Seleccione, com os botões de navegação ����, outras posições deprograma e introduza os números de faixas e capítulos para as posiçõesde programa.
• Para ver as próximas 10 posições de programa, seleccione, com os botõesde navegação ����, o campo e prima o botão ENTER. Pode atribuiraté 20 posições de programa.
• Para eliminar uma introdução numa posição de programa seleccione a respectiva posição e prima o botão ENTER.
• Para interromper a função de programação, seleccione o campo EXITe prima o botão ENTER . São eliminadas todas as posições de programaatribuídas.
4. Inicie a reprodução das posições de programa, seleccionando o campoSTART e premindo o botão ENTER.
Durante a reprodução programada surge no visor a indicação PROGRAM.Para apagar a reprodução programada, prima duas vezes o botão STOP�na parte da frente do leitor de DVD ou no telecomando.
Nota:Se não tiver a certeza do número do título ou capítulo que pretende programar,seleccione o respectivo capítulo durante a reprodução do filme através dobotão SKIP FWD e SKIP BWD e prima de seguida o botão DISPLAY notelecomando para exibir todas as informações do DVD/VCD/S-VCD no ecrãdo televisor. Aqui pode encontrar, entre outras coisas, os números dos títulose capítulos.
Para mais informações acerca deste tema, consulte também o capítulo"Exibir informações do disco".
- 17 -
Exibir informações do disco
Nota:Esta função pode não estar disponível em todos os DVD/VCD/S-VCD! Se tentar executar uma função não disponível, surge o símbolo no ecrãdo televisor.
Com esta função pode exibir no ecrã da televisão todas as informaçõesdisponíveis acerca do respectivo DVD/VCD/S-VCD inserido no leitor durante a reprodução.• Para isso, durante a reprodução, prima o botão DISPLAY no telecomando.
É exibido no ecrã do televisor:
No caso de DVD:• o número do título actual/o número total de títulos• o número actual de capítulos/o número total de capítulos• o tempo já reproduzido em horas, minutos e segundos (TITLE ELAPSED)• o tempo até ao final do filme em horas, minutos e segundos (TITLE REMAIN)• o tempo já reproduzido do capítulo em horas, minutos e segundos
(CHAPTER ELAPSED)• o tempo até ao final do capítulo em horas, segundos e minutos
(CHAPTER REMAIN)
No caso de VCD/S-VCD:• o número do título actual/o número total de títulos• o tempo já reproduzido da faixa actualmente em reprodução no
VCD/SVCD em horas, minutos e segundos (SINGLE ELAPSED)• o tempo até ao final da faixa actualmente em reprodução em horas,
minutos e segundos (SINGLE REMAIN)Para não apresentar mais a informações do disco, prima o botão DISPLAY atéaparecer a indicação DISPLAY OFF no ecrã do televisor.
Função de repetição para DVD, VCD, SVCD e CD áudioCom a função de reprodução pode…... no caso de DVD, repetir títulos, capítulos ou a totalidade do DVD inserido.... no caso de VCD/S-VCD, reproduzir repetidamente títulos individuais ou
o VCD/S-VCD completo.... no caso dos CD áudio, reproduzir faixas individuais ou a totalidade do
CD.Para ligar a reprodução repetida…• durante a reprodução, prima repetidamente o botão REPEAT. No visor surge o símbolo Repeat com a seguinte indicação:CHAPTER seleccione CHAPTER para repetir o capítulo actualmente
em reprodução, até que seja desactivada a função dereprodução repetida ou até que seja parada a reprodução,premindo duas vezes o botão STOP�.
TITLE seleccione TITLE, para repetir a faixa actualmente emreprodução, até que seja desactivada a função de reproduçãorepetida ou até que seja parada a reprodução, premindoduas vezes o botão STOP�.
ALL seleccione ALL, para repetir todas as faixas existentes nodisco, ou seja, o disco completo, até que seja desactivadaa função de reprodução repetida ou até que seja interrompidaa reprodução, premindo duas vezes o botão STOP�.
Para desactivar a função de reprodução repetida, prima repetidamente, durantea reprodução, o botão REPEAT até não aparecer mais nenhuma indicação novisor.
Função de repetição em discos com MP3/WMA/MPEG/JPEG/XvidDurante a reprodução, prima várias vezes o botão REPEAT, para utilizar as função de repetição (a função ajustada surge no visor):RANDOMReprodução aleatória das faixas do disco ou do dispositivo de armazenamentode dados.SINGLEA faixa/imagem actual é reproduzida apenas uma vez.REPEAT ONERepetição infinita da faixa/imagem actual.REPEAT FOLDERRepetição da pasta actual.REPEAT ALLRepetição de todas as faixas do disco ou do suporte de dados.
Repetir sequências (A – B)Com esta função pode reproduzir uma sequência à escolha dentro de umcapítulo do disco actualmente em reprodução.Para isso …• prima o botão A – B no telecomando durante a reprodução, assim que
o início da sequência pretendida for reproduzido. No ecrã do televisoraparece A.
• Prima novamente o botão A – B, assim que o final da sequência pretendida é reproduzido. Recordamos-lhe que o início e final da sequência devemfazer parte do mesmo capítulo.
No ecrã do televisor aparece AB.A reprodução repetida da sequência seleccionada começa imediatamente,sem ser necessário premir o botão PLAY/PAUSE��. A sequência é repetida, até premir novamente o botão A – B, para desligar a função.
Regular o volume da reproduçãoPrima o botão VOL + no telecomando para aumentar o volume de reproduçãodurante a mesma ou o botão VOL –, para reduzir o volume de reprodução.
Regulador de luzPrima o botão DIMMER no telecomando para alterar a luminosidade do visordo leitor de DVD em três níveis.
Desligar o som de reprodução (MUTE)Para desligar o som de reprodução durante a reprodução de DVD, VCD/S-VCD, CD de áudio e CD-R/CD-RW com ficheiros MP3 ou WMA, primao botão (MUTE) no telecomando. No ecrã do televisor aparece MUTE. Se pretender voltar a ligar o som, prima novamente o botão (MUTE) ou osbotões VOL + e VOL –. No ecrã do televisor aparece a indicação MUTE OFFou o nível de volume.
Desligar o leitor de DVDPara desligar o leitor de DVD, proceda do seguinte modo:• Se estiver a ser reproduzido um disco no leitor de DVD, interrompa primeiro
a reprodução premindo duas vezes o botão STOP� na parte da frentedo leitor de DVD ou no telecomando.
• Abra o compartimento para o CD, se pretender retirar o disco inseridodo leitor de DVD, premindo o botão OPEN/CLOSE na parte da frente doleitor de DVD ou no telecomando. De seguida, feche o compartimentopara o CD premindo o botão OPEN/CLOSE.
• Prima o botão STANDBY no telecomando. O leitor de DVD entra agoraem modo operacional ou de STANDBY. Para voltar a ligar o leitor deDVD, prima o botão STANDBY novamente.
• Para desligar completamente o leitor de DVD, accione o interruptor POWER na parte de trás do leitor de DVD.
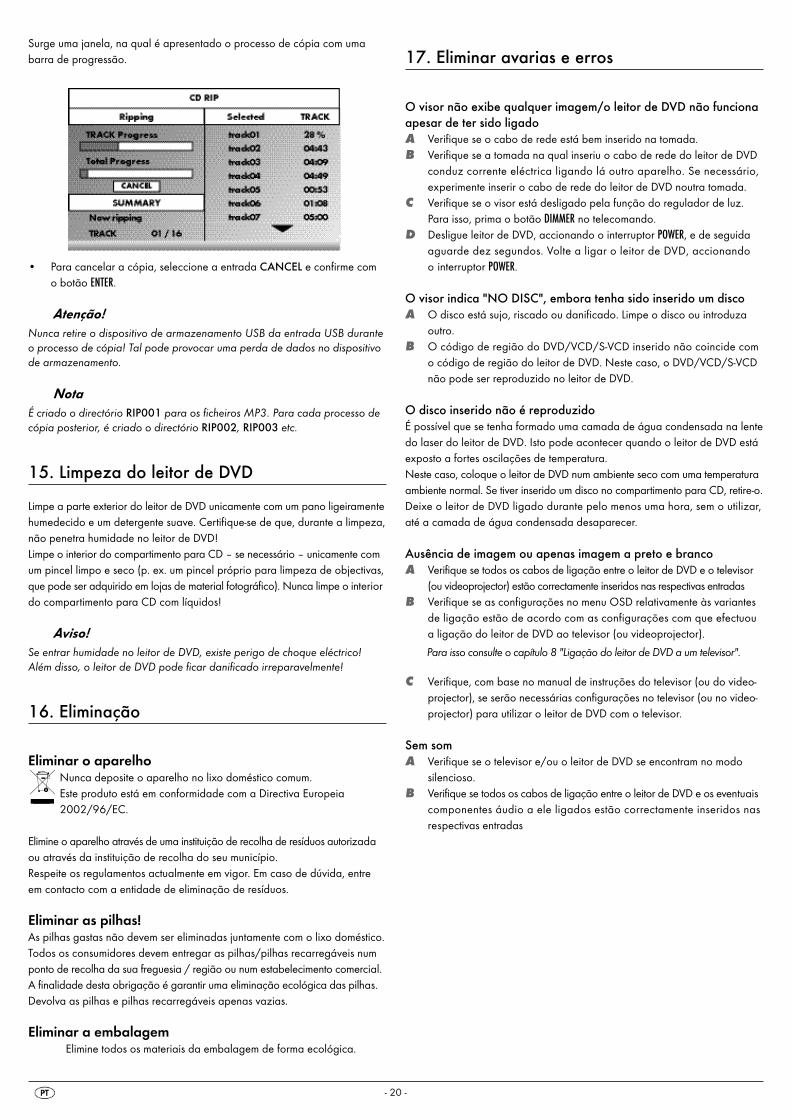
13. Reproduzir CD/WMA/MP3/MPEG4 de fotografias JPEG
Insira um dispositivo de armazenamento no leitor DVD. Se utilizar um cartãode memória ou uma pen drive USB, prima repetidamente o botão USB até queseja apresentado o dispositivo de reprodução desejado.O conteúdo do suporte de dados (CD, DVD, dispositivo de armazenamentoUSB ou cartão de memória) é apresentado no televisor:
Indicação de ficheiros MP3
Indicação de ficheiros JPEG
Indicação de ficheiros AVI e MPEG
- 18 -

• Do lado esquerdo são listados os ficheiros (janela de ficheiros). As pastas são representadas com o símbolo .
• Para visualizar as pastas existentes no disco, prima repetidamente o botãoPROG até surgir no visor, em baixo, a indicação FOLDER.
• Prima novamente o botão PROG até surgir no visor, em baixo, a indicaçãoFILELIST. As pastas desaparecem e são apresentados numa lista todosos ficheiros do disco.
A área à direita está prevista para a pré-visualização das imagens JPEG.Uma pré-visualização surge assim que tiver marcado um ficheiro JPEG na janela dos ficheiros.• Em baixo, encontra-se a barra de informações, na qual é indicado o tamanho
da imagem (imagens JPEG) bem como o suporte (DISC, USB ou CARD)no qual se encontram os ficheiros.
• Seleccione um ficheiro com os botões de navegação ��. Confirme a selecção com o botão ENTER. O ficheiro é reproduzido ou a imagemJPEG é apresentada.
1. Para abrir uma pasta, seleccione uma pasta e abra-a premindo o botãoENTER. É listado o conteúdo da pasta.
2. Para subir um nível na pasta, seleccione o símbolo com a entrada ".."e prima o botão ENTER.
Reprodução de discos JPEG• Seleccione uma imagem com os botões de navegação �� e prima
o botão ENTER ou PLAY/PAUSE��para abrir a imagem.A imagem é apresentada no visor.De seguida, a visualização muda para a próxima imagem no disco/na pasta.• Para apresentar a imagem actualmente apresentada durante mais tempo,
prima o botão PLAY/PAUSE�� .• Para retomar a reprodução, prima novamente o botão PLAY/PAUSE�� .• Pode consultar uma imagem directamente, introduzindo o número de ficheiro
da imagem com o teclado numérico e confirmando em seguida com o botãoENTER.
• Com os botões de navegação �� pode rodar a imagem em 90º durantea reprodução.
• Com os botões de navegação �� pode colocar a imagem em espelhona horizontal ou vertical, durante a reprodução.
• Durante a reprodução, prima o botão STOP� para mostrar uma visualizaçãoem miniatura de todas as imagens na pasta/no disco. São apresentadas12 miniaturas por página.
• Seleccione uma imagem com os botões de navegação ���� e iniciea reprodução com ENTER ou PLAY/PAUSE�� .
• Com os botões de navegação ����, seleccione uma das seguintesentradas das linhas do visor apresentadas abaixo e confirme com ENTER.
Slide Show É iniciada uma apresentação de diapositivos com asimagens na pasta/no disco
Menu Indica as funções de botão disponíveis para a reproduçãode JPEG. Prima o botão ENTER até a vista geral não estarvisível.
Prev Muda para a página anteriorNext Muda para a página seguinte
• Para regressar à lista de ficheiros, prima o botão MENU.
Selecção de efeitos de transição de diapositivos:Pode seleccionar diferentes efeitos de transição para a mudança de umaimagem para a imagem seguinte. WIPE TOP, WIPE BOTTOM, WIPE LEFT, WIPE RIGHT, DIAGONAL WIPELEFT TOP, DIAGONAL WIPE RIGHT TOP, DIAGONAL WIPE LEFT BOTTOM,DIAGONAL WIPE RIGHT BOTTOM, EXTEND FROM CENTER H, EXTENDFROM CENTER V, COMPRESS TO CENTER H, COMPRESS TO CENTER V,WINDOW H, WINDOW V, WIPE FROM EDGE TO CENTER e NONE.
- 19 -
• Durante a apresentação de diapositivos, prima o botão PROG até o nomedo efeito de transição pretendido aparecer no canto superior esquerdodo ecrã do televisor.
14. Função de ripar CD
Com o leitor de DVD, pode transferir ficheiros de música e de voz no formatocda (CD áudio) ou de um disco para um dispositivo de armazenamentoUSB. Os ficheiros são gravados em formato MP3 no dispositivo de armazenamento USB.
Nota:Ao efectuar a transferência de ficheiros áudio para um suporte de dados,tenha atenção aos direitos de autor e disposições legais com isso relacionadas!Tenha em atenção que as cópias devem ser efectuadas apenas para o usoprivado e tenha em consideração as normas em vigor!
Insira um CD áudio no compartimento para o CD.• Encaixe um dispositivo de armazenamento USB na porta USB.• Com a reprodução parada, prima o botão RIPPING MENU no telecomando.
O menu representado acima aparece no ecrã do televisor.Speed Seleccione esta entrada de menu para ajustar a velocidade
de transferência em Normal ou Fast.Bitrate Seleccione esta entrada de menu para ajustar a qualidade
MP3. Taxas de bits possíveis: 96 kbps, 112 kbps e 128 kbps.Uma taxa de bits mais elevada significa um maior espaçoocupado pelo ficheiro MP3 depois de copiado para o dispositivo de armazenamento USB.
Create ID3 Seleccione esta entrada de menu para criar automaticamenteum ID3-Tag para o ficheiro MP3.
• Com os botões de comando ����, seleccione uma faixa a partir dalista de faixas e confirme com o botão ENTER. A faixa é assinalada comum visto. Seleccione outras faixas para copiar no formato MP3 do mesmomodo.
• Para assinalar todas as faixas para copiar no formato MP3, seleccionecom os botões de comando ���� a entrada Select all e confirmecom o botão ENTER. Todas as faixas são assinaladas com um visto.
• Para anular a marcação de todas as faixas para copiar no formato MP3,seleccione com os botões de comando ���� a entrada Select nonee confirme com o botão ENTER. As marcações são apagadas.
• Para iniciar o processo de gravação, seleccione com os botões de comando���� a entrada Start e confirme com o botão ENTER.
• Para abandonar a função CD-Ripping, seleccione a entrada Exit com osbotões de comando ���� e confirme com o botão ENTER.
Surge uma janela, na qual é apresentado o processo de cópia com umabarra de progressão.
• Para cancelar a cópia, seleccione a entrada CANCEL e confirme com o botão ENTER.
Atenção!Nunca retire o dispositivo de armazenamento USB da entrada USB duranteo processo de cópia! Tal pode provocar uma perda de dados no dispositivode armazenamento.
NotaÉ criado o directório RIP001 para os ficheiros MP3. Para cada processo decópia posterior, é criado o directório RIP002, RIP003 etc.
15. Limpeza do leitor de DVD
Limpe a parte exterior do leitor de DVD unicamente com um pano ligeiramentehumedecido e um detergente suave. Certifique-se de que, durante a limpeza,não penetra humidade no leitor de DVD!Limpe o interior do compartimento para CD – se necessário – unicamente comum pincel limpo e seco (p. ex. um pincel próprio para limpeza de objectivas,que pode ser adquirido em lojas de material fotográfico). Nunca limpe o interiordo compartimento para CD com líquidos!
Aviso!Se entrar humidade no leitor de DVD, existe perigo de choque eléctrico!Além disso, o leitor de DVD pode ficar danificado irreparavelmente!
16. Eliminação
Eliminar o aparelhoNunca deposite o aparelho no lixo doméstico comum.Este produto está em conformidade com a Directiva Europeia2002/96/EC.
Elimine o aparelho através de uma instituição de recolha de resíduos autorizadaou através da instituição de recolha do seu município.Respeite os regulamentos actualmente em vigor. Em caso de dúvida, entreem contacto com a entidade de eliminação de resíduos.
Eliminar as pilhas!As pilhas gastas não devem ser eliminadas juntamente com o lixo doméstico.Todos os consumidores devem entregar as pilhas/pilhas recarregáveis numponto de recolha da sua freguesia / região ou num estabelecimento comercial.A finalidade desta obrigação é garantir uma eliminação ecológica das pilhas.Devolva as pilhas e pilhas recarregáveis apenas vazias.
Eliminar a embalagemElimine todos os materiais da embalagem de forma ecológica.
17. Eliminar avarias e erros
O visor não exibe qualquer imagem/o leitor de DVD não funcionaapesar de ter sido ligadoA Verifique se o cabo de rede está bem inserido na tomada.B Verifique se a tomada na qual inseriu o cabo de rede do leitor de DVD
conduz corrente eléctrica ligando lá outro aparelho. Se necessário,experimente inserir o cabo de rede do leitor de DVD noutra tomada.
C Verifique se o visor está desligado pela função do regulador de luz.Para isso, prima o botão DIMMER no telecomando.
D Desligue leitor de DVD, accionando o interruptor POWER, e de seguidaaguarde dez segundos. Volte a ligar o leitor de DVD, accionando o interruptor POWER.
O visor indica "NO DISC", embora tenha sido inserido um discoA O disco está sujo, riscado ou danificado. Limpe o disco ou introduza
outro.B O código de região do DVD/VCD/S-VCD inserido não coincide com
o código de região do leitor de DVD. Neste caso, o DVD/VCD/S-VCDnão pode ser reproduzido no leitor de DVD.
O disco inserido não é reproduzidoÉ possível que se tenha formado uma camada de água condensada na lentedo laser do leitor de DVD. Isto pode acontecer quando o leitor de DVD estáexposto a fortes oscilações de temperatura.Neste caso, coloque o leitor de DVD num ambiente seco com uma temperaturaambiente normal. Se tiver inserido um disco no compartimento para CD, retire-o.Deixe o leitor de DVD ligado durante pelo menos uma hora, sem o utilizar,até a camada de água condensada desaparecer.
Ausência de imagem ou apenas imagem a preto e brancoA Verifique se todos os cabos de ligação entre o leitor de DVD e o televisor
(ou videoprojector) estão correctamente inseridos nas respectivas entradas B Verifique se as configurações no menu OSD relativamente às variantes
de ligação estão de acordo com as configurações com que efectuoua ligação do leitor de DVD ao televisor (ou videoprojector).
Para isso consulte o capítulo 8 "Ligação do leitor de DVD a um televisor".
C Verifique, com base no manual de instruções do televisor (ou do video-projector), se serão necessárias configurações no televisor (ou no video-projector) para utilizar o leitor de DVD com o televisor.
Sem somA Verifique se o televisor e/ou o leitor de DVD se encontram no modo
silencioso.B Verifique se todos os cabos de ligação entre o leitor de DVD e os eventuais
componentes áudio a ele ligados estão correctamente inseridos nasrespectivas entradas
- 20 -
C Verifique se as configurações no menu OSD relativamente às variantesde ligação estão de acordo com as configurações com que efectuou a ligação dos componentes áudio ao leitor de DVD.
Para mais informações acerca deste tema, consulte o capítulo 9 "Ligarcomponentes áudio ao leitor de DVD".
D Verifique, com base no manual de instruções do televisor, se serãoeventualmente necessárias configurações para utilizar o leitor de DVDcom o televisor.
E Verifique, com base no manual de instruções do componente áudioeventualmente ligado, se é necessário efectuar configurações para o utilizar com o leitor de DVD.
F Se …• tiver ligado o leitor de DVD a um televisor estéreo e não tiver ligado
nenhum componente áudio ao leitor de DVD ou• se tiver ligado um componente áudio compatível com Dolby Prologic
através da saída estéreo analógica (através do cabo Cinch nas tomadasCinch L e R) do leitor DVD:Verifique se no menu OSD AUDIO, na entrada de menu FRONT SPEAKER,seleccionou a configuração LARGE.
Não reproduz imagem 4:3 ou 16:9 A Verifique, com base no manual de instruções do televisor, quais os formatos
de imagem disponíveis no televisor.B Verifique se as configurações no menu OSD estão de acordo com o formato
de imagem do televisor.
O telecomando não funcionaA Verifique se as pilhas do telecomando estão inseridas no compartimento
para as pilhas de acordo com a polaridade correcta.B Verifique se as pilhas do telecomando estão gastas e substitua-as, se
necessário.C Certifique-se de que não se encontram objectos entre o telecomando
e o leitor de DVD.D Ao utilizar o telecomando, a distância ao leitor de DVD não pode ser
superior a 5 metros.
O idioma de reprodução/idioma das legendas não correspondeao configurado no menu OSDO idioma de reprodução/idioma das legendas configurado no menu OSDnão está disponível no disco inserido.
Não é possível activar uma ou mais funçõesA função seleccionada pode não estar disponível em todos os DVDs/VCDs/S-VCDs. Se tentar executar uma função não disponível, surge o símbolo no ecrã do televisor.
Os botões do aparelho ou do telecomando não funcionam/outrasavarias de funcionamentoA Ligue o leitor de DVD accionando o interruptor POWER. Aguarde dez
segundos e accione novamente o interruptor POWER para voltar a ligar o leitor de DVD.
B Se a avaria persistir: reponha as configurações padrão do leitor de DVD.
Consulte também o capítulo 10.6. "Configuração do menu PREFERENCE".
Contacte o nosso parceiro de assistência técnica mais próximo, se …• as anomalias mencionadas persistirem mesmo após proceder como
descrito ou• surgirem outras anomalias que não as mencionadas.
Relativamente a isto, consulte também o capítulo 19 "Garantia & AssistênciaTécnica".
- 21 -
18. Glossário/Índice remissivo
O que são DVD, VCD e S-VCD?
DVDDVD é a abreviatura para o inglês "Digital Versatile Disc". Os DVD servempara armazenar dados de áudio e vídeo; existem no formato de 8 e 12 cm(diâmetro). Os DVD permitem - graças à sua capacidade de armazenamentomuito elevada em comparação com os CD-R/CD-RW - uma duração de reprodução dos dados de áudio e vídeo neles memorizados de até oito horas.
VCDs/S-VCDs"Video-CD" (VCD) e "Super Video-CD" (S-VCD) designam dois processos dememorização compacta – ou seja, economizadora de espaço – de filmesem CDs. Existem VCD e S-VCD nos formatos de 8 e 12 cm (diâmetro). A sua capacidade de armazenamento é muito mais reduzida do que a dosDVDs. Por isso, estes só permitem uma duração de reprodução dos dadosde áudio e vídeo neles memorizados de 20 minutos (formato de 8 cm) ou74 minutos (formato de 12 cm).Existem duas versões de VCD: • Em VCD/S-VCD da versão 1.1 só podem ser reproduzidos dados deáudio e vídeo.• Em VCD/S-VCD da versão 2.0, estão à disposição funções PBC (PlaybackControl). Também podem ser reproduzidas fotografias com elevada resolução.
Playback Control (PBC)Os VCD/S-VCD da versão 2.0 possuem Playback Control (abreviado para"PBC"). Sendo assim, está disponível no VCD/S-VCD um menu principal, atravésdo qual é possível executar várias funções do VCD/S-VCD.
O que são títulos e capítulos?Títulos são as maiores unidades de imagem e som existentes nos DVD; emmuitos DVD, o filme (principal) tem o número de título 01. Para os extras (p. ex.trailers do filme, informações extra etc.) disponíveis em muitos DVD, podemeventualmente ser utilizados outros números de título.
O capítulos designam uma unidade de imagem e som mais pequena, dentrodos títulos. Quando o ou os títulos de um DVD/VCD/S-VCD estão subdivididosem capítulos, estes estão ordenados por números, através dos quais é possívelseleccionar o(s) capítulo(s) directamente.
Recordamos-lhe que …• nem todos os títulos estão subdivididos em capítulos (numerados)• os capítulos também podem ser designados por "cenas" (p. ex. no
menu principal dos DVD)
O que são Scart, S-Video, Composite Video ProgressiveScan, YUV e HDMI?
ScartScart é a designação de um conector de 21 pinos normalizado, através doqual são transmitidos sinais RGB, sinais de vídeo e sinais S-vídeo, bem comomuitos outros sinais de comando e sinais adicionais.
S-vídeoAo ligar o leitor de DVD a um televisor através de S-vídeo, os sinais deluminosidade e de cor são transmitidos separadamente; desse modo, é alcançadauma maior nitidez da imagem e menos "ruído na imagem". Chama-se ruído na imagem à sobreposição de partes coloridas, geralmentemuito saturadas de uma imagem de vídeo através de uma estrutura de inter-ferência irregular e instável.
Composite-VideoSinal de vídeo ou sinal FBAS; é um sinal de imagem no qual estão contidassimultaneamente as informações de cor e luminosidade.
Progressive ScanNormalmente, os televisores e os videoprojectores são accionados pelaschamadas "Meias-imagens". Nestas existem claramente estruturas de linhasvisíveis. Progressive Scan designa, em contraste, a emissão de imagens completas(no caso deste leitor de DVD na saída YPbPr), os sinais Progressive Scan sópodem ser processados por aparelhos de reprodução compatíveis (especialmentetelevisores com ecrãs de grandes dimensões, projectores). A qualidade daimagem é, por oposição aos sinais de imagem comuns, muito mais elevada.
YUV (Component Video Out)YUV designa o sinal de componente disponível neste aparelho, na saída YPbPr,em forma das chamadas "meias imagens"; Normalmente, este é o melhor sinalpara o comando de televisores panorâmicos e projectores que não conseguemsuportar os sinais Progressive Scan. Tal como a transmissão de imagens RGB,o YUV é composto por três sinais de imagem separados:• o sinal de luminosidade "Y" e • ambos os sinais de diferença de cor "U/Pb" e "V/Pr"
Meias imagens (Interlace)/imagens inteiras (Progressive Scan)Uma imagem de televisão padrão é composta por 576 linhas visíveis; sãoapresentadas alternadamente primeiro todas as linhas de imagem ímpares, e depois todas as linhas de imagem pares, ou seja meia imagem. Atravésdisso, é possível apresentar apenas 25 imagens inteiras por segundo (50meias imagens). Esta técnica é designada por formato "Interlace".
Por outro lado, no chamado formato "Progressive Scan" são apresentadassempre todas as linhas de imagem, ou seja, são apresentadas 60 imagensinteiras por segundo. Com isto, a qualidade geral da imagem aumenta e asimagens paradas e texto também são exibidos com maior nitidez.
HDMI HDMI é a abreviatura para a designação em inglês de "High DefinitionMultimedia Interface" e representa uma interface de 19 pinos para a trans-missão totalmente digital de dados áudio e vídeo. Com a sua banda larga,a HDMI processa todos os formatos de vídeo e de áudio digitais conhecidosactualmente da técnica de entretenimento. A HDMI transmite dados de áudiocom frequências até 192 kHz com larguras de banda de até 24 bit, nummáximo de 8 canais. Assim, não são transmitidos apenas os formatos de som e imagem da técnica de entretenimento incluindo HDTV (a resolução de 1080i mais elevada do momento) sem perda de qualidade, mas tambémformatos futuros com resoluções de imagem ainda mais elevadas.
DescodificadorO som nos DVD com som surround de home-cinema é memorizado comcodificação no DVD. Existem diferentes formatos de codificação para diferentesfins, por ex., AC-3 para a reprodução de som Dolby Digital-Surround.Para poder reproduzir sons codificados, os aparelhos de reprodução (por ex. o leitor de DVD) ou componentes áudio ligados a este (por ex. sistemasSurround) dispõem de um codificador que converte os sinais codificadosnovamente em música ou som.O leitor DVD Silvercrest KH 6521/KH 6522 dispõe de um descodificadorAC-3 (para sinais de som Dolby Digital 5.1 Surround) .
Dolby SurroundDolby Surround é um formato de som analógico, através do qual os dois canaisde um sinal de som estéreo são utilizados para transmitir informações do somestereofónico a outros canais. Com um descodificador Dolby Surround, os sinaissão convertidos ou em áudio ou música e conduzidos para duas colunasadicionais, que devem ser colocadas atrás do local de audição.
Dolby PrologicEm comparação com o formato áudio Dolby Surround, no Dolby Prologic é utilizado mais um canal no sinal estéreo; este é o chamado canal “Center “.A respectiva coluna Center deve ser colocada entre as colunas estéreo. Ossons mais graves são enviados para uma coluna de graves, chamada de"subwoofer". O subwoofer pode ser instalado em qualquer local; tal podeser efectuado, pois os sons graves que o subwoofer transmite quase nãoconseguem ser localizados com precisão pelo ouvido humano.
Dolby Digital (5.1)O Dolby Digital, também designado por AC3, é um formato de som digitalno qual podem ser transportados até seis diferentes canais de áudio. Namaioria dos DVD actuais, o som está memorizado no formato "Dolby Digital 5.1";o "5" que aparece na designação "5.1" designa os três canais dianteiros e osdois canais traseiros do som surround, o "1" designa o canal de graves.
DTSDTS é a abreviatura do inglês "Digital Theatre System" e designa um dos formatosde som surround mais comum nos DVDs. Tal como no Dolby Digital 5.1, o DTStambém utiliza três canais dianteiros e dois canais traseiros de som surround,assim como um canal de graves.
O que são PAL e NTSC?
PALPAL é a abreviatura para o inglês "Phase Alternation Line". PAL é a norma detelevisão a cores mais comum e mais utilizada na Europa Central e Ocidental(excepção: França).
NTSCNTSC é a abreviatura para o inglês "National Television System Committee".NTSC é uma norma de televisão a cores, maioritariamente utilizada nos EUAe no Japão.
CD de áudioOs CDsde áudio contêm apenas dados de áudio; existem também no formatode 8 e 12 cm (diâmetro). A duração de reprodução dos dados neles gravados é de 20 minutos (formato de 8 cm) ou de 74 minutos (formato de 12 cm).Nos CD de áudio são memorizados dados áudio no formato CDA.
MP3MP3 designa um processo desenvolvido pelo Instituto Fraunhofer ou um formatopara compactação de dados áudio. As músicas compactadas no formatoMP3 têm apenas uma pequena parte do seu tamanho original e, sendo assim,é possível memorizar muito mais música p. ex. em CD-R/CD-RW do quenos CD de áudio à venda nas lojas, nos quais são memorizados dados deáudio no formato CDA.
WMAWMA (ingl. para "Windows® Media Audio") é um formato de ficheiro paradados de áudio desenvolvido pela Microsoft®.
JPEGJPEG (ingl. para "Joint Photographics Expert Group") designa um dos formatosgráficos, através do qual são compactados dados de imagem das escalasde cores e de cinzentos, desenvolvido por uma organização com o mesmonome.
- 22 -
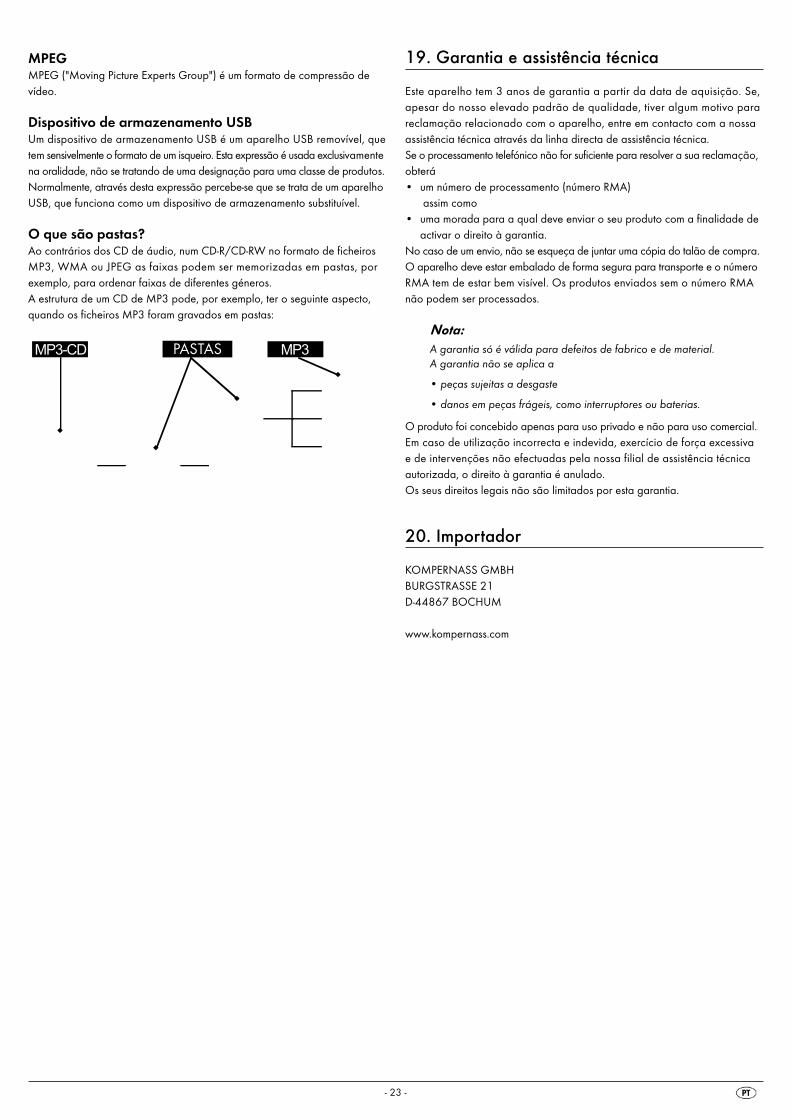
MPEGMPEG ("Moving Picture Experts Group") é um formato de compressão de vídeo.
Dispositivo de armazenamento USBUm dispositivo de armazenamento USB é um aparelho USB removível, quetem sensivelmente o formato de um isqueiro. Esta expressão é usada exclusivamentena oralidade, não se tratando de uma designação para uma classe de produtos.Normalmente, através desta expressão percebe-se que se trata de um aparelhoUSB, que funciona como um dispositivo de armazenamento substituível.
O que são pastas?Ao contrários dos CD de áudio, num CD-R/CD-RW no formato de ficheirosMP3, WMA ou JPEG as faixas podem ser memorizadas em pastas, porexemplo, para ordenar faixas de diferentes géneros. A estrutura de um CD de MP3 pode, por exemplo, ter o seguinte aspecto,quando os ficheiros MP3 foram gravados em pastas:
ORDNER MP3MP3-CD
- 23 -
19. Garantia e assistência técnica
Este aparelho tem 3 anos de garantia a partir da data de aquisição. Se,apesar do nosso elevado padrão de qualidade, tiver algum motivo parareclamação relacionado com o aparelho, entre em contacto com a nossaassistência técnica através da linha directa de assistência técnica.Se o processamento telefónico não for suficiente para resolver a sua reclamação,obterá• um número de processamento (número RMA)
assim como • uma morada para a qual deve enviar o seu produto com a finalidade de
activar o direito à garantia.No caso de um envio, não se esqueça de juntar uma cópia do talão de compra.O aparelho deve estar embalado de forma segura para transporte e o númeroRMA tem de estar bem visível. Os produtos enviados sem o número RMAnão podem ser processados.
Nota:A garantia só é válida para defeitos de fabrico e de material.A garantia não se aplica a
• peças sujeitas a desgaste
• danos em peças frágeis, como interruptores ou baterias.
O produto foi concebido apenas para uso privado e não para uso comercial.Em caso de utilização incorrecta e indevida, exercício de força excessiva e de intervenções não efectuadas pela nossa filial de assistência técnicaautorizada, o direito à garantia é anulado.Os seus direitos legais não são limitados por esta garantia.
20. Importador
KOMPERNASS GMBHBURGSTRASSE 21D-44867 BOCHUM
www.kompernass.com
PASTAS


Escrever o remetente de forma legível:
Apelido
Nome
Rua
CP/Localidade
País
Telefone
Data/Assinatura
DESCRIÇÃO DA AVARIA:
De modo a garantir um processo de reparação gratuito,entre em contacto com a linha directa de Assistência Técnica.Mantenha o talão de compra ao seu alcance.
GarantiaP
reen
cher
to
talm
ente
est
a s
ecçã
o e
an
exa
r a
o a
pa
relh
o!
Leitor de DVD KH6521/22
�
Kompernass Service PortugalTel.: 707 780 707 (0,12 EUR por minuto)
e-mail: [email protected]

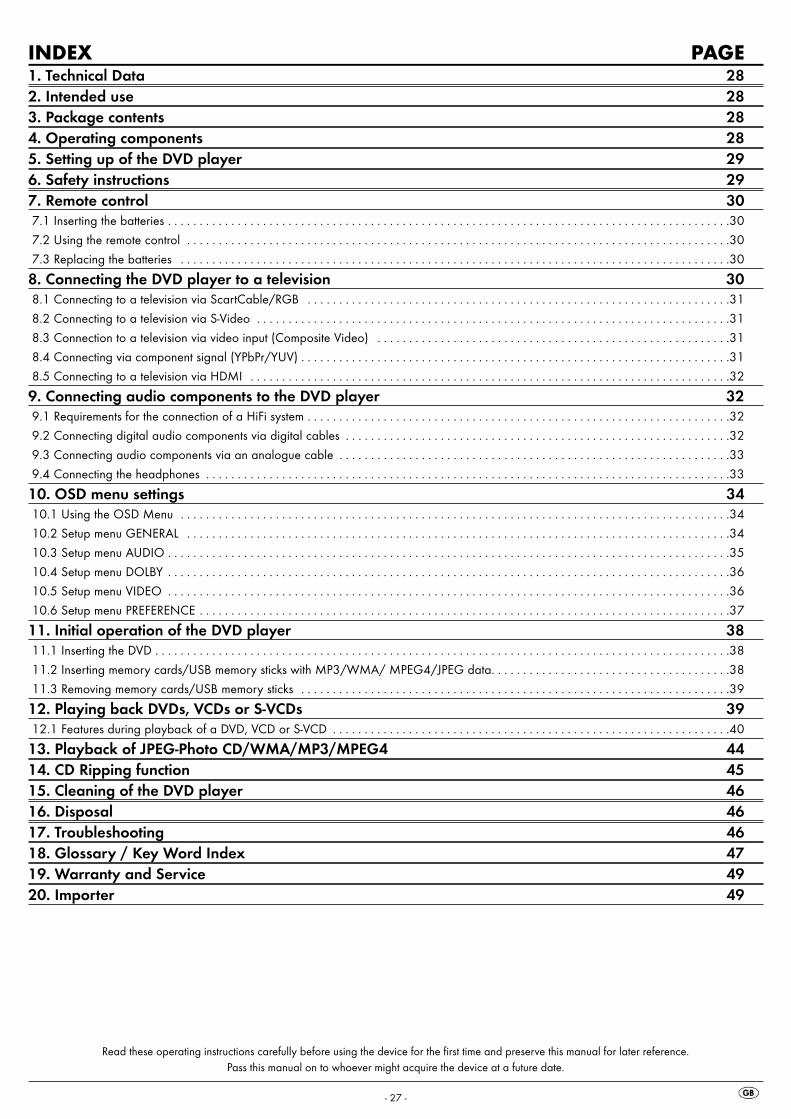
- 27 -
INDEX PAGE1. Technical Data 282. Intended use 283. Package contents 284. Operating components 285. Setting up of the DVD player 296. Safety instructions 297. Remote control 307.1 Inserting the batteries . . . . . . . . . . . . . . . . . . . . . . . . . . . . . . . . . . . . . . . . . . . . . . . . . . . . . . . . . . . . . . . . . . . . . . . . . . . . . . . . . . . . . . . . .30
7.2 Using the remote control . . . . . . . . . . . . . . . . . . . . . . . . . . . . . . . . . . . . . . . . . . . . . . . . . . . . . . . . . . . . . . . . . . . . . . . . . . . . . . . . . . . . . .30
7.3 Replacing the batteries . . . . . . . . . . . . . . . . . . . . . . . . . . . . . . . . . . . . . . . . . . . . . . . . . . . . . . . . . . . . . . . . . . . . . . . . . . . . . . . . . . . . . . .30
8. Connecting the DVD player to a television 308.1 Connecting to a television via ScartCable/RGB . . . . . . . . . . . . . . . . . . . . . . . . . . . . . . . . . . . . . . . . . . . . . . . . . . . . . . . . . . . . . . . . . . .31
8.2 Connecting to a television via S-Video . . . . . . . . . . . . . . . . . . . . . . . . . . . . . . . . . . . . . . . . . . . . . . . . . . . . . . . . . . . . . . . . . . . . . . . . . . .31
8.3 Connection to a television via video input (Composite Video) . . . . . . . . . . . . . . . . . . . . . . . . . . . . . . . . . . . . . . . . . . . . . . . . . . . . . . . .31
8.4 Connecting via component signal (YPbPr/YUV) . . . . . . . . . . . . . . . . . . . . . . . . . . . . . . . . . . . . . . . . . . . . . . . . . . . . . . . . . . . . . . . . . . . .31
8.5 Connecting to a television via HDMI . . . . . . . . . . . . . . . . . . . . . . . . . . . . . . . . . . . . . . . . . . . . . . . . . . . . . . . . . . . . . . . . . . . . . . . . . . . .32
9. Connecting audio components to the DVD player 329.1 Requirements for the connection of a HiFi system . . . . . . . . . . . . . . . . . . . . . . . . . . . . . . . . . . . . . . . . . . . . . . . . . . . . . . . . . . . . . . . . . . .32
9.2 Connecting digital audio components via digital cables . . . . . . . . . . . . . . . . . . . . . . . . . . . . . . . . . . . . . . . . . . . . . . . . . . . . . . . . . . . . .32
9.3 Connecting audio components via an analogue cable . . . . . . . . . . . . . . . . . . . . . . . . . . . . . . . . . . . . . . . . . . . . . . . . . . . . . . . . . . . . . .33
9.4 Connecting the headphones . . . . . . . . . . . . . . . . . . . . . . . . . . . . . . . . . . . . . . . . . . . . . . . . . . . . . . . . . . . . . . . . . . . . . . . . . . . . . . . . . . .33
10. OSD menu settings 3410.1 Using the OSD Menu . . . . . . . . . . . . . . . . . . . . . . . . . . . . . . . . . . . . . . . . . . . . . . . . . . . . . . . . . . . . . . . . . . . . . . . . . . . . . . . . . . . . . . .34
10.2 Setup menu GENERAL . . . . . . . . . . . . . . . . . . . . . . . . . . . . . . . . . . . . . . . . . . . . . . . . . . . . . . . . . . . . . . . . . . . . . . . . . . . . . . . . . . . . . .34
10.3 Setup menu AUDIO . . . . . . . . . . . . . . . . . . . . . . . . . . . . . . . . . . . . . . . . . . . . . . . . . . . . . . . . . . . . . . . . . . . . . . . . . . . . . . . . . . . . . . . . .35
10.4 Setup menu DOLBY . . . . . . . . . . . . . . . . . . . . . . . . . . . . . . . . . . . . . . . . . . . . . . . . . . . . . . . . . . . . . . . . . . . . . . . . . . . . . . . . . . . . . . . . .36
10.5 Setup menu VIDEO . . . . . . . . . . . . . . . . . . . . . . . . . . . . . . . . . . . . . . . . . . . . . . . . . . . . . . . . . . . . . . . . . . . . . . . . . . . . . . . . . . . . . . . . .36
10.6 Setup menu PREFERENCE . . . . . . . . . . . . . . . . . . . . . . . . . . . . . . . . . . . . . . . . . . . . . . . . . . . . . . . . . . . . . . . . . . . . . . . . . . . . . . . . . . . .37
11. Initial operation of the DVD player 3811.1 Inserting the DVD . . . . . . . . . . . . . . . . . . . . . . . . . . . . . . . . . . . . . . . . . . . . . . . . . . . . . . . . . . . . . . . . . . . . . . . . . . . . . . . . . . . . . . . . . . .38
11.2 Inserting memory cards/USB memory sticks with MP3/WMA/ MPEG4/JPEG data. . . . . . . . . . . . . . . . . . . . . . . . . . . . . . . . . . . . . .38
11.3 Removing memory cards/USB memory sticks . . . . . . . . . . . . . . . . . . . . . . . . . . . . . . . . . . . . . . . . . . . . . . . . . . . . . . . . . . . . . . . . . . . .39
12. Playing back DVDs, VCDs or S-VCDs 3912.1 Features during playback of a DVD, VCD or S-VCD . . . . . . . . . . . . . . . . . . . . . . . . . . . . . . . . . . . . . . . . . . . . . . . . . . . . . . . . . . . . . . .40
13. Playback of JPEG-Photo CD/WMA/MP3/MPEG4 4414. CD Ripping function 4515. Cleaning of the DVD player 4616. Disposal 4617. Troubleshooting 4618. Glossary / Key Word Index 4719. Warranty and Service 4920. Importer 49
Read these operating instructions carefully before using the device for the first time and preserve this manual for later reference. Pass this manual on to whoever might acquire the device at a future date.

- 28 -
DVD-PLAYER KH6521/22
1. Technical Data
This device fulfills, in regard to compliance with, the essential requirementsand other relevant provisions of the Low Voltage Directive 2006/96/EC, theEMC Directive 2004/108/EC and the Eco-Design Directive 2005/32/EC(Regulation 1275/2008 Annex II, No. 1).
Power supply: AC 220 V - 240 V ~ 50 HzPower consumption: 20 WattPower consumption:Standby: < 1 WProtection class: II / TV standard: PAL/NTSCOperating temperature: +5 ~ +40°CHumidity: 5 ~ 90% (no condensation)Measurements(L x W x H): 220 x 430 x 44 mmWeight : 1,6 kg approx.Laser class: 1
Video Output Format: 4:3 / 16:9Decoder: MPEG 2D/A converter: 12 Bit
Audio Output Decoder: MPEG Dolby Digital (AC-3)
DTS only possible with additional external decoder D/A converter: 24 Bit / 96 kHz
USB portReadableUSB memory sticks: USB1.1 and 2.0 up to a capacity of 4 GBMax. current output: 100 mA
Memory card slotReadable memory cards: SD (2 GB no SDHC), MS/MSPro (4 GB),
MMC (4 GB)
Headphones outputJackplug: 3,5 mmMaximum output voltage: approx. 25 mV
Playable mediums/formatsVIDEO: DVD, DVD+R, DVD+RW, DVD-R, DVD-RW,
DVD-R DL, DVD+R DL, VCD, S-VCDAudio: CD, CD-R, CD-RW, Audio-DVD, MP3, WMA,
OGG VorbisAdditional formats: AVI, MPEG 4, Xvid, JPEG (Foto-CD)Regional code: or
PostScript Bild
Unbenannt-1
2. Intended use
The SilverCrest KH 6521/22 DVD player is intended exclusively for stationaryuse in enclosed spaces. The device is intended exclusively for private, non-commercial use.The device is intended for use as a home entertainment device.No liability/guarantee will be assumed for damage that results from use otherthan that for which the device was intended!
3. Package contents
- DVD-Player- Infrared remote control- 2 Batteries for remote control, type AAA/ (Micro cells)- RGB Scart cable- Audio/Video RCA Cinch cable- HDMI cable- Operating manual
4. Operating components
A. DVD player front panelq Disc tray
w Display (with standby LED (green) and IR sensor for remote control)
e OPEN/CLOSE button
r PLAY/PAUSE ��button
t STOP � button
y STANDBY button
u Headphones output for 3,5 mm jackplug
i USB port
o Memory card slot for SD/MMC/MS and MSPro cards
B. DVD player rear panela Power cable
s POWER switch
d VIDEO: Composite video output
f Y, Pb/Cb, Pr/Cr: Component video outputs
g SCART: Scart/RGB output
h FL/FR: Output for front, left and right audio channels
j SL/SR: Output for rear, left and right audio channels
k SW: Output for bass audio channel
l CEN: Output for front and centre audio channels
; COAXIAL: Coaxial audio output
2) MIX L/R: Left and right audio outputs
2! HDMI: HDMI output
2@ OPTICAL: optical digital audio output
2# S-VIDEO: S-Video output
- 29 -
C. Remote controlq OPEN/CLOSE : Open/Close the disc tray
w Number buttons
e DISPLAY: Superimpose disc information
r DIMMER: Adjust the display brightness
t V-MODE: Set the video output
y STOP�: Stop playback
u PLAY/PAUSE�� : Start/Suspend playback
i SKIP FWD : Chapter skip forwards
o VOL +/- : Raise/lower the sound level
a FAST FWD�: Fast search forward
s SUBTITLE: Set the subtitle
d ENTER: Confirm input
f Control buttons ����
g MENU/RIPPING: Access disc menu/ripping function
h SLOW: Slow motion function
j RETURN: Set the playback mode
k ZOOM: Set the image enlargement
l PROG: Access the programme function
; A-B: Repeat sequence
2) Battery compartment (on the rear panel)
2! PBC: PBC function activate/deactivate (VCD, SVCD only)
2@ USB: Change between disc playback and USB/card playback
2# STEP: Individual frame playback
2$ L/R/ST: Set the audio channel
2% AUDIO: Set the audio language
2^ TITLE: Access the title menu
2& FAST RWD: Fast search backwards
2* SKIP BWD : Chapter skip backwards
2( MUTE : Switch the sound on/off
3) REPEAT: Set the repeat function
3! ANGLE: Change the camera perspective
3@ SETUP: Access the OSD menu
3# GOTO:Access titles, chapters and time direct select menus
3$ STANDBY : Switch the device to standby mode
5. Setting up of the DVD player
1. Carefully remove the DVD player and the supplied accessories from the packing.
2. Remove the protective foil from the display.3. Place the DVD player on a flat, even and firm base. Do not subject the
device to any external heat or moisture source. Make sure that the devicehas sufficient ventilation on all sides. Do not place any television directlyon top of the DVD player.
Attention!Do not plug the DVD player into an electrical outlet at this time. Wait until you have connected the DVD player to a television set.
In the event that you wish to change the type of video or audio connectionyou must first pull the power plug from the power socket! Otherwise theDVD player and possibly equipment connected to it could becomeirreparably damaged through voltage peak strikes!
6. Safety instructions
• This device is not intended for use by individuals (including children)with restricted physical, physiological or intellectual abilities or deficiencesin experience and/or knowledge unless they are supervised by a personresponsible for their safety or receive from this person instruction in howthe device is to be used.
• Children should be supervised to ensure that they do not play with thedevice.
• To avoid unintentionally switching on the device pull the power cordfrom the mains supply after use and before cleaning.
• Check the device and all parts for visible damages. The safety conceptcan work only if the device is in a faultless condition.
• The power plug must always be easily accessible, so that the device canbe quickly disconnected from the mains in the event of an emergency.
Risk of electrical shocks!• Connect the device only to correctly installed and earthed mains sockets.
Ensure that the rating of the local power supply tallies completely withthe details given on the rating plate of the device.
• Arrange for defective power plugs and/or cables to be replaced atonce by qualified technicians or our Customer Service Department.
• Arrange for customer service to repair or replace connecting cablesand/or devices that are not functioning properly or have been damaged.
• Never immerse the device in water. Wipe it only with a slightly dampcloth.
• Do not expose the device to rain and never use it in a humid or wet environment.
• Ensure that the power cable never becomes wet during operation.• You must not open the housing or repair the device yourself.
Should you do so, device safety can no longer be assured and the warranty will become void.
• Protect the device against drip and spray water. Do not place any water-filled vessels (e.g. flower vases) on the device.
Risk of fire!• Do not use the device in the vicinity of hot surfaces.• Do not locate the device in places exposed to direct sunlight.
If you do, it may overheat and become irreparably damaged. • Do not leave the device unattended when in use.• Never cover the ventilation slots of the device while it is being used.• Do not place any open sources of fire, like candles, on the device.
Injury hazard!• Keep children away from the connecting cable and the device.
Children frequently underestimate the dangers of electrical equipment.• Ensure that the device stands with a safe and secure positioning.• Do not operate the device if it has sustained a fall or is damaged.
Arrange for the device to be checked and/or repaired by qualified technicians.
• Batteries/ battery cells are potentially fatal if swallowed. Store batteriesout of the reach of children. If a battery is swallowed medical assistancemust be sought immediately.
• Also, store the packaging foils well away from children. There is a risk of suffocation.
- 30 -
Danger! Laser radiation!This device is fitted with a „Class 1 Laser“.• Never open the device. • Never attempt to repair the device. • There is invisible laser radiation inside the device.
Do not expose yourself to the laser beam.
Note: Some aggressive furniture finishes can have a destructive influence on the device's rubber feet. If necessary, place the device on a nonslip pad.
Thunderstorms!Equipment connected to a power supply can be damaged during athunderstorm. You should therefore always pull the power plug from thepower socket when there is a storm.
Notice regarding electrical power surges (EFT / electrical fast transient) and electrostatic discharges:In the case of malfunction due to an electrical fast transient (power surge)and/or electrostatic discharge, the device must be returned to defaultsettings in order to re-establish normal operation. The power supply mayhave to be disconnected and then reconnected. The batteries (if present)must be removed and then reinserted.
Notice regarding disconnection from mains-powerThe POWER switch does not completely disconnect the device from the power network. Additionally, the device consumes power when instandby-mode. To completely disconnect the device from mains-power,the power plug MUST be removed from the wall socket.
Information regarding the handling of batteriesThe remote control is operated by batteries. For the safe handling of batteries please observe the following safety information:
Danger exists from uses other than those intended!• Do not throw the batteries into a fire.• Do not short circuit the batteries.• Do not attempt to recharge the batteries.• Regularly check the condition of the battery. Leaking battery acid can
cause permanent damage to the device. When handling a damaged orleaking battery special care should be taken. Danger from acid burns!Wear protective gloves.
• Clean the battery compartment and the battery contacts with a dry cloth.• Store batteries out of reach of children. When swallowed seek immediate
medical attention.• Remove the batteries from the device if you do not intend to use the device
for an extended period of time.• Never open batteries, never solder or weld batteries.
The risk of explosions and injuries exists!
Attention!No liability/warranty will be considered for damage to the DVD playercaused by the effects of moisture, water penetration or overheating!
7. Remote control
7.1 Inserting the batteries1. Open the battery compartment on the rear of the remote control.2. Place the two supplied batteries type AAA (micro cells) into the battery
compartment. Make sure that the batteries are inserted in accordancewith the correct polarity.
3. Replace the battery compartment cover.
7.2 Using the remote controlIn order to guarantee faultless operation when using the remote control… • Always point the remote control, during use, directely at the DVD player• Make sure that there are no obstructions between the remote control
and the DVD player that will hinder reception.• When using the remote control place yourself not more than 5 metres
from the DVD playerotherwise interferences can occur during operation of the DVD player functionswith the remote control.
7.3 Replacing the batteriesIf the operation of the DVD player via the remote control does not functionproperly or does not function at all the batteries must be replaced• Always renew all batteries in order to return the remote control to its full
performance ability.
8. Connecting the DVD player to a television
After setting up the DVD player, you can now connect it to a television. The DVD player can be connected to televisions which operate with the PALand NTSC standards. If you want to use the DVD player on a television with the NTSC standardyou must change the video setting in the DVD players "OSD menu". TherePAL is set as the television standard at the factory. Depending on the televisionsequipment there are different methods of connecting the DVD player to it, these are explained as follows.
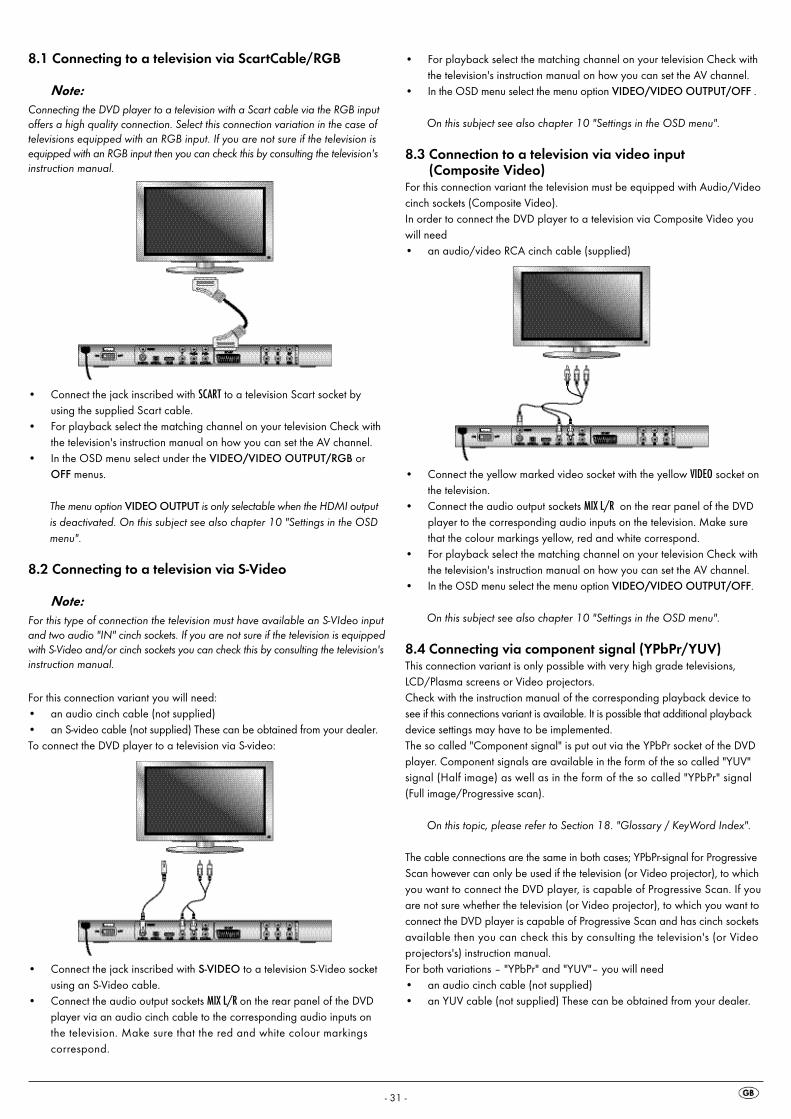
- 31 -
8.1 Connecting to a television via ScartCable/RGB
Note:Connecting the DVD player to a television with a Scart cable via the RGB inputoffers a high quality connection. Select this connection variation in the case oftelevisions equipped with an RGB input. If you are not sure if the television isequipped with an RGB input then you can check this by consulting the television'sinstruction manual.
• Connect the jack inscribed with SCART to a television Scart socket byusing the supplied Scart cable.
• For playback select the matching channel on your television Check withthe television's instruction manual on how you can set the AV channel.
• In the OSD menu select under the VIDEO/VIDEO OUTPUT/RGB orOFF menus.
The menu option VIDEO OUTPUT is only selectable when the HDMI outputis deactivated. On this subject see also chapter 10 "Settings in the OSDmenu".
8.2 Connecting to a television via S-Video
Note:For this type of connection the television must have available an S-VIdeo inputand two audio "IN" cinch sockets. If you are not sure if the television is equippedwith S-Video and/or cinch sockets you can check this by consulting the television'sinstruction manual.
For this connection variant you will need: • an audio cinch cable (not supplied)• an S-video cable (not supplied) These can be obtained from your dealer.To connect the DVD player to a television via S-video:
• Connect the jack inscribed with S-VIDEO to a television S-Video socketusing an S-Video cable.
• Connect the audio output sockets MIX L/R on the rear panel of the DVDplayer via an audio cinch cable to the corresponding audio inputs onthe television. Make sure that the red and white colour markingscorrespond.
• For playback select the matching channel on your television Check withthe television's instruction manual on how you can set the AV channel.
• In the OSD menu select the menu option VIDEO/VIDEO OUTPUT/OFF .
On this subject see also chapter 10 "Settings in the OSD menu".
8.3 Connection to a television via video input (Composite Video)
For this connection variant the television must be equipped with Audio/Videocinch sockets (Composite Video).In order to connect the DVD player to a television via Composite Video youwill need• an audio/video RCA cinch cable (supplied)
• Connect the yellow marked video socket with the yellow VIDEO socket onthe television.
• Connect the audio output sockets MIX L/R on the rear panel of the DVDplayer to the corresponding audio inputs on the television. Make surethat the colour markings yellow, red and white correspond.
• For playback select the matching channel on your television Check withthe television's instruction manual on how you can set the AV channel.
• In the OSD menu select the menu option VIDEO/VIDEO OUTPUT/OFF.
On this subject see also chapter 10 "Settings in the OSD menu".
8.4 Connecting via component signal (YPbPr/YUV)This connection variant is only possible with very high grade televisions,LCD/Plasma screens or Video projectors.Check with the instruction manual of the corresponding playback device tosee if this connections variant is available. It is possible that additional playbackdevice settings may have to be implemented.The so called "Component signal" is put out via the YPbPr socket of the DVDplayer. Component signals are available in the form of the so called "YUV"signal (Half image) as well as in the form of the so called "YPbPr" signal (Full image/Progressive scan).
On this topic, please refer to Section 18. "Glossary / KeyWord Index".
The cable connections are the same in both cases; YPbPr-signal for ProgressiveScan however can only be used if the television (or Video projector), to whichyou want to connect the DVD player, is capable of Progressive Scan. If youare not sure whether the television (or Video projector), to which you want toconnect the DVD player is capable of Progressive Scan and has cinch socketsavailable then you can check this by consulting the television's (or Videoprojectors's) instruction manual.For both variations – "YPbPr" and "YUV"– you will need• an audio cinch cable (not supplied)• an YUV cable (not supplied) These can be obtained from your dealer.
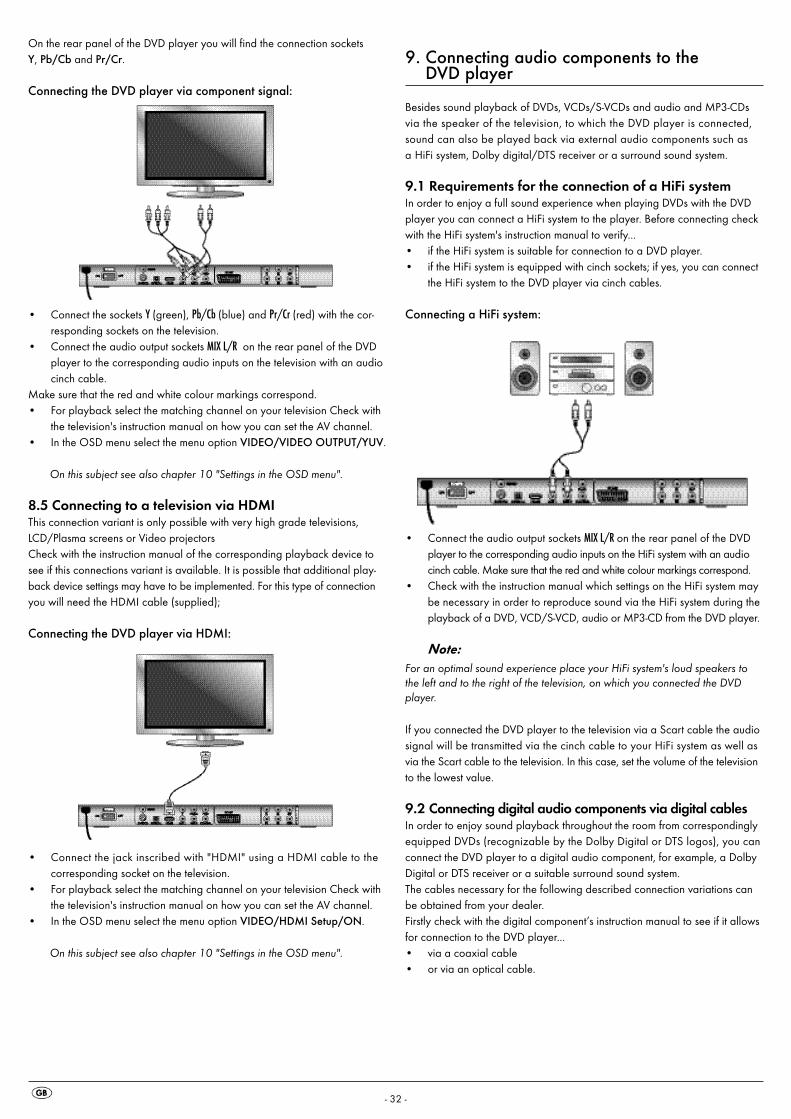
- 32 -
On the rear panel of the DVD player you will find the connection sockets Y, Pb/Cb and Pr/Cr.
Connecting the DVD player via component signal:
• Connect the sockets Y (green), Pb/Cb (blue) and Pr/Cr (red) with the cor-responding sockets on the television.
• Connect the audio output sockets MIX L/R on the rear panel of the DVDplayer to the corresponding audio inputs on the television with an audiocinch cable.
Make sure that the red and white colour markings correspond.• For playback select the matching channel on your television Check with
the television's instruction manual on how you can set the AV channel.• In the OSD menu select the menu option VIDEO/VIDEO OUTPUT/YUV.
On this subject see also chapter 10 "Settings in the OSD menu".
8.5 Connecting to a television via HDMIThis connection variant is only possible with very high grade televisions,LCD/Plasma screens or Video projectors Check with the instruction manual of the corresponding playback device tosee if this connections variant is available. It is possible that additional play-back device settings may have to be implemented. For this type of connectionyou will need the HDMI cable (supplied);
Connecting the DVD player via HDMI:
• Connect the jack inscribed with "HDMI" using a HDMI cable to the corresponding socket on the television.
• For playback select the matching channel on your television Check withthe television's instruction manual on how you can set the AV channel.
• In the OSD menu select the menu option VIDEO/HDMI Setup/ON.
On this subject see also chapter 10 "Settings in the OSD menu".
9. Connecting audio components to the DVD player
Besides sound playback of DVDs, VCDs/S-VCDs and audio and MP3-CDsvia the speaker of the television, to which the DVD player is connected,sound can also be played back via external audio components such as a HiFi system, Dolby digital/DTS receiver or a surround sound system.
9.1 Requirements for the connection of a HiFi systemIn order to enjoy a full sound experience when playing DVDs with the DVDplayer you can connect a HiFi system to the player. Before connecting checkwith the HiFi system's instruction manual to verify...• if the HiFi system is suitable for connection to a DVD player. • if the HiFi system is equipped with cinch sockets; if yes, you can connect
the HiFi system to the DVD player via cinch cables.
Connecting a HiFi system:
• Connect the audio output sockets MIX L/R on the rear panel of the DVDplayer to the corresponding audio inputs on the HiFi system with an audiocinch cable. Make sure that the red and white colour markings correspond.
• Check with the instruction manual which settings on the HiFi system maybe necessary in order to reproduce sound via the HiFi system during theplayback of a DVD, VCD/S-VCD, audio or MP3-CD from the DVD player.
Note:For an optimal sound experience place your HiFi system's loud speakers tothe left and to the right of the television, on which you connected the DVDplayer.
If you connected the DVD player to the television via a Scart cable the audiosignal will be transmitted via the cinch cable to your HiFi system as well asvia the Scart cable to the television. In this case, set the volume of the televisionto the lowest value.
9.2 Connecting digital audio components via digital cablesIn order to enjoy sound playback throughout the room from correspondinglyequipped DVDs (recognizable by the Dolby Digital or DTS logos), you canconnect the DVD player to a digital audio component, for example, a DolbyDigital or DTS receiver or a suitable surround sound system.The cables necessary for the following described connection variations canbe obtained from your dealer.Firstly check with the digital component’s instruction manual to see if it allowsfor connection to the DVD player... • via a coaxial cable• or via an optical cable.

- 33 -
Connection via coaxial cableTo connect the DVD player to a digital audio component with a digital coaxialcable:• Connect the "COAXIAL" inscribed plug to the corresponding socket on
the digital audio component.
Connecting via optical cableTo connect the DVD player to a digital audio component with an optical cable:• Remove the protective plug from the "OPTICAL" inscribed socket on the
rear panel of the DVD player and insert the optical cable plug.• Insert the plug at the other end of the optical cable in the corresponding
socket of the digital audio component.
Note:The optical cable is a glass fibre cable and must not be bent during installation.Otherwise the glass fibre contained in the cable could break and the cablewould become unusable.
Note:Make sure that no dirt can enter into the optical cable socket. This could causesignal interference. Always insert the protective plug into the socket if no opticalcable is connected.
9.3 Connecting audio components via an analogue cableIf a digital input is not available on the audio component you can connectthe DVD player to it via conventional analogue cinch cables.
To connect the DVD player with analogue cables:• Plug a cinch cable into each of the sockets FL (front left channel),
FR (front right channel), SL (rear left channel), SR (rear right channel), CEN (front centre channel) and SW (Bass) on the rear panel of the DVD player.
• Insert the cinch cables into the corresponding analogue inputs of the audio component.
9.4 Connecting the headphonesThe headphones output is located on the front panel of the DVD player.• Plug the 3.5 mm headphones jackplug into the headphones output.
Attention! Listening to music with headphones for long periods and at highvolume levels can lead to hearing damage!
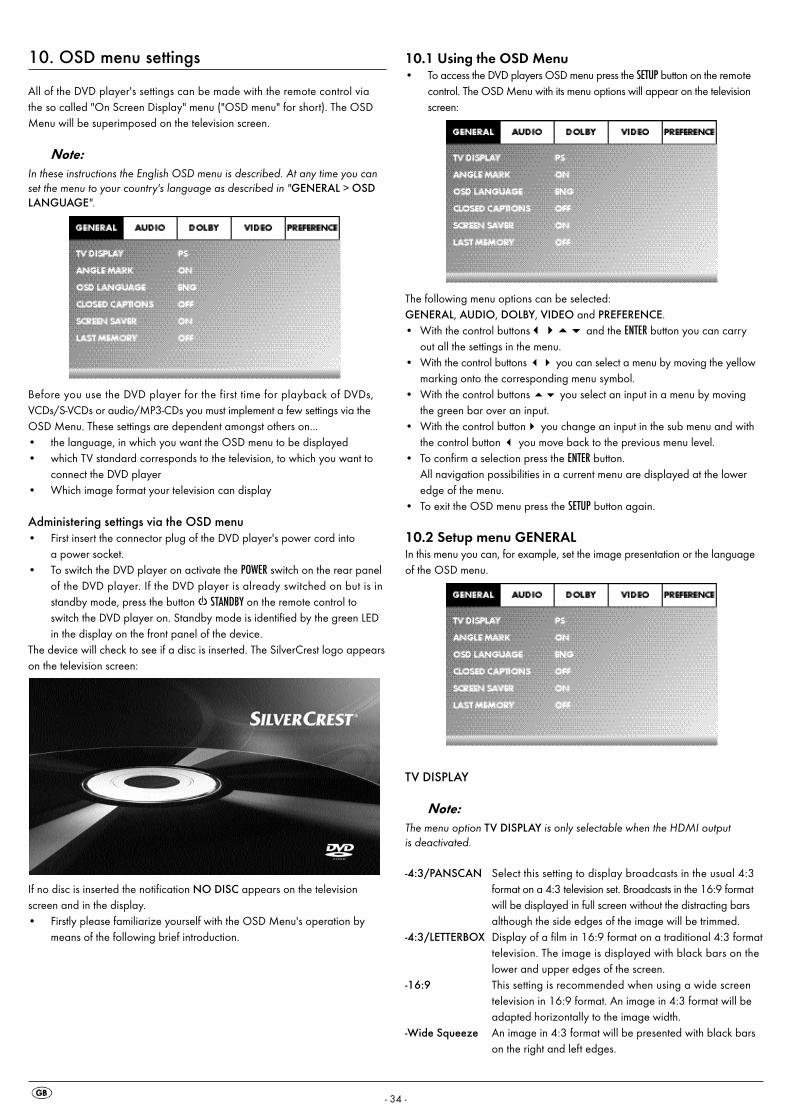
- 34 -
10. OSD menu settings
All of the DVD player's settings can be made with the remote control viathe so called "On Screen Display" menu ("OSD menu" for short). The OSDMenu will be superimposed on the television screen.
Note: In these instructions the English OSD menu is described. At any time you canset the menu to your country's language as described in "GENERAL > OSDLANGUAGE".
Before you use the DVD player for the first time for playback of DVDs,VCDs/S-VCDs or audio/MP3-CDs you must implement a few settings via theOSD Menu. These settings are dependent amongst others on...• the language, in which you want the OSD menu to be displayed• which TV standard corresponds to the television, to which you want to
connect the DVD player• Which image format your television can display
Administering settings via the OSD menu• First insert the connector plug of the DVD player's power cord into
a power socket.• To switch the DVD player on activate the POWER switch on the rear panel
of the DVD player. If the DVD player is already switched on but is instandby mode, press the button STANDBY on the remote control toswitch the DVD player on. Standby mode is identified by the green LEDin the display on the front panel of the device.
The device will check to see if a disc is inserted. The SilverCrest logo appearson the television screen:
If no disc is inserted the notification NO DISC appears on the televisionscreen and in the display.• Firstly please familiarize yourself with the OSD Menu's operation by
means of the following brief introduction.
10.1 Using the OSD Menu• To access the DVD players OSD menu press the SETUP button on the remote
control. The OSD Menu with its menu options will appear on the televisionscreen:
The following menu options can be selected:GENERAL, AUDIO, DOLBY, VIDEO and PREFERENCE.• With the control buttons���� and the ENTER button you can carry
out all the settings in the menu. • With the control buttons �� you can select a menu by moving the yellow
marking onto the corresponding menu symbol.• With the control buttons �� you select an input in a menu by moving
the green bar over an input.• With the control button� you change an input in the sub menu and with
the control button � you move back to the previous menu level.• To confirm a selection press the ENTER button.
All navigation possibilities in a current menu are displayed at the loweredge of the menu.
• To exit the OSD menu press the SETUP button again.
10.2 Setup menu GENERALIn this menu you can, for example, set the image presentation or the languageof the OSD menu.
TV DISPLAY
Note:The menu option TV DISPLAY is only selectable when the HDMI output is deactivated.
-4:3/PANSCAN Select this setting to display broadcasts in the usual 4:3format on a 4:3 television set. Broadcasts in the 16:9 formatwill be displayed in full screen without the distracting barsalthough the side edges of the image will be trimmed.
-4:3/LETTERBOX Display of a film in 16:9 format on a traditional 4:3 formattelevision. The image is displayed with black bars on thelower and upper edges of the screen.
-16:9 This setting is recommended when using a wide screentelevision in 16:9 format. An image in 4:3 format will beadapted horizontally to the image width.
-Wide Squeeze An image in 4:3 format will be presented with black barson the right and left edges.
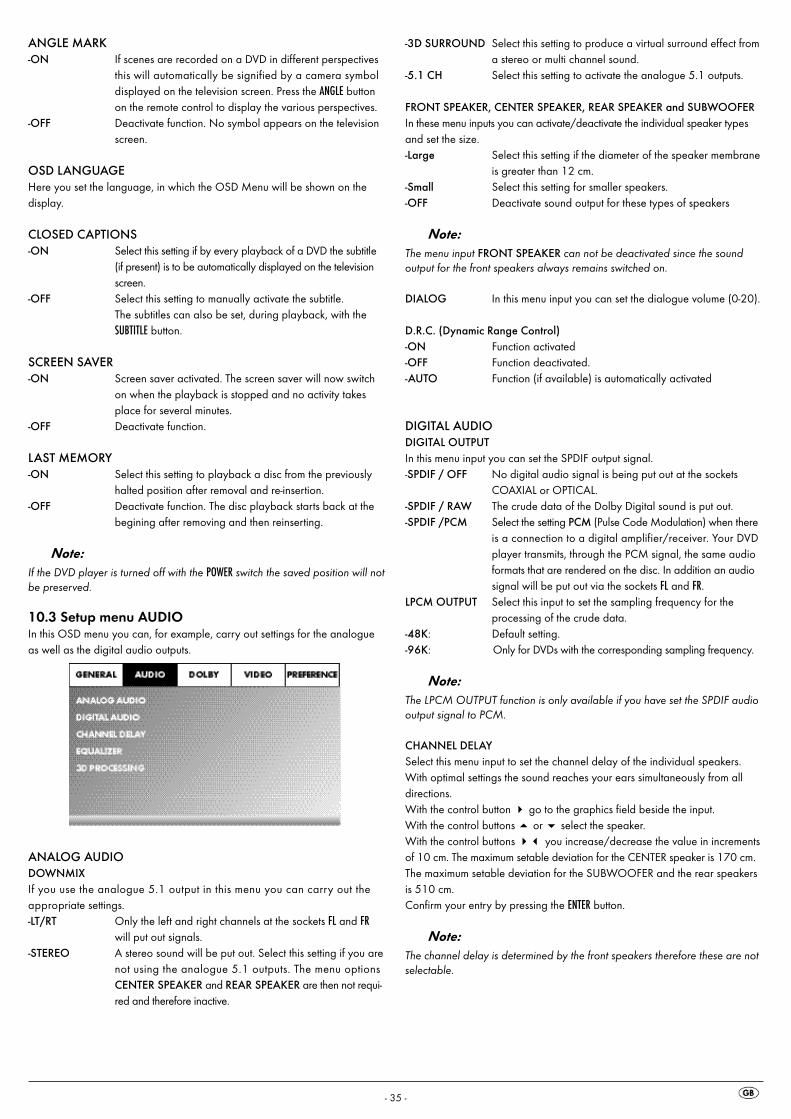
- 35 -
ANGLE MARK-ON If scenes are recorded on a DVD in different perspectives
this will automatically be signified by a camera symboldisplayed on the television screen. Press the ANGLE buttonon the remote control to display the various perspectives.
-OFF Deactivate function. No symbol appears on the televisionscreen.
OSD LANGUAGEHere you set the language, in which the OSD Menu will be shown on the display.
CLOSED CAPTIONS-ON Select this setting if by every playback of a DVD the subtitle
(if present) is to be automatically displayed on the televisionscreen.
-OFF Select this setting to manually activate the subtitle. The subtitles can also be set, during playback, with theSUBTITLE button.
SCREEN SAVER-ON Screen saver activated. The screen saver will now switch
on when the playback is stopped and no activity takes place for several minutes.
-OFF Deactivate function.
LAST MEMORY-ON Select this setting to playback a disc from the previously
halted position after removal and re-insertion.-OFF Deactivate function. The disc playback starts back at the
begining after removing and then reinserting.
Note:If the DVD player is turned off with the POWER switch the saved position will notbe preserved.
10.3 Setup menu AUDIOIn this OSD menu you can, for example, carry out settings for the analogueas well as the digital audio outputs.
ANALOG AUDIODOWNMIXIf you use the analogue 5.1 output in this menu you can carry out theappropriate settings.-LT/RT Only the left and right channels at the sockets FL and FR
will put out signals. -STEREO A stereo sound will be put out. Select this setting if you are
not using the analogue 5.1 outputs. The menu optionsCENTER SPEAKER and REAR SPEAKER are then not requi-red and therefore inactive.
-3D SURROUND Select this setting to produce a virtual surround effect froma stereo or multi channel sound.
-5.1 CH Select this setting to activate the analogue 5.1 outputs.
FRONT SPEAKER, CENTER SPEAKER, REAR SPEAKER and SUBWOOFERIn these menu inputs you can activate/deactivate the individual speaker typesand set the size.-Large Select this setting if the diameter of the speaker membrane
is greater than 12 cm.-Small Select this setting for smaller speakers.-OFF Deactivate sound output for these types of speakers
Note:The menu input FRONT SPEAKER can not be deactivated since the sound output for the front speakers always remains switched on.
DIALOG In this menu input you can set the dialogue volume (0-20).
D.R.C. (Dynamic Range Control)-ON Function activated-OFF Function deactivated.-AUTO Function (if available) is automatically activated
DIGITAL AUDIODIGITAL OUTPUTIn this menu input you can set the SPDIF output signal.-SPDIF / OFF No digital audio signal is being put out at the sockets
COAXIAL or OPTICAL.-SPDIF / RAW The crude data of the Dolby Digital sound is put out.-SPDIF /PCM Select the setting PCM (Pulse Code Modulation) when there
is a connection to a digital amplifier/receiver. Your DVDplayer transmits, through the PCM signal, the same audioformats that are rendered on the disc. In addition an audiosignal will be put out via the sockets FL and FR.
LPCM OUTPUT Select this input to set the sampling frequency for the processing of the crude data.
-48K: Default setting.-96K: Only for DVDs with the corresponding sampling frequency.
Note:The LPCM OUTPUT function is only available if you have set the SPDIF audiooutput signal to PCM.
CHANNEL DELAYSelect this menu input to set the channel delay of the individual speakers.With optimal settings the sound reaches your ears simultaneously from all directions.With the control button � go to the graphics field beside the input. With the control buttons � or � select the speaker.With the control buttons �� you increase/decrease the value in incrementsof 10 cm. The maximum setable deviation for the CENTER speaker is 170 cm.The maximum setable deviation for the SUBWOOFER and the rear speakersis 510 cm. Confirm your entry by pressing the ENTER button.
Note:The channel delay is determined by the front speakers therefore these are notselectable.
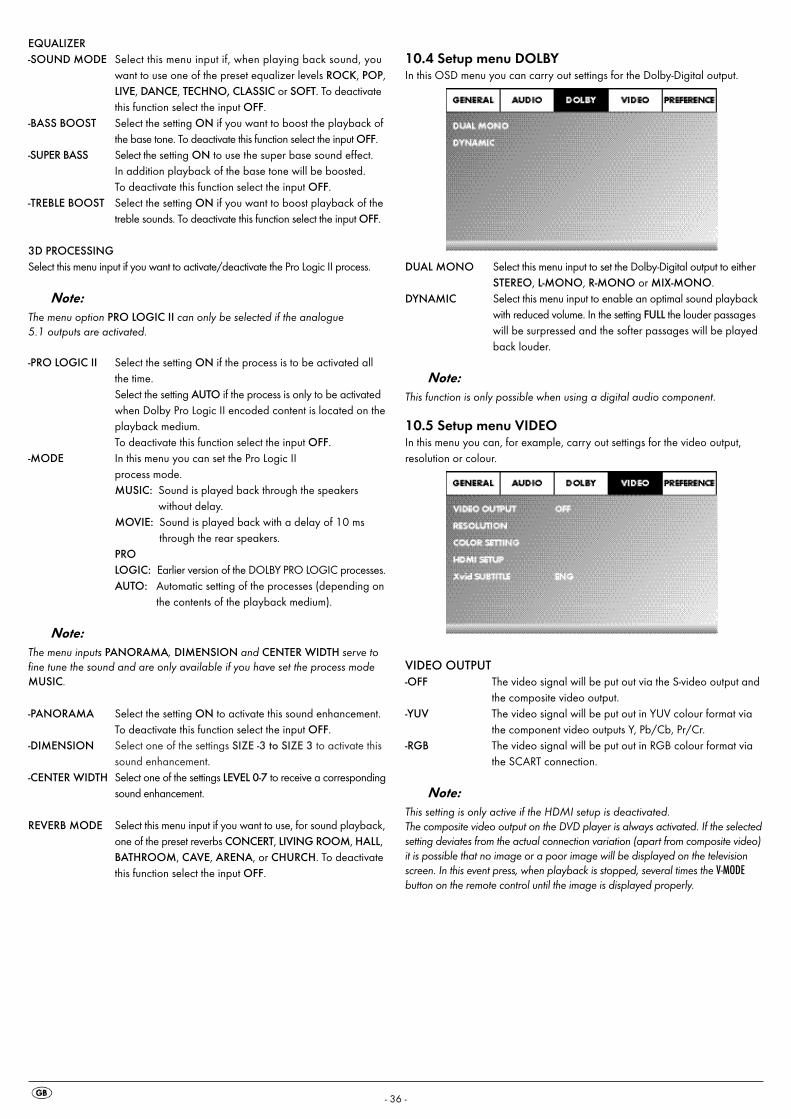
- 36 -
EQUALIZER-SOUND MODE Select this menu input if, when playing back sound, you
want to use one of the preset equalizer levels ROCK, POP,LIVE, DANCE, TECHNO, CLASSIC or SOFT. To deactivatethis function select the input OFF.
-BASS BOOST Select the setting ON if you want to boost the playback ofthe base tone. To deactivate this function select the input OFF.
-SUPER BASS Select the setting ON to use the super base sound effect. In addition playback of the base tone will be boosted. To deactivate this function select the input OFF.
-TREBLE BOOST Select the setting ON if you want to boost playback of thetreble sounds. To deactivate this function select the input OFF.
3D PROCESSINGSelect this menu input if you want to activate/deactivate the Pro Logic II process.
Note:The menu option PRO LOGIC II can only be selected if the analogue 5.1 outputs are activated.
-PRO LOGIC II Select the setting ON if the process is to be activated allthe time. Select the setting AUTO if the process is only to be activatedwhen Dolby Pro Logic II encoded content is located on theplayback medium. To deactivate this function select the input OFF.
-MODE In this menu you can set the Pro Logic IIprocess mode. MUSIC: Sound is played back through the speakers
without delay.MOVIE: Sound is played back with a delay of 10 ms
through the rear speakers.PRO LOGIC: Earlier version of the DOLBY PRO LOGIC processes.AUTO: Automatic setting of the processes (depending on
the contents of the playback medium).
Note:The menu inputs PANORAMA, DIMENSION and CENTER WIDTH serve tofine tune the sound and are only available if you have set the process modeMUSIC.
-PANORAMA Select the setting ON to activate this sound enhancement.To deactivate this function select the input OFF.
-DIMENSION Select one of the settings SIZE -3 to SIZE 3 to activate thissound enhancement.
-CENTER WIDTH Select one of the settings LEVEL 0-7 to receive a correspondingsound enhancement.
REVERB MODE Select this menu input if you want to use, for sound playback,one of the preset reverbs CONCERT, LIVING ROOM, HALL,BATHROOM, CAVE, ARENA, or CHURCH. To deactivatethis function select the input OFF.
10.4 Setup menu DOLBYIn this OSD menu you can carry out settings for the Dolby-Digital output.
DUAL MONO Select this menu input to set the Dolby-Digital output to eitherSTEREO, L-MONO, R-MONO or MIX-MONO.
DYNAMIC Select this menu input to enable an optimal sound playbackwith reduced volume. In the setting FULL the louder passageswill be surpressed and the softer passages will be playedback louder.
Note:This function is only possible when using a digital audio component.
10.5 Setup menu VIDEOIn this menu you can, for example, carry out settings for the video output,resolution or colour.
VIDEO OUTPUT-OFF The video signal will be put out via the S-video output and
the composite video output.-YUV The video signal will be put out in YUV colour format via
the component video outputs Y, Pb/Cb, Pr/Cr.-RGB The video signal will be put out in RGB colour format via
the SCART connection.
Note:This setting is only active if the HDMI setup is deactivated. The composite video output on the DVD player is always activated. If the selectedsetting deviates from the actual connection variation (apart from composite video)it is possible that no image or a poor image will be displayed on the televisionscreen. In this event press, when playback is stopped, several times the V-MODEbutton on the remote control until the image is displayed properly.
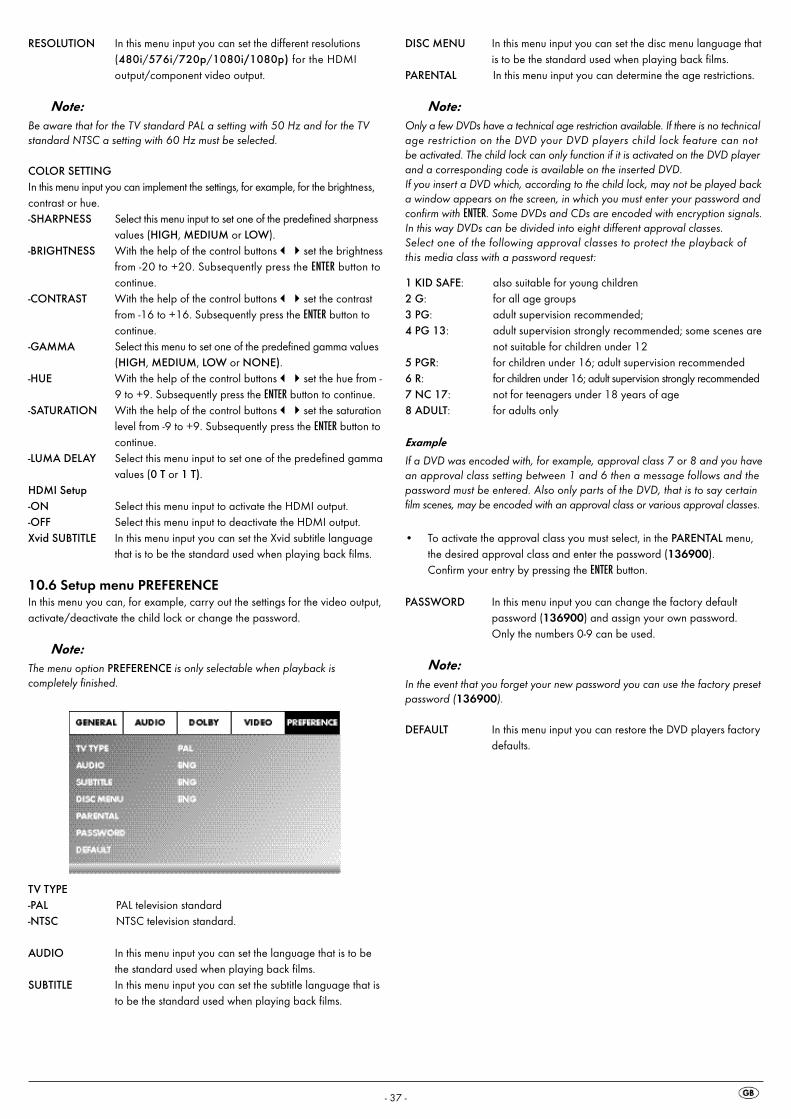
- 37 -
RESOLUTION In this menu input you can set the different resolutions(480i/576i/720p/1080i/1080p) for the HDMI output/component video output.
Note:Be aware that for the TV standard PAL a setting with 50 Hz and for the TVstandard NTSC a setting with 60 Hz must be selected.
COLOR SETTINGIn this menu input you can implement the settings, for example, for the brightness,contrast or hue.-SHARPNESS Select this menu input to set one of the predefined sharpness
values (HIGH, MEDIUM or LOW).-BRIGHTNESS With the help of the control buttons��set the brightness
from -20 to +20. Subsequently press the ENTER button tocontinue.
-CONTRAST With the help of the control buttons��set the contrastfrom -16 to +16. Subsequently press the ENTER button tocontinue.
-GAMMA Select this menu to set one of the predefined gamma values(HIGH, MEDIUM, LOW or NONE).
-HUE With the help of the control buttons��set the hue from -9 to +9. Subsequently press the ENTER button to continue.
-SATURATION With the help of the control buttons��set the saturationlevel from -9 to +9. Subsequently press the ENTER button tocontinue.
-LUMA DELAY Select this menu input to set one of the predefined gammavalues (0 T or 1 T).
HDMI Setup-ON Select this menu input to activate the HDMI output.-OFF Select this menu input to deactivate the HDMI output.Xvid SUBTITLE In this menu input you can set the Xvid subtitle language
that is to be the standard used when playing back films.
10.6 Setup menu PREFERENCEIn this menu you can, for example, carry out the settings for the video output,activate/deactivate the child lock or change the password.
Note:The menu option PREFERENCE is only selectable when playback is completely finished.
TV TYPE-PAL PAL television standard-NTSC NTSC television standard.
AUDIO In this menu input you can set the language that is to bethe standard used when playing back films.
SUBTITLE In this menu input you can set the subtitle language that isto be the standard used when playing back films.
DISC MENU In this menu input you can set the disc menu language thatis to be the standard used when playing back films.
PARENTAL In this menu input you can determine the age restrictions.
Note:Only a few DVDs have a technical age restriction available. If there is no technicalage restriction on the DVD your DVD players child lock feature can notbe activated. The child lock can only function if it is activated on the DVD playerand a corresponding code is available on the inserted DVD. If you insert a DVD which, according to the child lock, may not be played backa window appears on the screen, in which you must enter your password andconfirm with ENTER. Some DVDs and CDs are encoded with encryption signals.In this way DVDs can be divided into eight different approval classes. Select one of the following approval classes to protect the playback ofthis media class with a password request:
1 KID SAFE: also suitable for young children2 G: for all age groups3 PG: adult supervision recommended;4 PG 13: adult supervision strongly recommended; some scenes are
not suitable for children under 125 PGR: for children under 16; adult supervision recommended6 R: for children under 16; adult supervision strongly recommended7 NC 17: not for teenagers under 18 years of age8 ADULT: for adults only
Example
If a DVD was encoded with, for example, approval class 7 or 8 and you havean approval class setting between 1 and 6 then a message follows and thepassword must be entered. Also only parts of the DVD, that is to say certainfilm scenes, may be encoded with an approval class or various approval classes.
• To activate the approval class you must select, in the PARENTAL menu,the desired approval class and enter the password (136900). Confirm your entry by pressing the ENTER button.
PASSWORD In this menu input you can change the factory defaultpassword (136900) and assign your own password.Only the numbers 0-9 can be used.
Note:In the event that you forget your new password you can use the factory presetpassword (136900).
DEFAULT In this menu input you can restore the DVD players factorydefaults.
- 38 -
11. Initial operation of the DVD player
After you have …• placed the DVD player in a suitable location• connected the DVD player to a television by one of the designated
connection options• connected the DVD player, if desired, to a HiFi or Surround system
(analogue/digital) for example a Dolby Digital or DTS receiver• made the remote control ready for operation by inserting the batteries• and know how to activate and operate the OSD menu with the remote
control… the DVD player is ready for operation.
11.1 Inserting the DVDTo play a disc with the DVD player:• Switch on your television.• Make sure that the DVD player is ready for operation.If the television, the DVD player and possibly other connected devices (i.e. anaudio component) are ready for operation and are switched on and the DVDplayer is connected correctly to the television you will now see the Silvercrestlogo on the TV screenIf no disc is inserted into the DVD player's disc tray: The message NO DISC is displayed on the television screen.• Open the disc tray by pressing the button OPEN/CLOSE on the remote con-
trol or on the front panel of the DVD player. OPEN is displayed on thetelevision screen.
• Insert the disc in the disc tray with the inscribed/labled side up. For two-sided discs: The side you would like to play must face down.
• After you have inserted the disc press the button OPEN/CLOSE on the re-mote control or on the front panel of the DVD player again to close thedisc tray.
• The contents of the disc will now be loaded; this may take a few seconds.In the meantime LOADING is displayed on the television screen.
11.2 Inserting memory cards/USB memory sticks withMP3/WMA/ MPEG4/JPEG data.
Note:The DVD-Player always starts in DVD mode. To read memory cards/USB memorysticks press the USB button on the remote control. The DVD player recognizesthe data formats JPEG, MP3, WMA and MPEG4.
In order to insert memory cards of the types SD, MS/MSPro and MMC intothe DVD player:• Switch on your television.• Make sure that the DVD player is ready for operation.If the television, the DVD player and possibly other connected devices (i.e. anaudio component) are ready for operation and are switched on and the DVDplayer is connected correctly to the television you will now see the Silvercrestlogo on the TV screen If no disc is inserted into the DVD player's disc tray: The message NO DISC isdisplayed on the television screen.• Slide the memory card into the memory card slot.
Then proceed with the following steps depending on the type of memorycard that you want the device to read.
Warning!Always make sure that you insert memory cards into the memory card slot asdescribed hereafter! Under no circumstances bend or buckle the memorycard when inserting into the memory card slot! Slide the memory card up tothe stop in the memory card slot, with a light pressure.
Allow the memory card to slide in without force:• Check to make sure that the memory card is one that the DVD player is
capable of reading. Do not attempt to insert memory cards of another type in the memorycard slot!
• Make sure that you have inserted the memory card into the memorycard slot in the correct manner.
• Under no circumstances attempt to force the memory card into the memorycard slot!
Otherwise the DVD player, memory card and the data on the memory cardcould be damaged!
Supported memory card types and capacitiesMemory cards of the types SD (2 GB not SDHC), MS/MSPro (4 GB), MMC(4 GB) can be played back.
Note:Your DVD player can only read storage mediums with several data formats ifeach folder contains only one data format.
MultiMediaCard- /SecureDigital memory cards (MMC/SD)Insert the MMC/SD memory cards with the contacts forward and slide themstraight into the memory card slot.With this the side of the memory card, on which the contacts are locatedmust face downwards with the chamfered corner facing to the right.
MemoryStick/memory cards (MS/MSPro)Slide the MS memory card into the memory card slot, level and with the contacts facing forward. With this the side of the memory card, on which the contacts are locatedmust face downwards with the chamfered corner facing to the left.
- 39 -
USB memory sticks (USB)The DVD player supports USB memory sticks 1.1 and 2.0 up to a capacity of 4GB.USB memory sticks must be inserted into the USB port.
• Press the USB button on the remote control. If several memory mediums(USB and memory card) are inserted press, repeatedly, the USB buttonuntil the contents of the USB memory stick is displayed. This procedurealso applies to particular memory cards.
11.3 Removing memory cards/USB memory sticksMemory cards/USB Memory sticks should only be removed after the memorycard slot is deactivated. Thus avoiding the possibility of damage or data loss.• Press the USB button on the remote control to return to the DVD mode.
For this a disc must be inserted into the DVD player. • You can now remove the memory card/USB memory stick from the memory
card slot/USB port.
12. Playing back DVDs, VCDs or S-VCDs
To play back a DVD/VCD/S-VCD with the DVD player...• Switch on your television.• Make sure that the DVD player is ready for operation.If the television, the DVD player and possibly other connected devices (i.e. anaudio component) are ready for operation and are switched on and the DVDplayer is connected correctly to the television you will now see the "Silvercrest"logo on the TV screen
• Open the disc tray on the front panel of the DVD player by pressing the OPEN/CLOSE button.
OOPPEENN now appears in the display on the front panel of the DVD player andon the television screen.• Insert a DVD/VCD/S-VCD disc in the disc tray with the inscribed/labled
side up.• Press the OPEN/CLOSE button again to close the disc tray. CLOSE will appear in the display on the front panel of the DVD player andon the television screen while the disc tray is closing.• The contents of the inserted DVD/VCD/S-VCD will now be loaded; this
may take a few seconds. In the meantime LOADING blinks in the displayon the front panel of the DVD player and on the television screen.
• Playback of the inserted DVD/VCD/S-VCD starts automatically.
Note:DVDs, VCDs and S-VCDs that you want to playback with the DVD player may possibly have a country code which is printed on the DVD's jacket.
The DVD player can only playback DVDs/VCDs/S-VCDs with the country code .
If no country code is printed on the cover of a DVD/VCD/S-VCD...
• but instead the symbol , then the DVD/VCD/S-VCD can be played back with the DVD player
• then the DVD/VCD/S-VCD can possibly not be played back with theDVD player. You can check this by attempting to play back the DVD.
Depending on the inserted DVD/VCD/S-VCD it is possible that the contentsof the DVD/VCD/S-VCD will not playback immediately, rather first a selectionmenu appears on the television screen.
In this event select the menu option, which will start the playback of the film,with the control buttons ����on the remote control.
• To start playback of the film press the ENTER button on the remote controlor press the PLAY/PAUSE��button.
- 40 -
In the display on the front panel of the DVD player, the following notices appear:With DVDs:• "DVD"• the number of the currently playing chapter• the played back so far time of the currently playing DVD in minutes and
seconds
With VCDs/S-VCDs: • "VCD" or "S-VCD"• the number of the currently playing title• the played back so far time of the currently playing VCD/S-VCD in
minutes and seconds
12.1Features during playback of a DVD, VCD or S-VCDDuring the playback of a DVD/VCD/S-VCD you can use the following DVDplayer features...
Pause playbackTo pause the playback of the inserted DVD/VCD/S-VCD...• During playback press the PLAY/PAUSE��button� will now appear in the display on the front panel of the DVD player andon the television screen.On the television screen you will see a freeze frame of the scene that has justbeen halted.• To contnue playback of the film press the PLAY/PAUSE��button.
Stop playback (STOP�)To stop playback of the film on the inserted DVD/VCD/S-VCD press theSTOP� button.With resume functionIf you have cancelled playback of the inserted DVD/VCD/S-VCD by pressingthe STOP� button once the DVD player automatically saves the positionwhere playback was interrupted. This function is called the "resume function".PRESS PLAY KEY TO CONTINUE appears on the television screen. Assoon as you press the PLAY/PAUSE��button again playback will continuefrom the saved position.Without resume functionIf you have cancelled playback of the inserted DVD/VCD/S-VCD by pressingthe STOP� button once and you press the STOP� button a second time the saved position, at which you interrupted the playback, will be cleared. When you press the PLAY/PAUSE��button again playback of the insertedDVD/VCD/S-VCD starts from the beginning.
Access the DVD menu (MENU)
Note:This function may not be available on all DVDs! If you attempt to execute a function that is not available, the symbol is displayed on the televisionscreen.
With many films on DVDs there is a main menu on the disc which, apart fromthe option of playing back the main film, allows you to select from the followingcontents:• the subtitle and film dialogue languages• direct chapter selection • to playback the films bonus material (Background information,
"Making of" etc.)If such a menu is present on the DVD inserted in the DVD player you can accessit during playback by pressing the MENU button on the remote control.You can select particular menu options by pressing the control buttons����on the remote control.To confirm the selected menu option press the PLAY/PAUSE��button or the ENTER button on the remote control.To return to playback press the MENU button on the remote control again.
Note:If you cancel playback by pressing the STOP� button twice (Playback stop withoutresume function) access to the disc's main menu is no longer possible.
Playback Control (PBC) with VCDs/S-VCDsMany VCDs/S-VCDs have Playback Control (in short "PBC"). Playback Controlindicates a main menu that allows operation of several functions of theVCD/S-VCD. If PCB is available on a VCD/S-VCD inserted in the DVD player you must firstactivate it in order to be able to superimpose the menu.• During playback or when playback is stopped press the MENU button.
The message PBC: OFF appears in the display.• Press the MENU button again. The message PBC: ON appears in the display.
PBC is now switched on the discs main menu can be accessed with theMENU or TITLE buttons.
Note:If you switch on PBC during playback then it is possible that playback willstop and start again from the beginning and/or with the main menu.
Skip to start of chapter (Skip)
Note:This function may not be available on all DVDs! If you attempt to execute a function that is not available, the symbol is displayed on the televisionscreen.
With the buttons SKIP FWD and SKIP BWD you can, during playback, within the film on the inserted DVD/VCD/S-VCD …• skip forward to the beginning of the next chapter or• skip backward to the preceeding chapterThe respectively selected chapter will playback immediately without havingto press the PLAY/PAUSE�� button. The number of the respectively selectedchapter will be displayed on the front panel of the DVD player to the left ofthe played back so far time.
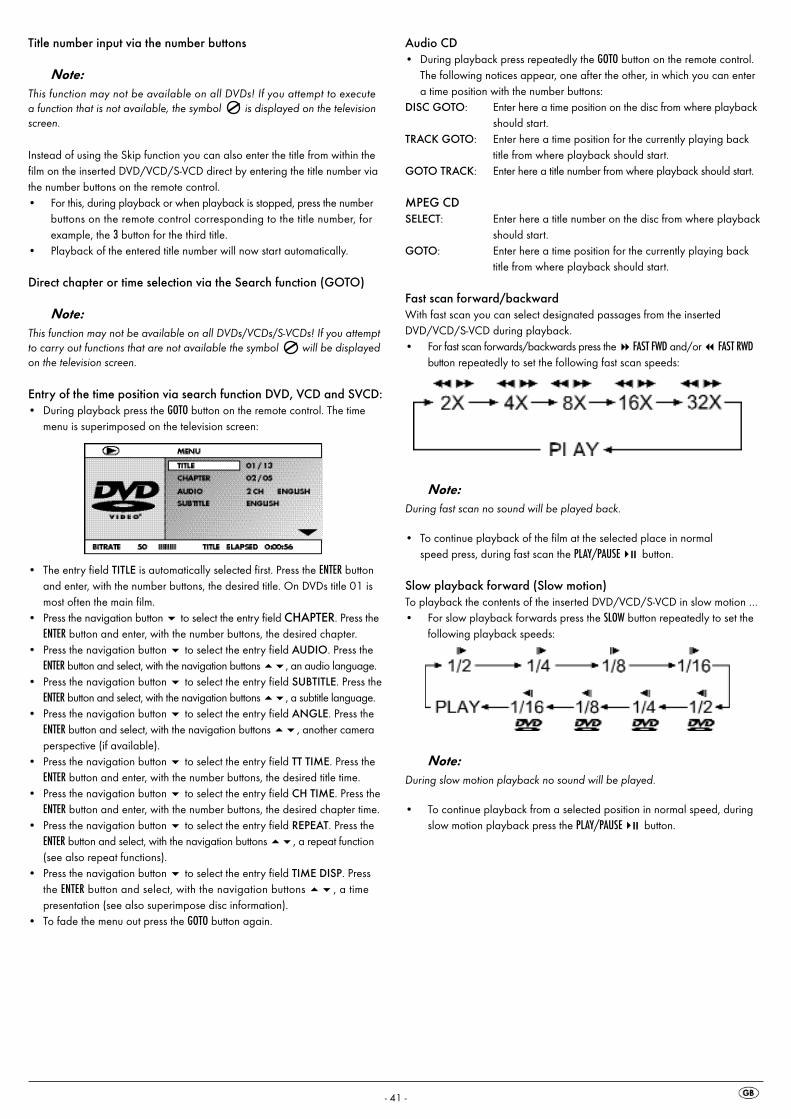
- 41 -
Title number input via the number buttons
Note:This function may not be available on all DVDs! If you attempt to execute a function that is not available, the symbol is displayed on the televisionscreen.
Instead of using the Skip function you can also enter the title from within thefilm on the inserted DVD/VCD/S-VCD direct by entering the title number viathe number buttons on the remote control.• For this, during playback or when playback is stopped, press the number
buttons on the remote control corresponding to the title number, forexample, the 3 button for the third title.
• Playback of the entered title number will now start automatically.
Direct chapter or time selection via the Search function (GOTO)
Note:This function may not be available on all DVDs/VCDs/S-VCDs! If you attemptto carry out functions that are not available the symbol will be displayedon the television screen.
Entry of the time position via search function DVD, VCD and SVCD:• During playback press the GOTO button on the remote control. The time
menu is superimposed on the television screen:
• The entry field TITLE is automatically selected first. Press the ENTER buttonand enter, with the number buttons, the desired title. On DVDs title 01 ismost often the main film.
• Press the navigation button � to select the entry field CHAPTER. Press the ENTER button and enter, with the number buttons, the desired chapter.
• Press the navigation button � to select the entry field AUDIO. Press theENTER button and select, with the navigation buttons ��, an audio language.
• Press the navigation button � to select the entry field SUBTITLE. Press theENTER button and select, with the navigation buttons ��, a subtitle language.
• Press the navigation button � to select the entry field ANGLE. Press theENTER button and select, with the navigation buttons ��, another cameraperspective (if available).
• Press the navigation button � to select the entry field TT TIME. Press theENTER button and enter, with the number buttons, the desired title time.
• Press the navigation button � to select the entry field CH TIME. Press theENTER button and enter, with the number buttons, the desired chapter time.
• Press the navigation button � to select the entry field REPEAT. Press theENTER button and select, with the navigation buttons ��, a repeat function(see also repeat functions).
• Press the navigation button � to select the entry field TIME DISP. Pressthe ENTER button and select, with the navigation buttons ��, a time presentation (see also superimpose disc information).
• To fade the menu out press the GOTO button again.
Audio CD• During playback press repeatedly the GOTO button on the remote control.
The following notices appear, one after the other, in which you can entera time position with the number buttons:
DISC GOTO: Enter here a time position on the disc from where playbackshould start.
TRACK GOTO: Enter here a time position for the currently playing back title from where playback should start.
GOTO TRACK: Enter here a title number from where playback should start.
MPEG CDSELECT: Enter here a title number on the disc from where playback
should start.GOTO: Enter here a time position for the currently playing back
title from where playback should start.
Fast scan forward/backwardWith fast scan you can select designated passages from the insertedDVD/VCD/S-VCD during playback.• For fast scan forwards/backwards press the � FAST FWD and/or FAST RWD
button repeatedly to set the following fast scan speeds:
Note:During fast scan no sound will be played back.
• To continue playback of the film at the selected place in normalspeed press, during fast scan the PLAY/PAUSE�� button.
Slow playback forward (Slow motion)To playback the contents of the inserted DVD/VCD/S-VCD in slow motion …• For slow playback forwards press the SLOW button repeatedly to set the
following playback speeds:
Note:During slow motion playback no sound will be played.
• To continue playback from a selected position in normal speed, duringslow motion playback press the PLAY/PAUSE�� button.
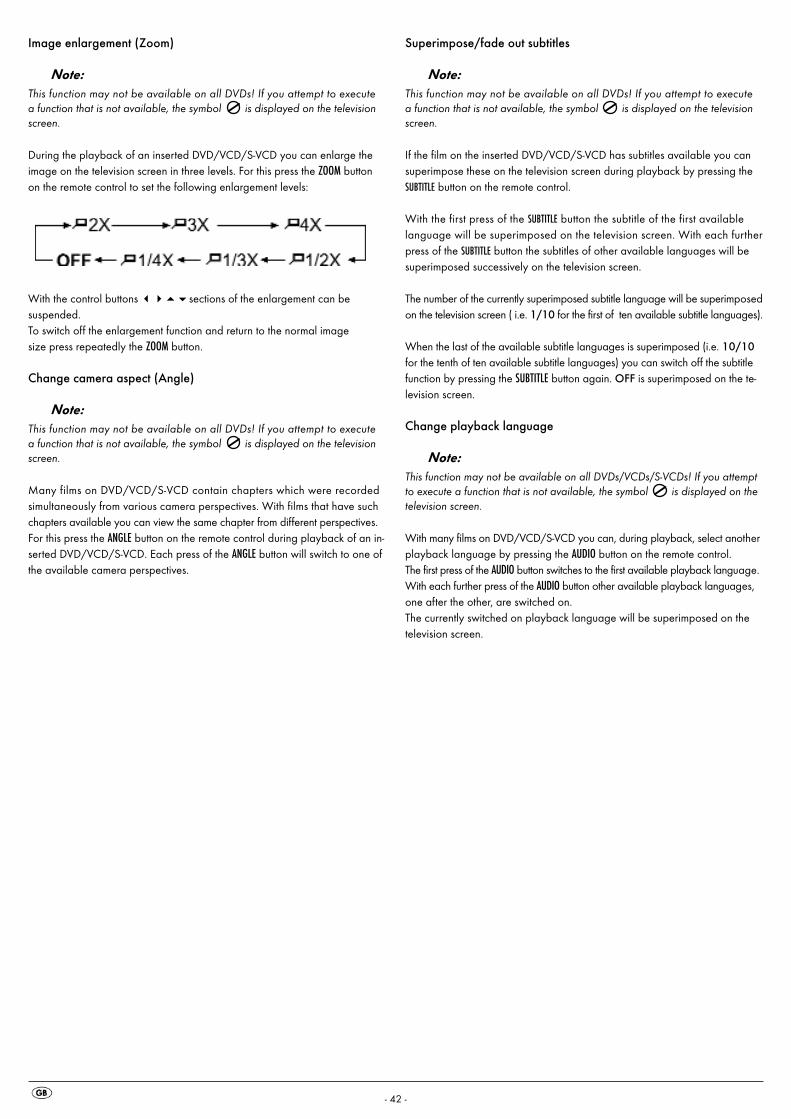
- 42 -
Image enlargement (Zoom)
Note:This function may not be available on all DVDs! If you attempt to execute a function that is not available, the symbol is displayed on the televisionscreen.
During the playback of an inserted DVD/VCD/S-VCD you can enlarge theimage on the television screen in three levels. For this press the ZOOM buttonon the remote control to set the following enlargement levels:
With the control buttons ����sections of the enlargement can be suspended.To switch off the enlargement function and return to the normal image size press repeatedly the ZOOM button.
Change camera aspect (Angle)
Note:This function may not be available on all DVDs! If you attempt to execute a function that is not available, the symbol is displayed on the televisionscreen.
Many films on DVD/VCD/S-VCD contain chapters which were recordedsimultaneously from various camera perspectives. With films that have suchchapters available you can view the same chapter from different perspectives.For this press the ANGLE button on the remote control during playback of an in-serted DVD/VCD/S-VCD. Each press of the ANGLE button will switch to one ofthe available camera perspectives.
Superimpose/fade out subtitles
Note:This function may not be available on all DVDs! If you attempt to execute a function that is not available, the symbol is displayed on the televisionscreen.
If the film on the inserted DVD/VCD/S-VCD has subtitles available you cansuperimpose these on the television screen during playback by pressing theSUBTITLE button on the remote control.
With the first press of the SUBTITLE button the subtitle of the first availablelanguage will be superimposed on the television screen. With each furtherpress of the SUBTITLE button the subtitles of other available languages will besuperimposed successively on the television screen.
The number of the currently superimposed subtitle language will be superimposedon the television screen ( i.e. 1/10 for the first of ten available subtitle languages).
When the last of the available subtitle languages is superimposed (i.e. 10/10for the tenth of ten available subtitle languages) you can switch off the subtitlefunction by pressing the SUBTITLE button again. OFF is superimposed on the te-levision screen.
Change playback language
Note:This function may not be available on all DVDs/VCDs/S-VCDs! If you attemptto execute a function that is not available, the symbol is displayed on thetelevision screen.
With many films on DVD/VCD/S-VCD you can, during playback, select anotherplayback language by pressing the AUDIO button on the remote control. The first press of the AUDIO button switches to the first available playback language.With each further press of the AUDIO button other available playback languages,one after the other, are switched on.The currently switched on playback language will be superimposed on the television screen.
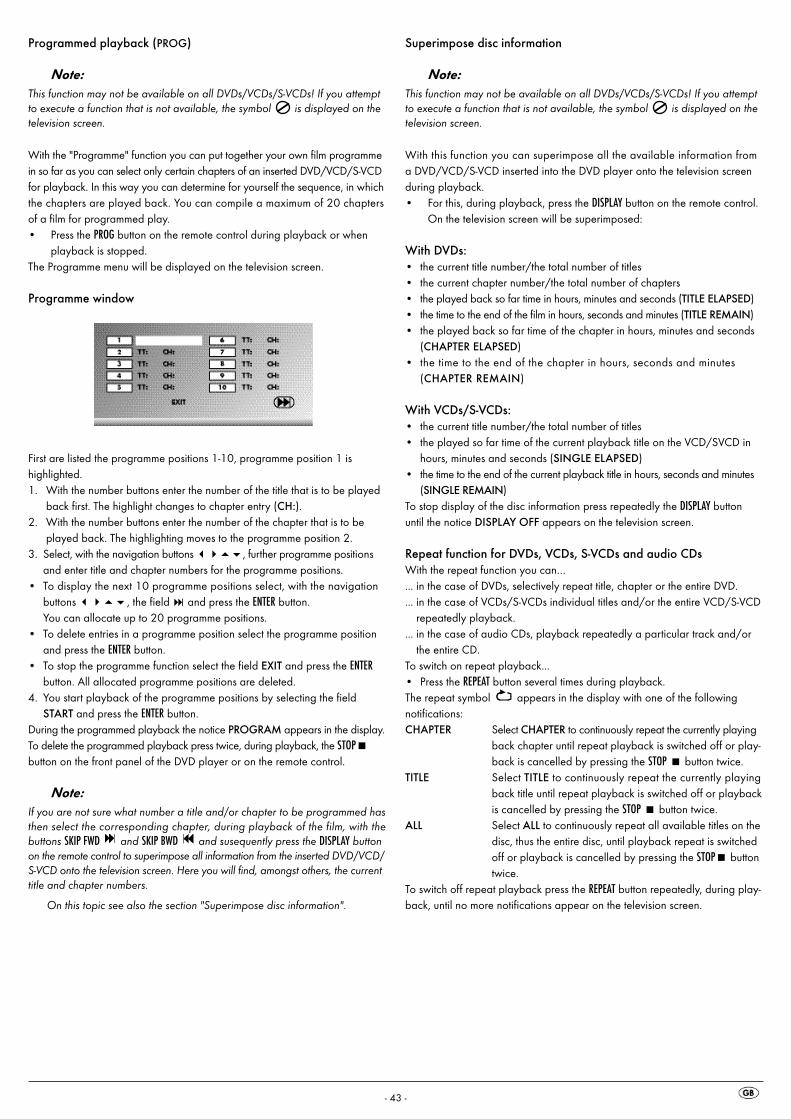
- 43 -
Programmed playback (PROG)
Note:This function may not be available on all DVDs/VCDs/S-VCDs! If you attemptto execute a function that is not available, the symbol is displayed on thetelevision screen.
With the "Programme" function you can put together your own film programmein so far as you can select only certain chapters of an inserted DVD/VCD/S-VCDfor playback. In this way you can determine for yourself the sequence, in whichthe chapters are played back. You can compile a maximum of 20 chaptersof a film for programmed play.• Press the PROG button on the remote control during playback or when
playback is stopped. The Programme menu will be displayed on the television screen.
Programme window
First are listed the programme positions 1-10, programme position 1 ishighlighted.1. With the number buttons enter the number of the title that is to be played
back first. The highlight changes to chapter entry (CH:).2. With the number buttons enter the number of the chapter that is to be
played back. The highlighting moves to the programme position 2.3. Select, with the navigation buttons ����, further programme positions
and enter title and chapter numbers for the programme positions.• To display the next 10 programme positions select, with the navigation
buttons ����, the field and press the ENTER button. You can allocate up to 20 programme positions.
• To delete entries in a programme position select the programme positionand press the ENTER button.
• To stop the programme function select the field EXIT and press the ENTERbutton. All allocated programme positions are deleted.
4. You start playback of the programme positions by selecting the fieldSTART and press the ENTER button.
During the programmed playback the notice PROGRAM appears in the display.To delete the programmed playback press twice, during playback, the STOP�button on the front panel of the DVD player or on the remote control.
Note:If you are not sure what number a title and/or chapter to be programmed hasthen select the corresponding chapter, during playback of the film, with thebuttons SKIP FWD and SKIP BWD and susequently press the DISPLAY buttonon the remote control to superimpose all information from the inserted DVD/VCD/S-VCD onto the television screen. Here you will find, amongst others, the currenttitle and chapter numbers.
On this topic see also the section "Superimpose disc information".
Superimpose disc information
Note:This function may not be available on all DVDs/VCDs/S-VCDs! If you attemptto execute a function that is not available, the symbol is displayed on thetelevision screen.
With this function you can superimpose all the available information from a DVD/VCD/S-VCD inserted into the DVD player onto the television screenduring playback.• For this, during playback, press the DISPLAY button on the remote control.
On the television screen will be superimposed:
With DVDs:• the current title number/the total number of titles• the current chapter number/the total number of chapters• the played back so far time in hours, minutes and seconds (TITLE ELAPSED)• the time to the end of the film in hours, seconds and minutes (TITLE REMAIN)• the played back so far time of the chapter in hours, minutes and seconds
(CHAPTER ELAPSED)• the time to the end of the chapter in hours, seconds and minutes
(CHAPTER REMAIN)
With VCDs/S-VCDs:• the current title number/the total number of titles• the played so far time of the current playback title on the VCD/SVCD in
hours, minutes and seconds (SINGLE ELAPSED)• the time to the end of the current playback title in hours, seconds and minutes
(SINGLE REMAIN)To stop display of the disc information press repeatedly the DISPLAY button until the notice DISPLAY OFF appears on the television screen.
Repeat function for DVDs, VCDs, S-VCDs and audio CDsWith the repeat function you can…... in the case of DVDs, selectively repeat title, chapter or the entire DVD.... in the case of VCDs/S-VCDs individual titles and/or the entire VCD/S-VCD
repeatedly playback.... in the case of audio CDs, playback repeatedly a particular track and/or
the entire CD.To switch on repeat playback...• Press the REPEAT button several times during playback. The repeat symbol appears in the display with one of the following notifications:CHAPTER Select CHAPTER to continuously repeat the currently playing
back chapter until repeat playback is switched off or play-back is cancelled by pressing the STOP � button twice.
TITLE Select TITLE to continuously repeat the currently playingback title until repeat playback is switched off or playbackis cancelled by pressing the STOP � button twice.
ALL Select ALL to continuously repeat all available titles on thedisc, thus the entire disc, until playback repeat is switchedoff or playback is cancelled by pressing the STOP� buttontwice.
To switch off repeat playback press the REPEAT button repeatedly, during play-back, until no more notifications appear on the television screen.

- 44 -
Repeat function with MP3/WMA/MPEG/ JPEG/Xvid discsDuring playback press the REPEAT button several times to apply the followingrepeat functions (the set function appears in the display):RANDOMRandom playback of the titles on the disc and/or the data carrier.SINGLEOne time playback of the current title/image.REPEAT ONEEndless repeat of the current title/image.REPEAT FOLDERRepeat the current folder.REPEAT ALLRepeat all titles on the disc and/or data carrier.
Repeat sequence (A–B)With this function you can repeat playback of a favourite sequence within a chapter of the current playback disc.To do this …• During playback press the A – B button on the remote control as soon as the
desired sequence starts to playback. A appears on the television screen.• Press the A – B button again as soon as the end of the desired sequence is
played back. Pay careful attention to the fact that the start and finish ofthe sequence must be located within a chapter.
AB appears on the television screen.Repeat playback of the selected sequence begins immediately without youhaving to press the PLAY/PAUSE�� button. The sequence will continuously re-peat until you press the A – B button again in order to switch off the function.
Setting playback volumePress the VOL + button on the remote control during playback to increase play-back volume or the VOL – button to reduce playback volume.
DimmerPress the DIMMER button on the remote control to change the DVD player's display brightness in three levels.
To switch playback sound to mute (MUTE)To switch the playback sound to mute press the (MUTE) button on the remotecontrol during playback of DVDs, VCDs/S-VCDs, audio CDs and CD-Rs/CD-RWswith MP3 or WMA data. MUTE is displayed on the television screen. When you want to switch the playback sound back on press the (MUTE) buttonagain or the VOL + and VOL – buttons. MUTE OFF or the corresponding volumelevel is displayed on the television screen.
Switching off the DVD playerTo switch off the DVD player:• In the event that a disc inserted into the DVD player is playing back, first
cancel playback by pressing the STOP� button on the front panel of theDVD player or on the remote control twice.
• Open the disc tray to remove a currently inserted disc from the DVDplayer by pressing the OPEN/CLOSE button on the front panel of theDVD player or on the remote control. Subsequently close the disc trayby pressing the OPEN/CLOSE button again.
• Press the STANDBY button on the remote control. The DVD player nowswitches to the STANDBY mode. To switch the DVD player back on pressthe STANDBY button again.
• To switch the DVD player off completely activate the POWER switch on the rear panel of the DVD player.
13. Playback of JPEG-PhotoCD/WMA/MP3/MPEG4
Insert a storage medium into the DVD player. If you use a memory card orUSB stick press repeatedly the USB button until the desired playback source is depicted.The contents of the data carrier (CD, DVD, USB memory stick or memory card)will be displayed on the television:
Display of MP3 data
Display of JPEG data
Display of AVI and MPEG data
• The data is listed on the left (Data window). Folders will be depicted withthe symbol .
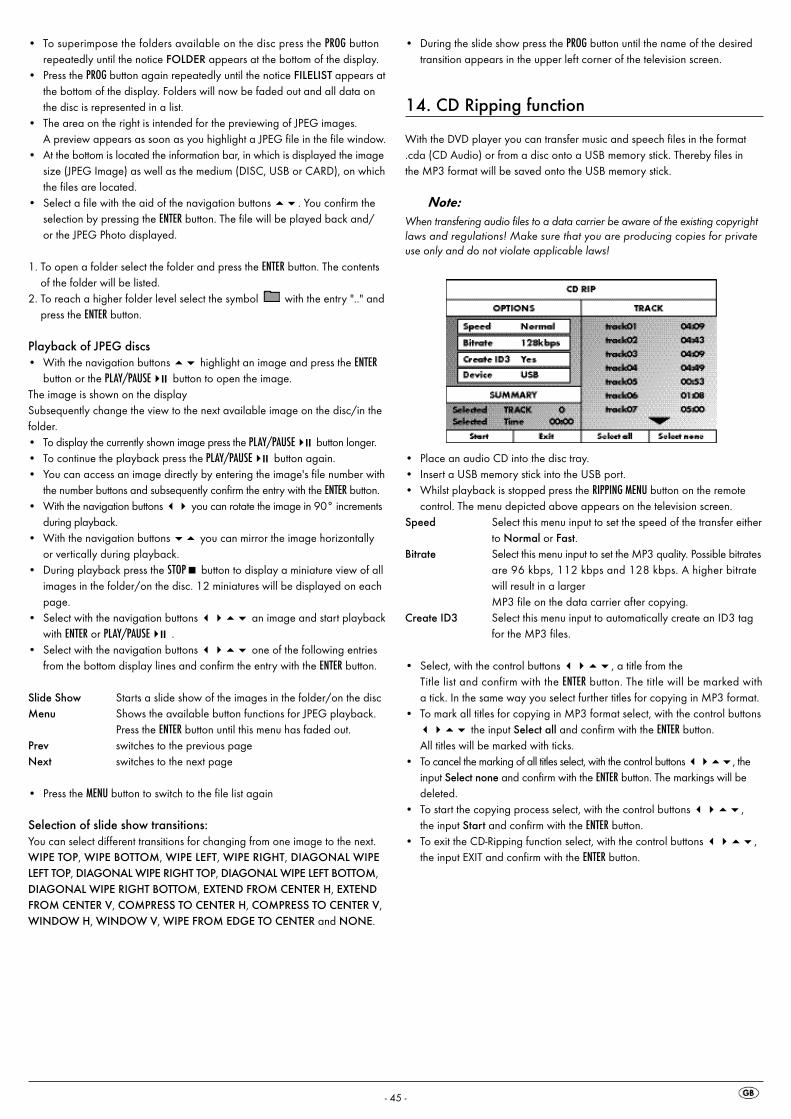
- 45 -
• To superimpose the folders available on the disc press the PROG buttonrepeatedly until the notice FOLDER appears at the bottom of the display.
• Press the PROG button again repeatedly until the notice FILELIST appears atthe bottom of the display. Folders will now be faded out and all data onthe disc is represented in a list.
• The area on the right is intended for the previewing of JPEG images. A preview appears as soon as you highlight a JPEG file in the file window.
• At the bottom is located the information bar, in which is displayed the imagesize (JPEG Image) as well as the medium (DISC, USB or CARD), on whichthe files are located.
• Select a file with the aid of the navigation buttons ��. You confirm theselection by pressing the ENTER button. The file will be played back and/or the JPEG Photo displayed.
1. To open a folder select the folder and press the ENTER button. The contentsof the folder will be listed.
2. To reach a higher folder level select the symbol with the entry ".." andpress the ENTER button.
Playback of JPEG discs• With the navigation buttons �� highlight an image and press the ENTER
button or the PLAY/PAUSE�� button to open the image.The image is shown on the displaySubsequently change the view to the next available image on the disc/in thefolder.• To display the currently shown image press the PLAY/PAUSE�� button longer.• To continue the playback press the PLAY/PAUSE�� button again.• You can access an image directly by entering the image's file number with
the number buttons and subsequently confirm the entry with the ENTER button.• With the navigation buttons �� you can rotate the image in 90° increments
during playback.• With the navigation buttons �� you can mirror the image horizontally
or vertically during playback.• During playback press the STOP� button to display a miniature view of all
images in the folder/on the disc. 12 miniatures will be displayed on eachpage.
• Select with the navigation buttons ���� an image and start playbackwith ENTER or PLAY/PAUSE�� .
• Select with the navigation buttons ���� one of the following entriesfrom the bottom display lines and confirm the entry with the ENTER button.
Slide Show Starts a slide show of the images in the folder/on the discMenu Shows the available button functions for JPEG playback.
Press the ENTER button until this menu has faded out.Prev switches to the previous pageNext switches to the next page
• Press the MENU button to switch to the file list again
Selection of slide show transitions:You can select different transitions for changing from one image to the next. WIPE TOP, WIPE BOTTOM, WIPE LEFT, WIPE RIGHT, DIAGONAL WIPELEFT TOP, DIAGONAL WIPE RIGHT TOP, DIAGONAL WIPE LEFT BOTTOM,DIAGONAL WIPE RIGHT BOTTOM, EXTEND FROM CENTER H, EXTENDFROM CENTER V, COMPRESS TO CENTER H, COMPRESS TO CENTER V,WINDOW H, WINDOW V, WIPE FROM EDGE TO CENTER and NONE.
• During the slide show press the PROG button until the name of the desiredtransition appears in the upper left corner of the television screen.
14. CD Ripping function
With the DVD player you can transfer music and speech files in the format.cda (CD Audio) or from a disc onto a USB memory stick. Thereby files in the MP3 format will be saved onto the USB memory stick.
Note:When transfering audio files to a data carrier be aware of the existing copyrightlaws and regulations! Make sure that you are producing copies for privateuse only and do not violate applicable laws!
• Place an audio CD into the disc tray.• Insert a USB memory stick into the USB port.• Whilst playback is stopped press the RIPPING MENU button on the remote
control. The menu depicted above appears on the television screen.Speed Select this menu input to set the speed of the transfer either
to Normal or Fast.Bitrate Select this menu input to set the MP3 quality. Possible bitrates
are 96 kbps, 112 kbps and 128 kbps. A higher bitratewill result in a largerMP3 file on the data carrier after copying.
Create ID3 Select this menu input to automatically create an ID3 tagfor the MP3 files.
• Select, with the control buttons ����, a title from theTitle list and confirm with the ENTER button. The title will be marked with a tick. In the same way you select further titles for copying in MP3 format.
• To mark all titles for copying in MP3 format select, with the control buttons���� the input Select all and confirm with the ENTER button. All titles will be marked with ticks.
• To cancel the marking of all titles select, with the control buttons ����, theinput Select none and confirm with the ENTER button. The markings will bedeleted.
• To start the copying process select, with the control buttons ����, the input Start and confirm with the ENTER button.
• To exit the CD-Ripping function select, with the control buttons ����,the input EXIT and confirm with the ENTER button.
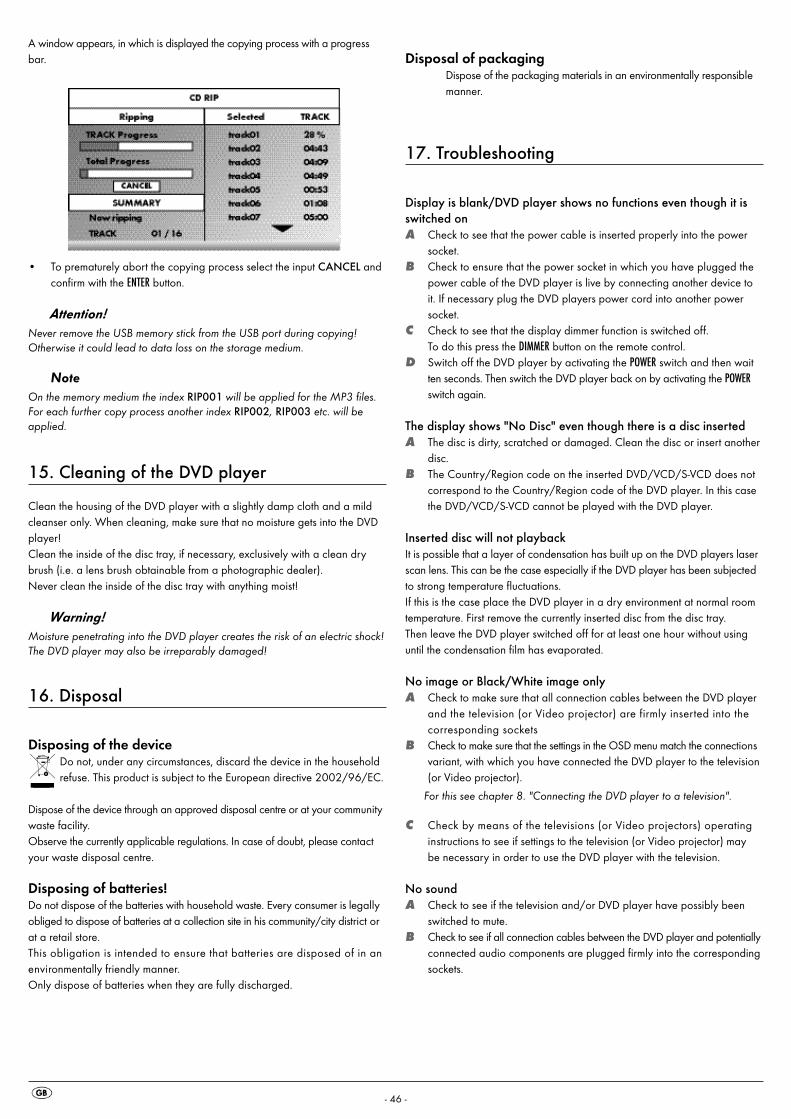
- 46 -
A window appears, in which is displayed the copying process with a progressbar.
• To prematurely abort the copying process select the input CANCEL andconfirm with the ENTER button.
Attention!Never remove the USB memory stick from the USB port during copying!Otherwise it could lead to data loss on the storage medium.
NoteOn the memory medium the index RIP001 will be applied for the MP3 files.For each further copy process another index RIP002, RIP003 etc. will beapplied.
15. Cleaning of the DVD player
Clean the housing of the DVD player with a slightly damp cloth and a mildcleanser only. When cleaning, make sure that no moisture gets into the DVDplayer!Clean the inside of the disc tray, if necessary, exclusively with a clean drybrush (i.e. a lens brush obtainable from a photographic dealer). Never clean the inside of the disc tray with anything moist!
Warning!Moisture penetrating into the DVD player creates the risk of an electric shock!The DVD player may also be irreparably damaged!
16. Disposal
Disposing of the deviceDo not, under any circumstances, discard the device in the householdrefuse. This product is subject to the European directive 2002/96/EC.
Dispose of the device through an approved disposal centre or at your communitywaste facility.Observe the currently applicable regulations. In case of doubt, please contactyour waste disposal centre.
Disposing of batteries!Do not dispose of the batteries with household waste. Every consumer is legallyobliged to dispose of batteries at a collection site in his community/city district orat a retail store.This obligation is intended to ensure that batteries are disposed of in anenvironmentally friendly manner.Only dispose of batteries when they are fully discharged.
Disposal of packagingDispose of the packaging materials in an environmentally responsiblemanner.
17. Troubleshooting
Display is blank/DVD player shows no functions even though it isswitched onA Check to see that the power cable is inserted properly into the power
socket.B Check to ensure that the power socket in which you have plugged the
power cable of the DVD player is live by connecting another device toit. If necessary plug the DVD players power cord into another power socket.
C Check to see that the display dimmer function is switched off. To do this press the DIMMER button on the remote control.
D Switch off the DVD player by activating the POWER switch and then waitten seconds. Then switch the DVD player back on by activating the POWERswitch again.
The display shows "No Disc" even though there is a disc insertedA The disc is dirty, scratched or damaged. Clean the disc or insert another
disc.B The Country/Region code on the inserted DVD/VCD/S-VCD does not
correspond to the Country/Region code of the DVD player. In this casethe DVD/VCD/S-VCD cannot be played with the DVD player.
Inserted disc will not playbackIt is possible that a layer of condensation has built up on the DVD players laserscan lens. This can be the case especially if the DVD player has been subjectedto strong temperature fluctuations.If this is the case place the DVD player in a dry environment at normal roomtemperature. First remove the currently inserted disc from the disc tray. Then leave the DVD player switched off for at least one hour without usinguntil the condensation film has evaporated.
No image or Black/White image onlyA Check to make sure that all connection cables between the DVD player
and the television (or Video projector) are firmly inserted into thecorresponding sockets
B Check to make sure that the settings in the OSD menu match the connectionsvariant, with which you have connected the DVD player to the television(or Video projector).
For this see chapter 8. "Connecting the DVD player to a television".
C Check by means of the televisions (or Video projectors) operatinginstructions to see if settings to the television (or Video projector) may be necessary in order to use the DVD player with the television.
No soundA Check to see if the television and/or DVD player have possibly been
switched to mute.B Check to see if all connection cables between the DVD player and potentially
connected audio components are plugged firmly into the correspondingsockets.

- 47 -
C Check whether the settings in the OSD menu match the connection optionyou have used to connect the audio components to the DVD player.
For this see chapter 9. "Connecting an audio component to the DVD player".
D Using the television's instruction manual check to see if current settings tothe television are necessary in order to use the DVD player with the tele-vision.
E Check by means of the operating instructions for a potential connectedaudio component if settings to it are necessary in order to use it with theDVD player.
F If you …• have connected the DVD player to a stereo television and have not
connected an audio component to the DVD player or• have connected a Dolby Prologic compatible audio component via the
analogue stereo outlet (via cinch cables to the cinch sockets L and R) of the DVD player:Check to see that you have selected in the OSD menu AUDIO with themenu input FRONT SPEAKER the setting LARGE.
No 4:3 or 16:9 image A Check by means of the televisions operating instructions, which image
formats the television has at its disposal.B Check to see if the settings in the OSD menu match the available image
format of the television.
Remote control not functioningA Check to make sure that the remote control batteries have been inserted
into the battery compartment with the correct polarity.B Check to see if the remote control batteries are exhausted and, if necessary,
change both batteries.C Make sure that there are no obstacles located between the remote control
and the DVD player.D Remain within five meters of the DVD player when using the remote control.
Playback language/ Subtitle language do not correspond to thesettings in the OSD menuThe playback language/Subtitle language setting in the OSD menu is notavailable on the inserted disc.
One or several functions can not be switched onThe selected functions may not be available on all DVDs/VCDs/S-VCDs! If you attempt to execute a function that is not available, the symbol isdisplayed on the television screen.
None of the buttons on the device or on the remote control arefunctioning/other malfunctionsA Switch off the DVD player by pressing the POWER switch. Wait ten seconds
and then activate the POWER switch again to switch the DVD player ononce more.
B In the event that the malfunction is still present: Reset the DVD player toits default settings.
For this see chapter 10.6 "Setup menu PREFERENCE".
Contact one of our service partners in your area if …• the stated function defect can not be resolved as described or• other functional defects arise.
For this see chapter 19 "Warranty and service".
18. Glossary / Key Word Index
What are DVDs, VCDs and S-VCDs?
DVDsDVD is the short form for "Digital Versatile Disc". DVDs are a storage mediumfor audio and video data; they are available in 8 cm and 12 cm (Diameter)formats. Because of the much higher storage capacity as compared to CD-Rs/CD-RWs DVDs can provide a playback duration of up to eight hours for theaudio and video data stored on them.
VCDs/S-VCDs"Video CD" (VCD) and "Super Video CD" (S-VCD) are designations for twoprocesses of compressed storage, thus space saving, of films on CDs. VCDsand S-VCDs are available in 8 cm and 12 cm (Diameter) formats. Their storagecapacity is a great deal lower than that of DVDs. For this reason they only offer a playback duration, for the saved audio and video data on them, of20 minutes (8 cm format) and/or 74 minutes (12 cm format).VCDs are available in two versions: • Only audio and video data can be played back on version 1.1VCDs/S-VCDs.• PBC (Playback control) functions are available on version 2.0 VCDs/S-VCDs. In addition still images can be played back in a higher resolution.
Playback Control (PBC)Version 2.0 VCDs/S-VCDs have Playback Control (in short "PBC") at their disposal.Then on the VCD/S-VCD a main menu is available, by which various functions ofthe VCD/S-VCD are allowed to be operated.
What are Title and Chapter?Title is the name given to the largest units of image and sound units on DVDs;on many DVDs the (Main) film has the title number 01. For bonus material(i.e. Film trailer, background information etc.), that is available on many DVDs,other possible title numbers can be used.
Chapter is the name given to the next smaller image and sound units beneathtitle. If the DVD/VCD/S-VCD or its title is divided into chapters, numbers areassigned to you, through the input of which the chapter can be selected direct.
Bear in mind that not on all DVDs …• are the DVD or the title divided into (numbered) chapters• Chapters are also designated as "Scenes" (i.e. in the main menu of
DVDs)
What are Scart, S-Video, Composite-Video ProgressiveScan, YUV and HDMI?
ScartScart denotes a 21 pole standardized plug connection, via which the RGBsignal, video signal and S-Video signal as well as a number of control andauxiliary signals are transmitted.
S-videoWhen the DVD player is connected to a television via S-Video the brightnessand colour signals are transmitted seperately; in this way a greater imagesharpness and a reduced so called "Colour noise" is achieved. Colour noise refers to the overlaying of the colours, mostly heavily saturatedparts of a video image, through an irregular, restive breakdown structure.
- 48 -
Composite videoVideo signal or FBAS signal; thereby it involves an image signal, in which colour and brightness information are included at the same time.
Progressive scanIn the normal way TV devices and Video projectors are controlled with socalled "Half images". Thereby clearly visible line structures develop. Contraryto this, Progressive Scan denotes the output of full images (with this DVD player,at the output YPbPr) Progressive Scan signals can only be processed by play-back devices equipped for this purpose (in particular large screen televisionsand projectors). The image quality as opposed to traditional image signals isconsiderably higher.
YUV (component video out)YUV indicates the component signal, which with this device is available at theoutput YPbPr in the form of so called "Half images"; as a rule this is the bestsignal for the control of large screen televisions and projectors, which can notprocess Progressive Scan signals. As with the RGB image transmission, YUV iscomprised of three separated image signals:• the brightness signal "Y" and • the two colour diferential signals "U/Pb" and "V/Pr"
Half images (Interlace)/Full images (Progressive Scan)A standard television image is comprised of 576 visible lines; at first all oddand then all even image lines are displayed alternatively, thus each displaysa half image. Thereby only 25 full images (50 Half images) can be displayedper second. This technique is designated as "Interlace" format.
Contrary to this with the so called progressive or "Progressive Scan" formatall image lines are displayed every time, that is to say 60 full images persecond are displayed. Thereby increasing the total quality of the images, stillimages and text for example appear sharper.
HDMI HDMI is short for "High Definition Multimedia Interface" and refers to a 19contact interface for complete digital transmission of audio and video data.With its high bandwidth HDMI handles all known today home electronics digital video and audio formats. HDMI transmits audio data up to frequencysof 192 kHz with text widths of up to 24 Bit on up to 8 channels. Thus notonly all of today's image and sound formats introduced into home electronicsincluding HDTV (up to the highest present resolution of 1080i) are transmittedwithout loss of quality but also future formats with yet higher resolutions.
DecoderThe sound on DVDs with home theatre sound is saved on the DVD in encrypted(encoded) form. Different encryption formats exist for several purposes, forexample AC-3 for the playback of Dolby Digital Surround Sound.In order to playback encrypted sound, the playback device (i.e. the DVDplayer) and/or the audio component connected to it (for example Surroundsystem) must be equipped with a so called decoder, which converts theencrypted signal back into music and/or sound.The Silvercrest KH 6521/KH 6522 DVD player is equipped with an AC-3Decoder (for Dolby Digital 5.1 Surround Sound signals).
Dolby SurroundDolby Surround is an analogue sound format, by which the two channels ofa stereo sound signal are used in order to accommodate room sound informationfor further channels. Dolby Surround decoders convert the signals back intosound or music and send the audio to two additional speakers that are situatedbehind the listener.
Dolby PrologicIn comparison to Dolby Surround sound format, with Dolby Prologic an additionalchannel in the stereo signal is used; this is the so called "Centre" channel. Thecorresponding centre loudspeaker is to be situated in the middle between thestereo loudspeakers. The deepest sounds are fed to a bass loudspeaker, theso called "Subwoofer". The subwoofer can be placed in any desired locationin the room; the logic for this is that the bass sounds that the subwoofer putsout can scarcely be localized exactely by the human ear
Dolby Digital (5.1)Dolby Digital, also designated as AC3, is a digital sound format, by which upto six seperate audio channels can be transported. With most of the currentDVDs, the sound is stored in the so called "Dolby Digital 5.1" format; the "5"in the name "5.1" stands for the three front and two rear surround soundchannels, the "1" stands for the subwoofer channel.
DTSDTS is the abbreviation for "Digital Theatre System" and denotes one of themost common surround sound formats for DVDs. As with Dolby Digital 5.1,DTS uses three front and two rear surround sound channels as well as a basssound channel.
What are PAL and NTSC?
PALPAL is the abbreviation for "Phase Alternation Line". PAL is the mid and westEurope (Exception: France) customary and widest distributed colour televisionstandard.
NTSCNTSC is the abbreviation for "National Television System Committee". NTSCis a colour television standard that is primarily used in the USA and Japan.
Audio CDsAudio CDs contain exclusively audio data; they are also available in 8 cmand 12 cm (Diameter) formats. The playback duration for the audio data storedon them amounts to 20 minutes (8 cm format) and/or 74 minutes (12 cm format).Audio data is stored on audio CDs in CDA format.
MP3MP3 denotes a process and/or format developed by the Fraunhofer Institutefor the compression of audio data. In the MP3 format compressed music piecesare only a fraction of their original size, which, for example, on CD-Rs/CD-RWsallows for storage of a considerably greater volume of music than on com-mercially available audio CDs, on which audio data is stored in the CDA format.
WMAWMA ("Windows® Media Audio") is a data format developed by Microsoft®for audio data.
JPEGJPEG ("Joint Photographics Expert Group") denotes a wide spread graphicformat, developed by the organization with the same name, with whichimage data of the colour and grey scales are compressed.
- 49 -
MPEGMPEG ("Moving Picture Experts Group") refers to a video compression format.
USB memory sticksThe term USB memory stick refers to a plugable USB device, which is approximatelythe size of a cigarette lighter. The expression is only colloquial and not a designationfor a type of product. For the most part with this expression is meant a USBdevice that serves as an interchangeable storage media.
What are folders?As opposed to audio CDs the title on a CD-R/CD-RW with MP3, WMA orJPEG files can be stored in folders, for example, in order to file titles from different genres. The structure of an MP3-CD can, for example, appear as follows, if the MP3files are stored in folders:
ORDNER MP3MP3-CD
19. Warranty and Service
The warranty for this device is for 3 years from the date of purchase. Shouldyou have grounds for complaint, despite our high quality standards, pleasecontact our Service Hotline.In the event that your complaint cannot be resolved over the telephone, youwill receive from them• a processing number (RMA number) as well as • an address, to which you can send your product for warranty processing.Please include a copy of your purchase receipt with all postal submissions.The device must be securely packed and the RMA number clearly visible.Shipments without an RMA number can not be processed.
Note:The warranty provisions cover only material or factory defects.The warranty provisions do not cover
• worn out parts
• damage to breakable parts like switches or rechargeable batteries.
This product is for private use only and is not intended for commercial use.The warranty is void in the case of abusive and improper handling, use of forceand internal tampering not carried out by our authorized service branch.Your statutory warranty claims are not restricted by this warranty.
20. Importer
KOMPERNASS GMBHBURGSTRASSE 21D-44867 BOCHUM
www.kompernass.com
FOLDER


Sender, please write clearly:
Last name
First name
Street
City/Town
Country
Telephone
Date/Signature
Description of the defect:
In order to guarantee a cost free repair procedure pleaseget in touch with the service hotline. Make sure you haveyour sales slip handy.
WarrantyC
om
ple
tely
fill
ou
t thi
s se
ctio
n a
nd e
nclo
se w
ith
the
dev
ice!
DVD-Player KH6521/22
�
DES UK LTDTel.: 0871 5000 700 (£ 0,10 / minute)
e-mail: [email protected]
Kompernass Service IrelandTel: 1850 930 412 (0,082 EUR/Min.)
Standard call rates apply. Mobile operators may vary.
e-mail: [email protected]